
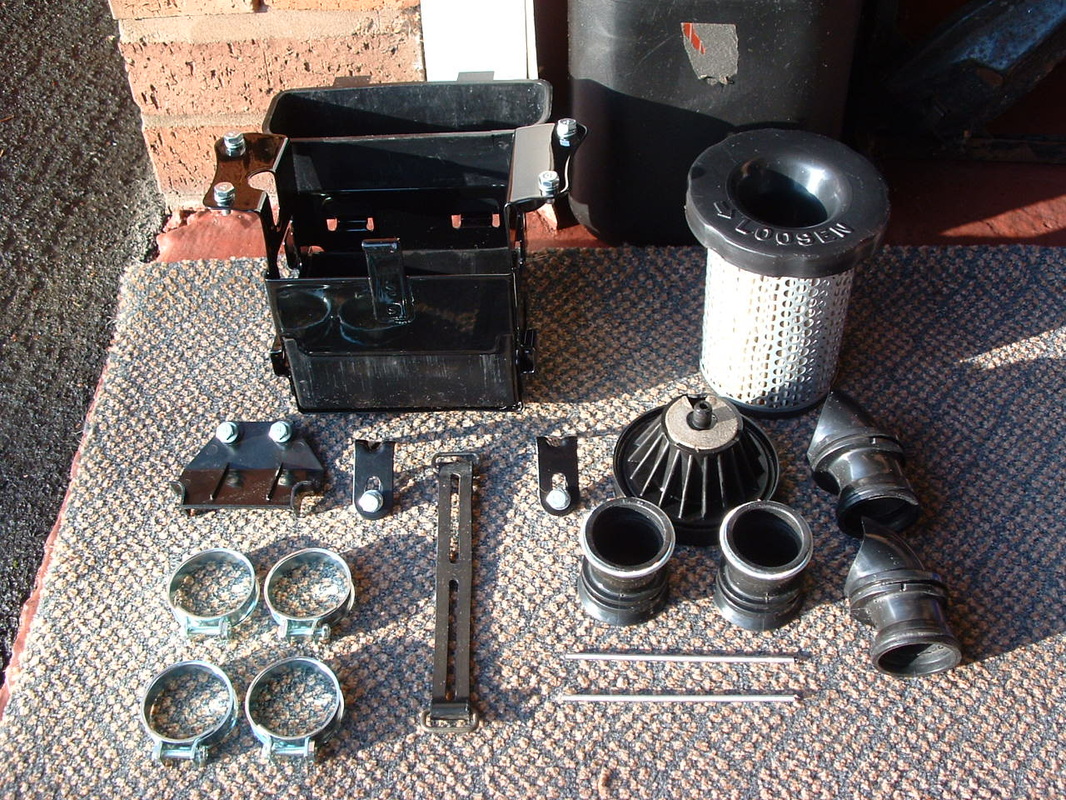
Battery Box & Carb Fittings
Our bike has a standard airbox and Mikuni VM24SS carbs.
To refit the airbox the battery box should be loosely fitted first - you need a bit of slack to wriggle the large airbox in to place.
We have re-plated clamps and spring clips to secure the carbs and the two small brackets on each side of the battery band will hold the airbox to the battery box.
TIP - The air filter and cap should be off the airbox. No cap gives extra clearance and no filter allows you to get inside the box when the new rubbers are fitted to join up to the carbs.
Don't fit the battery box brackets to the airbox until it is inside the frame.

Fitting the Airbox
Here is the airbox going in. Note the frame has been wrapped to protect the new paintwork. Also there is a breather tube fitted to the base of the airbox under the filter. This is often broken off or forgotten. It should be routed with the four carb overflow pipes to the rear of the engine.
TIP - You can see that the circular PCV vent cover has been removed - you need this off to give that last few mm. to get the airbox into place.
TIP - Don't tighten the airbox or battery box until carbs are on - gives more wriggle room!!
TIP - You can see that the circular PCV vent cover has been removed - you need this off to give that last few mm. to get the airbox into place.
TIP - Don't tighten the airbox or battery box until carbs are on - gives more wriggle room!!

PCV Cover & Seals
The PCV system re-circulates fumes and oil vapour back to the combustion chambers for a cleaner emission. With the airbox in you can replace the PCV cover and join it to the airbox with the angled PCV tube and it's two circlips. The brackets from airbox to battery box can then be added.
Here is the PCV apparatus ready to go back on. You can see where the various rubber O rings and the link hose go.
Our link hose only has one circlip because it has been replaced with a modified unit. Even we couldn't find a new one of those - UNLESS YOU KNOW DIFFERENT!!
Here is the PCV apparatus ready to go back on. You can see where the various rubber O rings and the link hose go.
Our link hose only has one circlip because it has been replaced with a modified unit. Even we couldn't find a new one of those - UNLESS YOU KNOW DIFFERENT!!
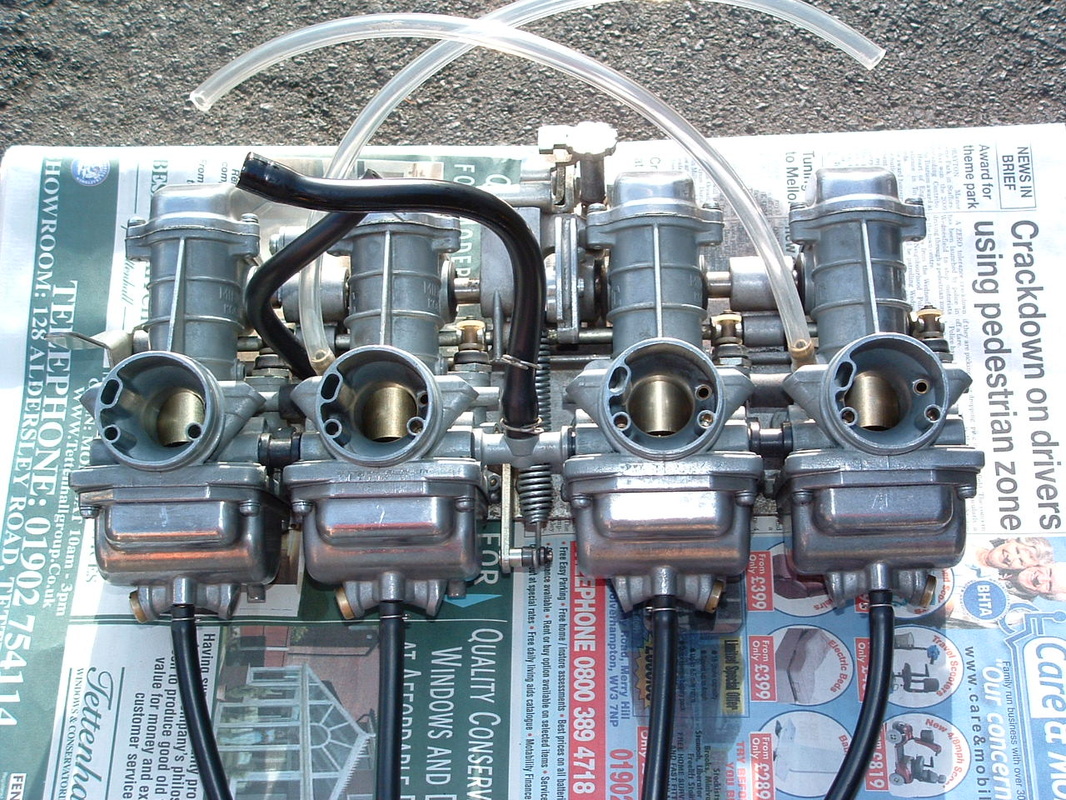
Mikuni VM24SS Carbs
Here's the standard carbs from our Z650. They are not marked as 24mm anywhere but if you measure the inner diameter where the carb joins the cylinder head rubbers you can tell. All early bikes had these Slide Carbs. Later models had Diaphragm Carbs which work differently.
The B2A model from 1978 seems to be the only model that used 22mm carbs - trying to satisfy tough new Californian emission standards.
Our carbs had a good clean up and new hoses. The float bowls were removed and debris cleaned out. Because the bike was running ok that was as far as it went in season one.
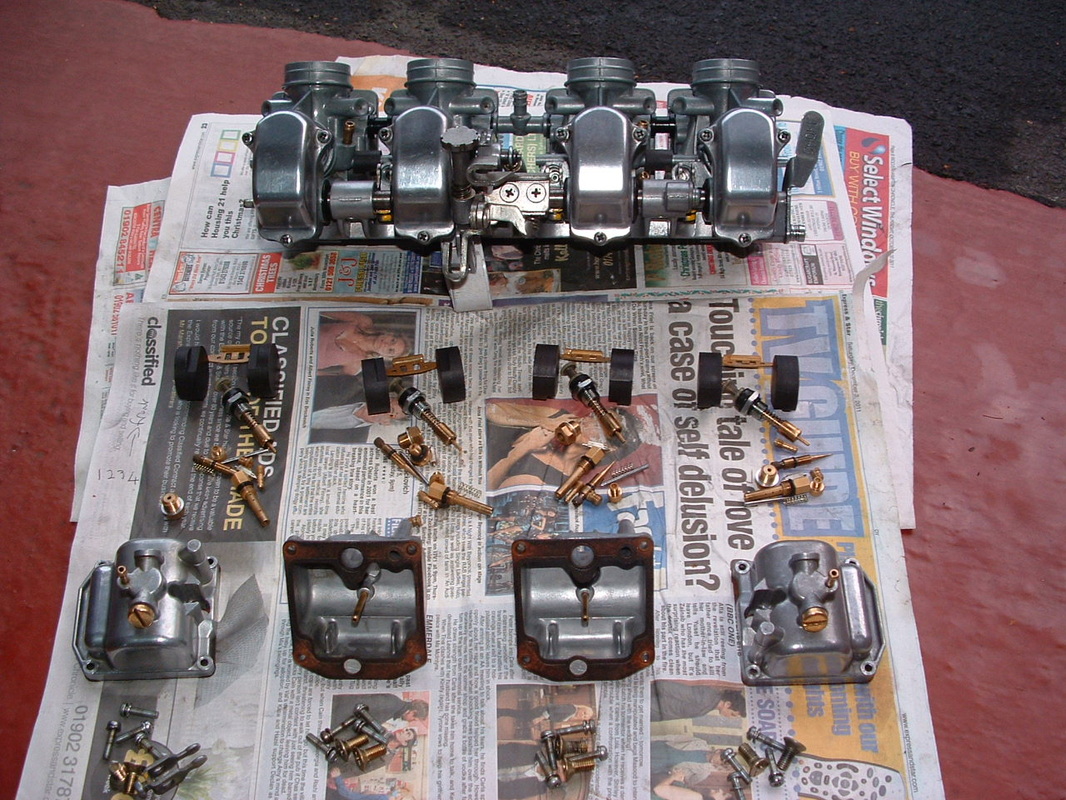
Carb Internals
During 2010 we had a crash course in carb restoration in order to get our Z1 machine back to life. Having done the job properly on that bike - vacuum settings, mixture settings, float height and internal parts and passageways cleaned out - we had to come back and give our Z650 carbs a proper going over this winter whilst they were off the machine.
As you can see from the picture our confidence had grown somewhat!
As you can see from the picture our confidence had grown somewhat!

Exploded Carbs Front View
We used soaking in cellulose thinners and carb cleaner spray to unblock all the jets, air tubes and passageways.
TIP - Use the thinnest (single strand) metal guitar strings to check that jets and air tube holes are clear. They also work well on the tiny hole at the base of the long brass choke pick up tube.
In order to remove the choke plungers we had to loosen all the carbs from the backing plate to give wriggle room.
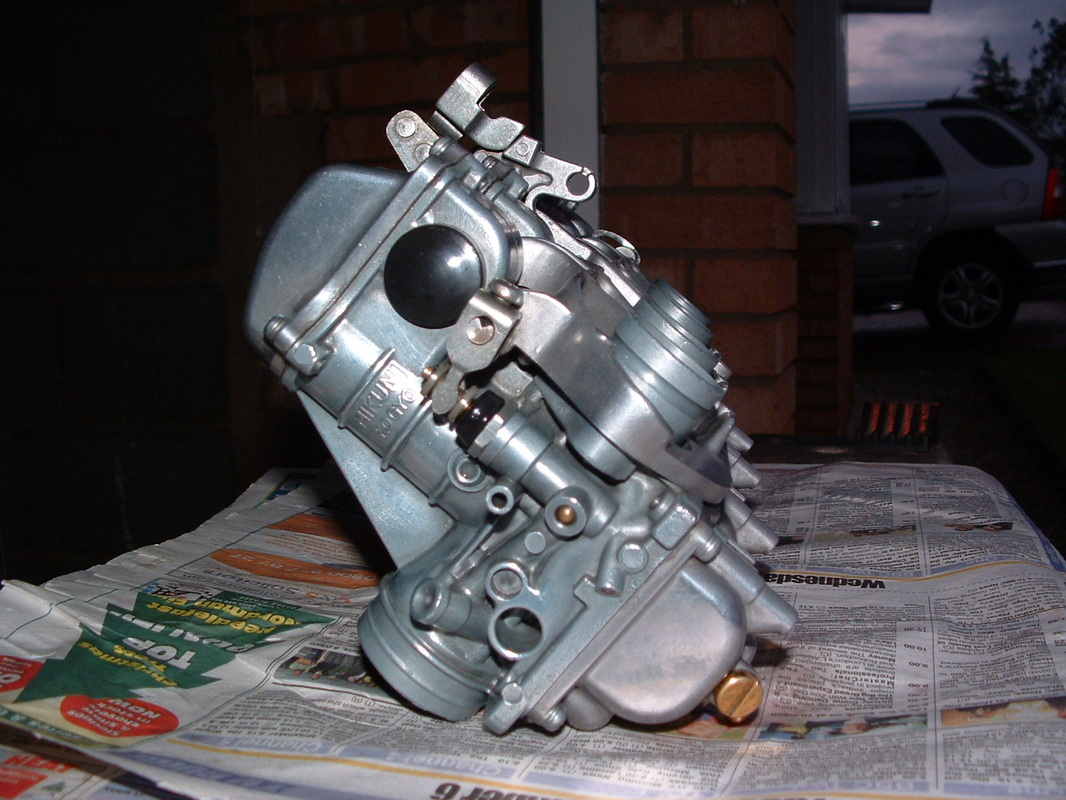
Reassembled Carbs Side View
Then the whole lot was re-assembled and the tops and bottoms were given a shine up using 00 gauge steel wool and autosol chrome cleaner.
Now is the right time to check and set your carb bowl float levels and and to ensure that the carbs are leak tight with working float valves - before they are back on the bike.
TIP - Because we are going to check float levels only fit two of the float bowl screws - diagonally opposite each other - hand tight only.
This will save time and stripped threads as you will have to get the bowls on and off a few times whilst the float tang is bent up or down to alter the fuel level.

Adjusting Float Hight & Leak Testing
Here are the carbs held level on the bench for testing. Use an in line fuel filter to prevent tiny bits getting back into the carbs. You will probably need to put the fuel through several times to get all the levels right.
You can buy a special float level tool but we used a tip from an experienced zed fettler - clear aquarium piping and a straight plastic connector piece. This fits nicely and costs a few pence.
TIP - You can measure the level on the inner carbs by holding the clear pipe against the outer ones - as long as they are dead level.
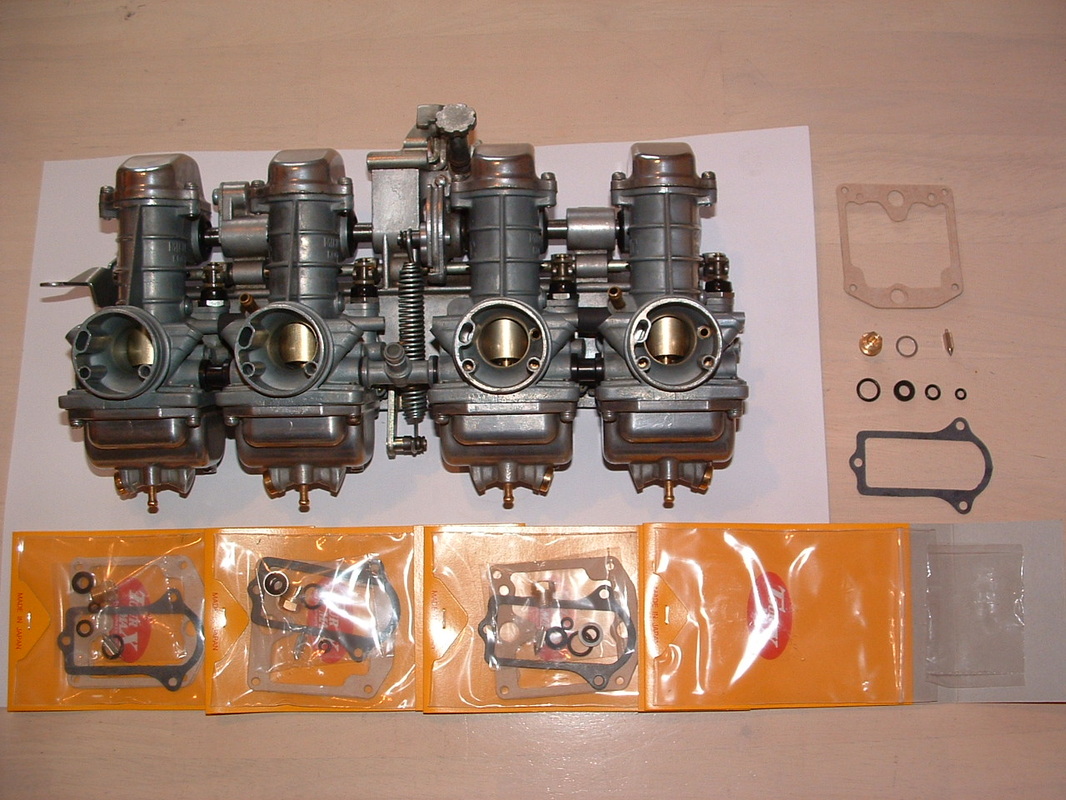
Basic Carb Repair Kits
Now the float levels are correct we can fit new gaskets and fitting screws to the float bowls and tighten them up properly ready for final leak testing. Because our bike was running ok we used a basic carb kit which has all the gaskets and seals you need, new float valve needles and seats. - but no new jets and needles.
That gave us a good saving on the full Keyster kits - especially as four are needed.
TIP - Another important bit was to replace the air screw O ring seals - as these fit under the carb body (unlike the Z1 type) and so can give a petrol leak.
That gave us a good saving on the full Keyster kits - especially as four are needed.
TIP - Another important bit was to replace the air screw O ring seals - as these fit under the carb body (unlike the Z1 type) and so can give a petrol leak.
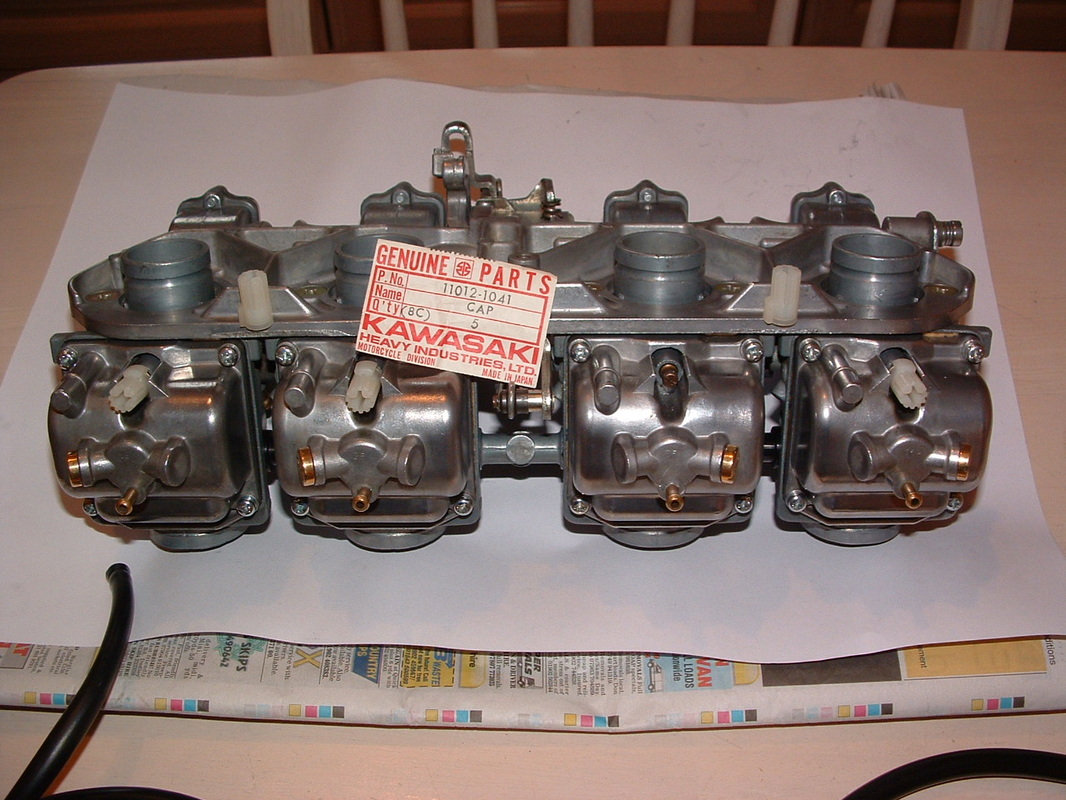
Carb Air Screw Limiter Caps
After another period connected back onto the remote fuel tank we were happy that there were no leaks from any of the rubber fuel joints or carb gaskets so they can be re-fitted to the bike once the pilot adjusting screws are all turned out to the correct setting (see manual).
On this Zedrider machine we have shown you the original white nylon adjusting screw limiter caps. They fit over the screw to limit over adjustment by keen DIYers. These are a full set of genuine new ones - a very rare find these days.
LIMITED STOCKS AVAILABLE AT ZEDRIDER
On this Zedrider machine we have shown you the original white nylon adjusting screw limiter caps. They fit over the screw to limit over adjustment by keen DIYers. These are a full set of genuine new ones - a very rare find these days.
LIMITED STOCKS AVAILABLE AT ZEDRIDER
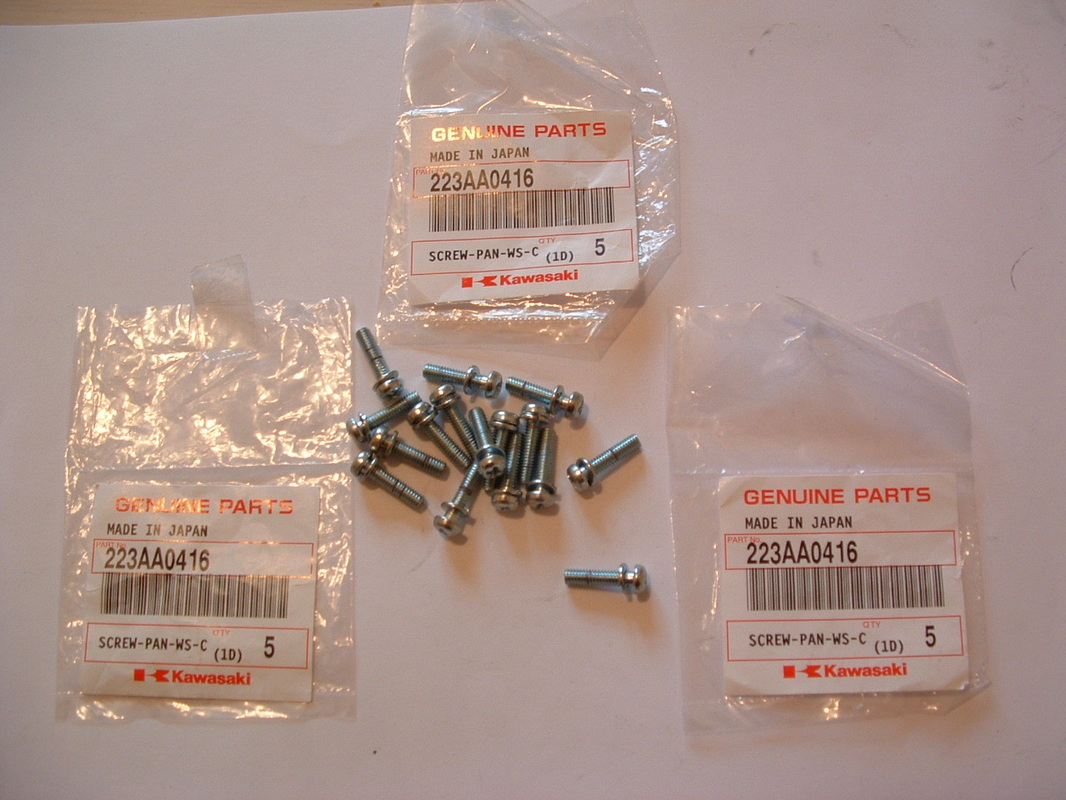
Flaot Bowl & Mixing Chamber Screws
Depending on how worn or rusty your fitting screws have become it may be worth fitting new genuine screws and washers to hold the bowls and tops onto the carb bodies. In the picture above you can see the new bowl screws and we think they give a nice finishing touch to your restored carbs.
TIP - On Z650 the top cover screws are 14mm x m4 thread so a Z1 screw kit will not work ( as they use 16mm screws top and bottom).
Z650 TOP AND BOTTOM SCREW SETS COMING SOON
TIP - On Z650 the top cover screws are 14mm x m4 thread so a Z1 screw kit will not work ( as they use 16mm screws top and bottom).
Z650 TOP AND BOTTOM SCREW SETS COMING SOON
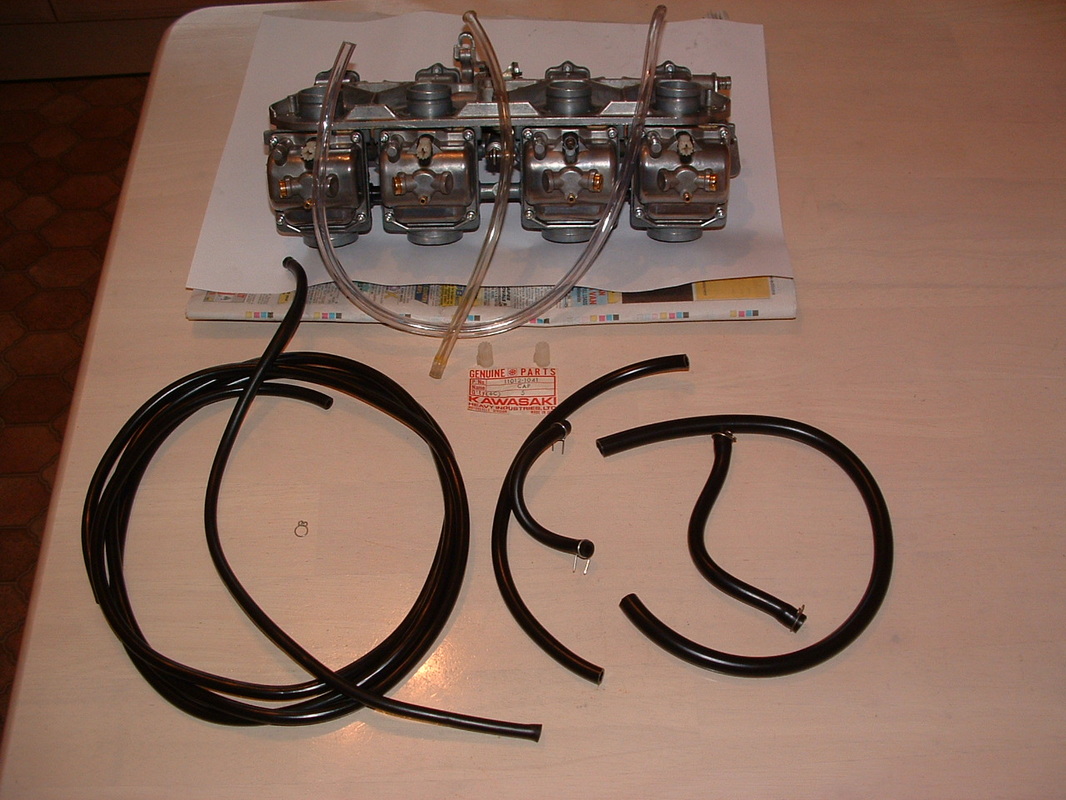
New Carb Hose Kits
We have obtained a full collection of new hoses for our carbs. You can see the old ones as well but they had gone hard or discoloured from petrol exposure. Zedrider knows the dimensions for all the hoses shown if you need a set making up. The hoses you have to make all have different diameters!!
4 carb overflow pipes (2.5metres should cover those)
2 clear carb vent hoses (25cm each)
1 petrol pipe and 1 Vacuum pipe (no vacuum pipe on B1 models)
4 carb overflow pipes (2.5metres should cover those)
2 clear carb vent hoses (25cm each)
1 petrol pipe and 1 Vacuum pipe (no vacuum pipe on B1 models)
New Hoses & Clips
Here's the finished pipes with correct Kawasaki hose clips attached.
Note the clips for the vacuum hose are different to the petrol hose
The vent pipe does not need a clip - but we heat the ends in boiled water to soften them up ready to fit easily.
We are going to re-use the old carb overflow pipes for a little while until we have the bike running right. They will be routed outside where we can see them as it's quicker to spot which carb has a problem.
Carbs With New Rubbers & Hoses
Now the carbs are hosed up ready to go back on the bike. We have used new genuine carb to airbox rubbers and the spring clips have all been re-zinc plated to set the hole lot off. Don't forget to write plenty of notes with your Kawasaki pen - oh and it even marks hoses ready for trimming!
TIP - If you look at the lower straight hoses the one on the left has the spring clip where it will end up once the carbs are mounted. The right one shows how it needs to be placed during carb installation. It then gets rolled into position at the end.
TIP - If you look at the lower straight hoses the one on the left has the spring clip where it will end up once the carbs are mounted. The right one shows how it needs to be placed during carb installation. It then gets rolled into position at the end.
Fitting Hoses & Spring Clips
Once you have fitted the carbs between the airbox and head rubbers you can feed the new airbox rubbers in from the air filter cap hole like this. It's best to send them through with the spring clips already fitted half way along as shown.
TIP - Make sure that all spring clips joints face inwards so they can't be seen, and the seams in the centre hoses face up and down for a professional Zeddish look.
The two outer angled rubbers have a cut out in the outer lip (see above) which you have to line up with a projection above the airbox hole to ensure they are angled for correct air flow (greater at the sides than the centre).
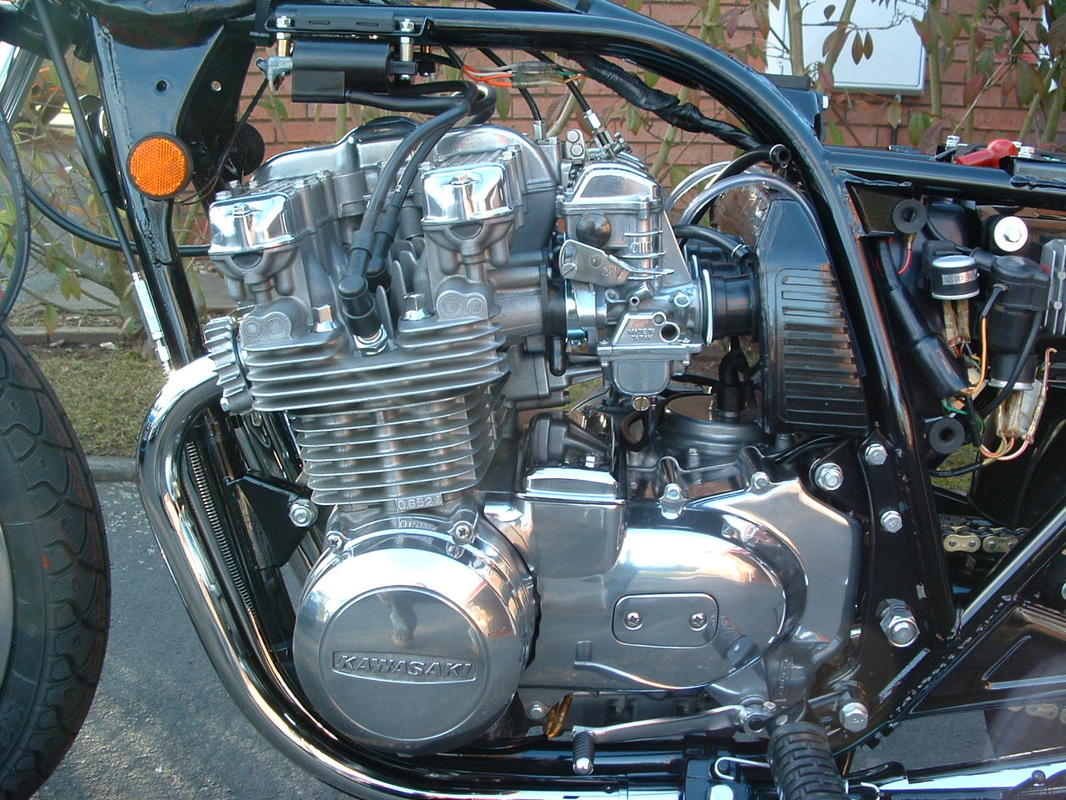
Carbs Restored & Re-fitted
Here's the installed carbs showing throttle cable connections and clear air vent hose routing.
We fitted a rare pair of new factory throttle cables.
TIP - You must fit the zinc hose clips and screws to cylinder rubbers before carbs go on - all screws face outwards from the underside.
Don't forget you only add the airbox rubbers after the carbs are mounted and the front clamps are tightened.
We are pretty pleased with that result and the PCV hose can now be connected firmly between the airbox and crank cover using it's two zinced circlips.
Carbs & Airbox Showing Hose Routing
Here's a picture of the other side and a better view of where to put the clear air vent hose.
On some bikes it goes up above the airbox at the side of the plastic frame baffle plate - but this is the correct fitting for a Z650.
TIP - Don't leave the starter motor cover in place when setting these carbs up on a running bike. If you need to access the mixture screw for 1 & 2 you will have no space and end up scratching that nice chrome cover.
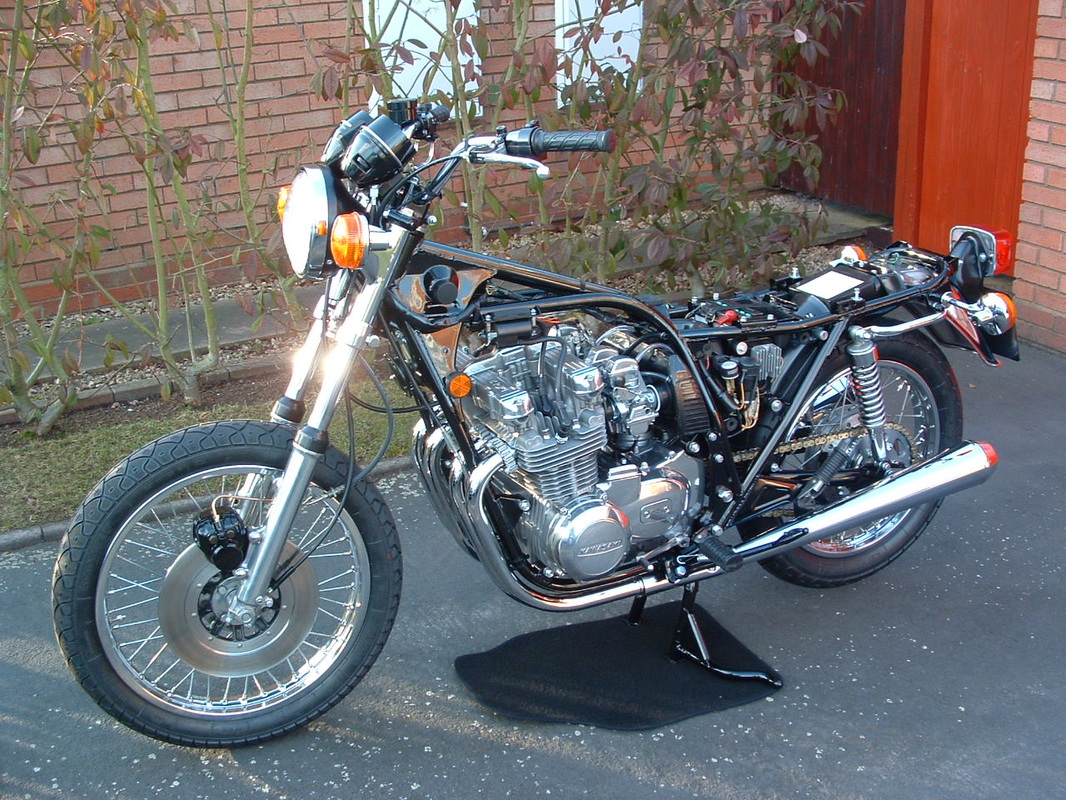
Ready to Fire Back Up
Now that carbs and exhausts and coils are fitted we can get some oil into the engine, charge the battery and get her going to test the vacuum settngs and petrol / air mixture are correct.
Now where did we put that remote fuel tank?
Oh and don't use last years petrol to set her up with - it will have gone stale and give bad readings.
TIP - Mixture should always be slightly rich rather than slightly lean - this prevents blue header pipes and damage to the engine through overheating.
.
Now where did we put that remote fuel tank?
Oh and don't use last years petrol to set her up with - it will have gone stale and give bad readings.
TIP - Mixture should always be slightly rich rather than slightly lean - this prevents blue header pipes and damage to the engine through overheating.
.
