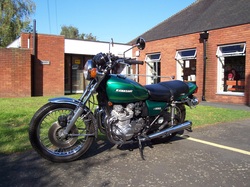
Sold as seen 2009
Back in 2009 we were lucky enough to come across this little survivor from the 1978 production run of KZ650s built for the American market. As you can tell from the picture she was largely standard and displaying original chrome in extraordinary mint condition - didn't make it to the UK until 1995 and must have been resident in a very dry state to achieve this level of preservation. Nice low mileage and only one UK keeper since she came over the pond. USA models feature a shorter rear fender and higher bars. The rear indicators mount onto the frame - not the tail light bracket like our euro bikes did.
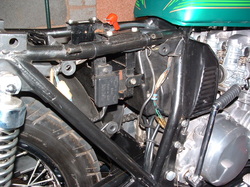
Early Frame Shot
After a little first aid to a leaking caliper the bike ran well until winter 2009 set in. Then it was time for a strip down with plenty of reference photos being taken. No horror stories during dismantling and the worst bits were freeing up the front sprocket nut which broke an edge off an already damaged inner transmission cover.
Wiring harness turned out to be pretty intact despite the addition of a seperate group of wires running from near the coil to the tail light - not connected at either end so I've no idea what the mystery accessory was.
Wiring harness turned out to be pretty intact despite the addition of a seperate group of wires running from near the coil to the tail light - not connected at either end so I've no idea what the mystery accessory was.
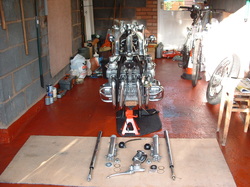
Front End Stripped
We invested in a small polishing lathe (actually a bench grinder with conversion spindles) and set about the front fok lower casings. The forks themselves were stripped down and fitted with new inner seals, given a thorough clean, and topped back up with the right amount of the correct grade fork oil. It's amazing how dirty fork oil gets considering there is no combustion going on in there!! Not a good idea to just pour clean stuff onto that 30 year old sediment. An air gun seemed to be the only way to loosen the allen bolts under the fork legs. The front brake system was also stripped and re-built with new internals.
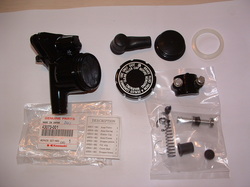
Master Cylinder & Repair Kit
You can get reproduction master cylinder repair kits - but it is such a hard job getting the old parts out I always spend the extra and go for factory parts. Guys on the owners club have been really kind in helping me get the parts back in - you need special pliers and at least three hands!!
We had to source a brand new caliper piston and seals because the pistons
tend to get pitted - even on low mileage bikes.
We had to source a brand new caliper piston and seals because the pistons
tend to get pitted - even on low mileage bikes.
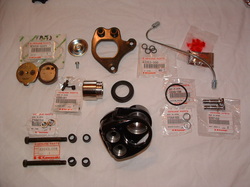
Caliper Components
You would not believe how difficult it is to get new caliper shaft bolts in the correct olive drab finish and it was a real bonus to find a supplier who had the original kawasaki brake pad sets left in stock after 30 years. We also sourced some new caliper shaft boots & O rings to keep the whole mechanism moving.
IF YOU NEED SHAFT BOOTS, O RINGS OR A PISTON AND SEALS TRY THE COOL PARTS LINK ON HERE.
IF YOU NEED SHAFT BOOTS, O RINGS OR A PISTON AND SEALS TRY THE COOL PARTS LINK ON HERE.
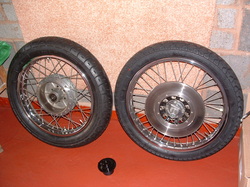
New Tyres & Trued Spokes
The tyres that came with the bike had plenty of tread left but were looking a bit old in the tooth on the side walls and at the bottom of the treads. Whilst the bike was stripped she gained new tyres and inner tubes and the spokes were trued and re-tensioned because they loosen off over the decades. Luckily the chrome was good with a clean and the zincing on the spokes was fine. The rear hub got a good clean to remove brake dust and traces of the old cush rubber. Oh and that's the horn after a repaint in front of the tyres.
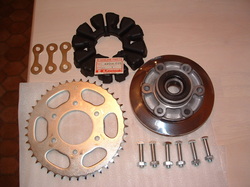
Sprocket Carrier Refurb
After many months we managed to source a new cush rubber from the USA and the sprocket carrier was given a polish before the re-zinced sprocket, bolts and lock washers were applied.
The large Oil / Grease seal that keeps the grease in the rear sprocket carrier bearing can become cracked and will give a poor seal.
WE HAVE A FEW NEW GENUINE SEALS AVAILABLE ON THE COOL PARTS PAGE.
The large Oil / Grease seal that keeps the grease in the rear sprocket carrier bearing can become cracked and will give a poor seal.
WE HAVE A FEW NEW GENUINE SEALS AVAILABLE ON THE COOL PARTS PAGE.
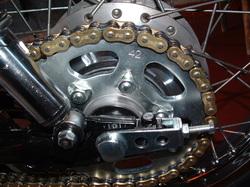
Tab Washer Fitment
In order to get the new locking tab washers to look like the factory fitted ones you need to bend them up so that they look like this - two folds - making triangles that point out towards the wheel rims.Do a trial fit, & mark where the folds will be. Loosen off and pre-bend to start the folds before you torque the nuts down finally. A wooden or nylon chisel shape can then tap them up into place - or gaffa tape a normal chisel blade if you are stuck.
As you can see by the 42 stamping - and the way it fits flush with the sprocket carrier - this is an original rear sprocket.
As you can see by the 42 stamping - and the way it fits flush with the sprocket carrier - this is an original rear sprocket.
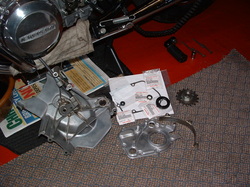
New Inner Transmission Cover
The damaged inner transmission cover was replaced using new gaskets and seals.
Several used ones I was shown had the same top mounting bolt sheared off where the metal chain guard attaches to the alloy cover so this must be a design weak spot.
We decided to go with a new x ring chain even though there was life left in the old one at under 9000 miles. We wanted to fit a one piece endless chain as per factory spec. and it's just so much easier whilst the swinging arm is out.
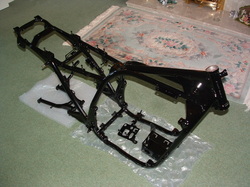
Finished Frame & Parts
The frame and some parts like stands, battery box, engine brackets, light fiittings and electric panels have come back from the finishers ready for the re-build.
TIP - it's good to specify that you need to be able to read the frame number after the paint/ coating has been applied - otherwise you may have trouble trying to sell the bike one day!
TIP - it's good to specify that you need to be able to read the frame number after the paint/ coating has been applied - otherwise you may have trouble trying to sell the bike one day!
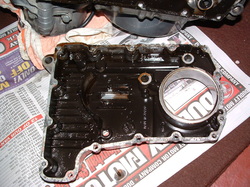
Check Sump & Oil Pump Strainer
Almost ready to get it back together again. The motor was running well but we took this chance to drop the sump and check for any nasties like dropped bolts & swarf from worn parts etc. Luckily only found 30 odd years worth of light deposit and the oil pump strainer was also nice and unobstructed. You can only check that when the sump is off. Years of dirty oil can cause them to block and you will lose oil pressure so it's always worth checking.
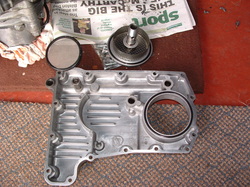
New O Rings & Oil Pump Strainer Gauze
After a quick clean the sump can go back on. Replace the large O ring on the inner filter tunnel and don't forget the three little O rings - 2 above the filter tunnel and one right at the front of the oil pan (top left in the picture).
TIP - The little ones have a flat and a curved side - make sure they face the right way. We also replaced the O rings on the oil filter pan and the oil filter bolt to prevent any oil weeping onto that nice clean sump.
The newly cleaned oil pump strainer gauze is shown top left. On the Z650, 900, 1000 it is a push fit. On the earlier Z1 it is held by three screws.
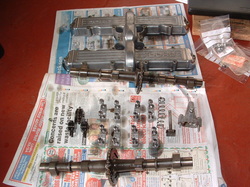
Camshafts & Tensioner Removed
Having taken some hot compression tests and felt her pulling strongly on the road we decided not to remove the barrels and piston rings etc. at less than 9000 miles shown from new.
Valve shim clearance was checked because wear reduces the gap between the valve and cam shaft.Camshafts and idler wheel have to come off to gain access to them. We also removed the cam chain tensioner assembly and checked the components for wear.
Valve shim clearance was checked because wear reduces the gap between the valve and cam shaft.Camshafts and idler wheel have to come off to gain access to them. We also removed the cam chain tensioner assembly and checked the components for wear.
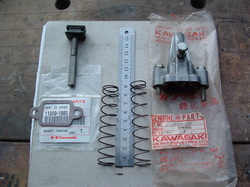
Cam Tensioner Refurb
Our bike got a new genuine cam chain tensioner spring. As you can see - 30 odd years of being compressed had taken a few mm. off the old one. Once a spring has shrunk it has lost a bit of it's strength so this one would not have been holding the cam chain as tight as it should have.
The new one should reduce wear and noise.
The new one should reduce wear and noise.
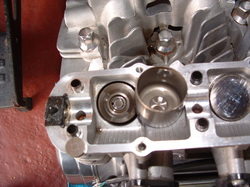
Under Bucket Shims
The shims are tiny and you can see one on the lower left edge of the cylinder head. When fitted they sit in the recess on top of the valve stem. All the numbers on this bike were good - it was still on large shim sizes - indicating low wear. You need a magnet or valve grinder stick sucker to pull up the buckets.
TIP - If you are keeping the bike make a note of what size shim is fitted to which valve - you can then get the correct sizes ready to fit before removing the cams next time.
TIP - If you are keeping the bike make a note of what size shim is fitted to which valve - you can then get the correct sizes ready to fit before removing the cams next time.
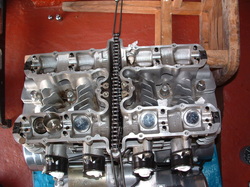
Cam Chain Service Limit
With the camhafts out and the idler gear removed you get enough exposed cam chain to take a service limit measurement - which must be done across 20 stretched links - best repeated at a couple of different points on the chain. This chain was within spec and so will be staying as I do not like the idea of a soft (split) link in my cam chain. Obviously because the camshafts are out they will have to be re-timed when they go back in. This is a good chance to check they were timed right in the first place as these bikes will still run if they are a tooth out.
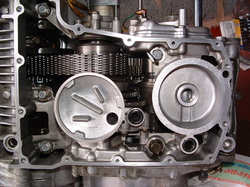
Primary (HyVo) Chain & Oil Pump Strainer
Before the sump goes back on check the primary chain which takes power from the crank to the transmission. The larger Z1 type engine drives the transmission directly - but on these ones a chain is used to save space. Again there is a service limit to measure by checking slack play in the HyVo chain at mid point between the sprockets. Quite a bit of play is allowed and this one was well inside the spec so no new primary chain needed. You can see the location for the oil pump strainer to the left of the filter tunnel. It took ages to get the gasket faces that clean!!
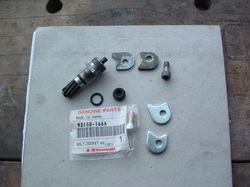
Tacho Drive & Seals Removed
Try and remove the tacho drive gear before fitting cams. It's held in place by two plates & a bolt. If you free the bolt you can change the oil seal and O ring shown here - which will stop it leaking oil later.
TIP - If you leave it in and the cams trap it you will muller your cylinder head when the bike runs. Make sure the tacho drive rotates when you turn the engine over by hand and you know it will be fine.
We fitted brand new genuine keeper plates and allen bolt.
TIP - Use loctite if you re-use your old bolt, new ones come with it on already
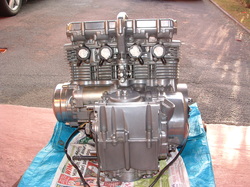
Engine Cleaning Rear
Once the cams are back on and timed we re-fitted the sump and cam cover with some nicely polished and replated bolts (all 39 of them) and replaced the points cover. With the carb inlets and exhaust outlets sealed up it was then time for some serious degreasing and cleaning/ polishing. We did ours by hand rather than stripping the whole engine and sending it away for blasting.
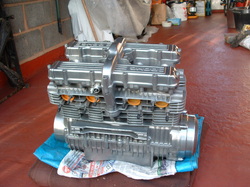
Engine Cleaning Front
We tried to keep the polishing restricted to extremities on the cam cover, and the outer engine covers - after removing any old laquer with paint stripper. Note the long bolt hole at the front of the engine - in fact a lot of bikes use two shorter bolts with captive heads in that location instead of the one long unit. You can see how smart the new tacho drive mounting gear is looking. It will set off the new genuine tacho cable nicely when the bike is back together.
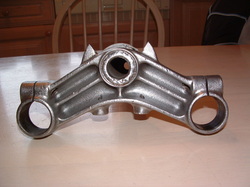
Rust Removal
One area that was letting the bike down was underneath the front fork yoke. It took some time to get all the paint stripped and the surface rust removed.
Turns out there was corrosion under the paint due to poor preparation last time it was painted. As you can see we were determined that was not going to come back!
Turns out there was corrosion under the paint due to poor preparation last time it was painted. As you can see we were determined that was not going to come back!
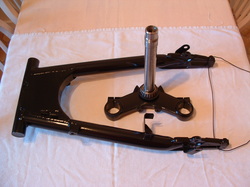
Hand Finished - Due to Bearings
We hand painted the front fork yoke (triple tree) and swinging arm using rattle cans. Neither would have survived the heat and grit from blasting and powder coating. The swinger had pressed in roller bearings and the yoke had a rubber grease seal beneath the lower race. Neither needed to be replaced due to wear so they have been retained.
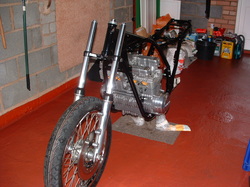
Engine & Frame Back Together
My method is to fit the main stand, lower fork yokes and steering bearings to the frame before dropping it over the engine - which is lain on it's side. Use newspaper and bubble wrap to protect the frame.
The front wheel and forks are ready to hand. Once the engine is secured we lift the whole lot up and put the main stand down to take the weight. The helpers hold the whole lot steady whilst I slip the forks into place followed by the front wheel. Once the wheel is located the whole lot becomes self supported like this and we can all go for a well earned cuppa!.
The front wheel and forks are ready to hand. Once the engine is secured we lift the whole lot up and put the main stand down to take the weight. The helpers hold the whole lot steady whilst I slip the forks into place followed by the front wheel. Once the wheel is located the whole lot becomes self supported like this and we can all go for a well earned cuppa!.
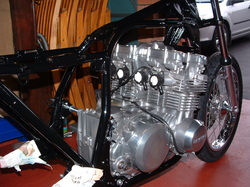
Engine & Frame Rear View
Next job is to get some protection onto the new frame before the new chain can be fitted. It's a one piece endless type so needs to go on before the swinger. Once fitted it will need to be suspended to allow the swinging arm to be mounted without damage.
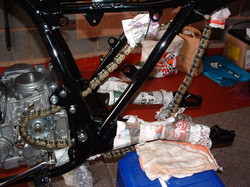
Chain Before Swinging Arm
Newspaper, bubble wrap and bungee cords all deployed to leave our hands free to get the swinging arm wriggled into place.
TIP - I make sure it is well greased with an excess coming out of both ends BEFORE it goes back onto the bike.
TIP - I make sure it is well greased with an excess coming out of both ends BEFORE it goes back onto the bike.
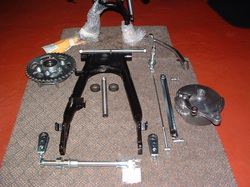
Rear Wheel Fitting Kit
Now it's time to get all the rear wheel fittings together. Don't they look smart in their new zinc coatings??
Make sure you know in which order the rear axle spacers go onto the shaft. Before pictures help here (see below).
TIP - Fit the rear brake arm pivot arm and spring BEFORE the swinging arm goes in - whilst you have plenty of access
Make sure you know in which order the rear axle spacers go onto the shaft. Before pictures help here (see below).
TIP - Fit the rear brake arm pivot arm and spring BEFORE the swinging arm goes in - whilst you have plenty of access
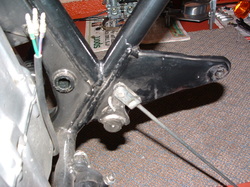
Rear Brake Arm Pivot & Spring Location
This is how the rear brake pivot arm should look when fitted - before the swinging arm. Note how the spring is hooked over the lever. The other end of the spring goes into a hole in the frame.
Make sure the split pin and washer for the brake rod are fitted away from the swinging arm as shown.
The three wires with bullet connectors are from the points unit (1&4 coil, 2&3 coil and Oil Pressure Sender) and they join onto the main harness back here.
Make sure the split pin and washer for the brake rod are fitted away from the swinging arm as shown.
The three wires with bullet connectors are from the points unit (1&4 coil, 2&3 coil and Oil Pressure Sender) and they join onto the main harness back here.
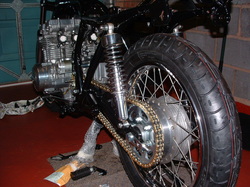
Rear Wheel & Shocks Re-fitted
Once the swinging arm is back in and the shaft re-fitted (nut goes to generator side) drop the rear shockers on loosely to support the swinging arm and prevent paint damage.
TIP - Use two wooden chocks under the tyre. As you pull them closer the wheel will rise & line up with the swinging arm. Grease the spindle.
TIP - Make sure the notches on the chain adjusters are faciing the right way to read them against the marks on the arm.
Can't wait to put some wear on that new tyre!!
Bars & Top Yoke Re-fitted
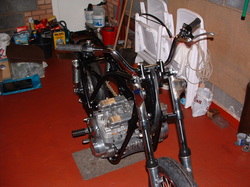
Now we fitted the top yoke and bars so we could have a rolling chassis again.
You can see how high the USA spec bars are in this shot. Unlike the Z1 the bar wiring runs inside the bars on the Z650 so you need to work on them as a combined unit which is a bit cumbersome. Naturally the bar switch screws have been polished and re-plated to match the other new fittings.
You can see how high the USA spec bars are in this shot. Unlike the Z1 the bar wiring runs inside the bars on the Z650 so you need to work on them as a combined unit which is a bit cumbersome. Naturally the bar switch screws have been polished and re-plated to match the other new fittings.
Steering Lock & Seat Lock
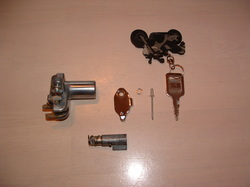
One key fits all locks on this bike, which is a good sign. Here you can see the seat lock and steering lock all cleaned and lubed ready for re-fitting. The chrome steering lock cover is a new genuine part.
TIP - If the original screw is loose when you re-fit the steering lock cover - a normal pop rivet gives a neat solution
TIP - If the original screw is loose when you re-fit the steering lock cover - a normal pop rivet gives a neat solution
Click Here For Carbs & Airbox Detail
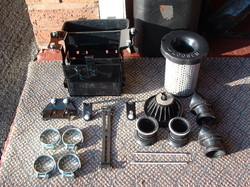
The battery box can go in loosely next. No need to tighten it yet because we need some slack to get the large standard airbox into place. We have re-plated clamps and spring clips to secure the carbs and the two small brackets on each side of the battery band will hold the airbox to the battery box.
Note how the plastic tool tray clips to the rear of the battery box.
See the Carbs & Airbox link above or click on this image for the full details on how to restore them and fit them back into that tiny space.
Note how the plastic tool tray clips to the rear of the battery box.
See the Carbs & Airbox link above or click on this image for the full details on how to restore them and fit them back into that tiny space.
Re-zincing Returned
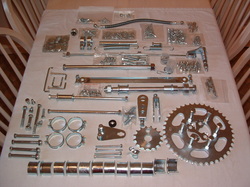
All the zinced plated parts are de-rusted using Proscale 650 solution. Threads were cleaned up, then bolt heads and fittings were polished. Then it was off to the zincers for a bright zinc plate and clear passivate finish. A good automotive plater should always apply clear passivate and get their plating regularly checked for corrosion resistance in a salt spray test.
Now it's all checked back in and bagged up to help find what goes where. This is where exploded parts diagrams on http://cmsnl.com and the digital photos are going to come in handy.
Now it's all checked back in and bagged up to help find what goes where. This is where exploded parts diagrams on http://cmsnl.com and the digital photos are going to come in handy.
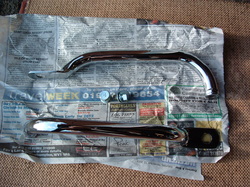
Grab Handles & Fittings
Here comes some of the new chrome plating - a pair of original grab handles. Repro items aren't available for this model. The fitting bolts are also re-zinced and have the correct 13mm. head with no. 4 stamped onto it and two captive washers.
TIP - Make sure the front grab rail mount is sandwiched between two plain washers to protect the chrome from the large rear shocker nut and lock washer.
TIP - Make sure the front grab rail mount is sandwiched between two plain washers to protect the chrome from the large rear shocker nut and lock washer.
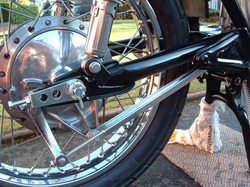
Rear Brake Mechanism
The rear brake mechanism and torque arm has now been re-fitted and adjusted to factory spec.
The brake rod and torque arm are zinc plated, the rear arm and knurled nut are chrome plated.
TIP - Note the wrapping on the main stand - this prevents it getting damaged by the chain as the bike moves. It will come up too high and foul the chain until the left exhaust bracket is re-fitted with its rubber stopper.
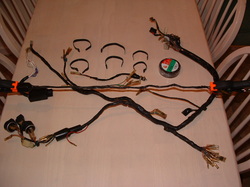
Wiring Harness Complete
We knew that the wiring harness was working ok before the strip down. The only problem when we got hold of her was a loose connection onto the hazard switch - which was soon re-soldered once the left switchgear was dismantled. Here we can see the main harness and fuse box with all the genuine cable ties. The rear harness is stretched between the two clamps for inspection, The idea was to check and clean the whole loom and examine any frayed or worn areas for damage.
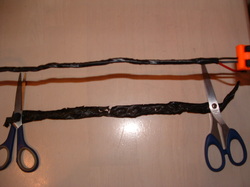
Damaged Outer Wrapping
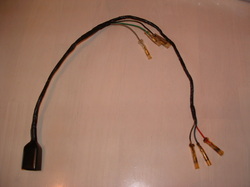
Because this was a USA machine the rear harness had been wrapped in on itself to lose some length. It needs to be unwound to become longer when fitted to a UK or Euro spec rear fender. The internal cables were all good but as you can see the old outer wrapping needed to be replaced as it was starting to wear through.
Restored Rear Harness
Here's the finished rear harness - re-wrapped and with the kinks straightened out. When we re-fit this it will be coiled rather than folded to reduce stress on the old wires. Vaseline (petroleum jelly) on a cotton bud goes on the block connector prongs to ensure no corrosion deposits interfere with a good connection when she's back together.
Check Grommets & Rubbers
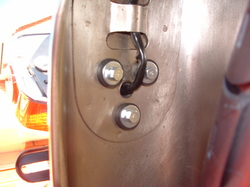
Here's an example of why it's important to wrap the loom well - the cables are fed through metal tubes under the fender where salty water deposits can attack them during the winter. A good recipe for a short out!
TIP - Check your strip notes,before photos and exploded parts diagrams to make sure you replace all the grommets on these sharp edges and that the wires are going through larger rubbers without trapping.
TIP - Check your strip notes,before photos and exploded parts diagrams to make sure you replace all the grommets on these sharp edges and that the wires are going through larger rubbers without trapping.
Main & Rear Harness Finished
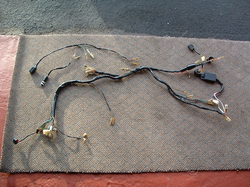
Here's the main and rear harness ready to fit. The rear brake light switch had newly plated nuts. More bits of outer wrap that were re-done as well. Bullet connectors got cleaned out and the male bullets had a light vaseline coating before they were pushed back in. Most of the female bullets got a light re-crimp to give them better grip on the males.
TIP - Put gaffa tape or cloth around pliers or crimper jaws when tightening female bullets - prevents damage to the clear insulation sleeve which could give you a short out later.
TIP - Put gaffa tape or cloth around pliers or crimper jaws when tightening female bullets - prevents damage to the clear insulation sleeve which could give you a short out later.
Check Fuse Box & Spares
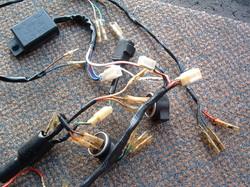
The block connectors and bullets have cleaned up nicely and there are no signs of overheating joints anywhere. This model has a three fuse box fitted (see top left). It hangs by a slotted rubber from the points side of the battery box.
TIP - Your fuse box should have a 20 amp main and two 10 amp fuses fitted. Don't assume others have fitted the right length of fuse or the correct rating until you have checked. You should be using 25mm long fuses. There are plastic tags in the fuse box lid to park one fuse of each rating as a spare. Make sure you have got them in there - and they are not the blown ones the last guy never got round to swapping.
TIP - Your fuse box should have a 20 amp main and two 10 amp fuses fitted. Don't assume others have fitted the right length of fuse or the correct rating until you have checked. You should be using 25mm long fuses. There are plastic tags in the fuse box lid to park one fuse of each rating as a spare. Make sure you have got them in there - and they are not the blown ones the last guy never got round to swapping.
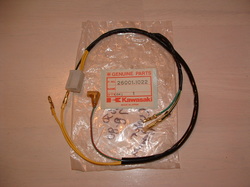
New Centre Harness
The old centre harness had a worn wire at the block connector. Only a tiny amount, and it was not shorting anywhere - but it needed a fix.Luckily the Zedrider network came up trumps and within a couple of weeks two brand new old stock centre harnesses had appeared in the Zed Cave. RESULT!
This is the one we fitted to the bike. The centre harness takes power from the generator to the Regulator Rectifier and also carries the neutral light switch signal to the main harness.
This is the one we fitted to the bike. The centre harness takes power from the generator to the Regulator Rectifier and also carries the neutral light switch signal to the main harness.
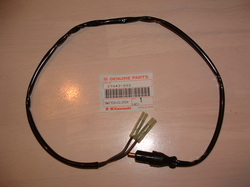
New Clutch Switch
The clutch switch was also replaced with a new genuine item. This is visible on the handlebars and because the bike is getting a full set of new genuine cables we wanted this to look factory fresh as well. The old one has already found a home on someone elses zed because we believe strongly in re-cycling usable parts rather than buying up zeds just to break them like some eBay traders do. The clutch switch joins onto two black wire male bullets - one from the bar switches and one from the centre loom. If your switch is broken you can just join them but you will then be able to start the bike in gear - NOT WISE!
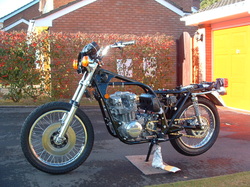
Rolling Chassis (no main harness)
Here we have our first good glimpse of the rolling chassis. Still no main wiring harness, carbs, or control cables fitted - but the rear fender and tail light loom have been rebuilt and fitted back on.
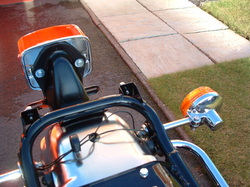
Tail Light, Fender & Indicators
All the indicators, tail light chrome and lens and the rear fender itself are original and in great condition so they have been cleaned and re-fitted.
On a UK or Euro spec bike the rear indicator stems are built into the tail light bracket and the rear fender is longer with a reflector and bracket at the bottom.
Have a look at the Brochures & Posters page above if you want to see the UK version.
On a UK or Euro spec bike the rear indicator stems are built into the tail light bracket and the rear fender is longer with a reflector and bracket at the bottom.
Have a look at the Brochures & Posters page above if you want to see the UK version.
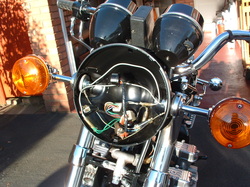
Headlamp Wiring
Next step was to re-fit the instruments and headlamp bowl before the main wiring harness could be replaced.
Note the position of the block connectors - inside the headlamp bowl
TIP - Not all the connectors inside the headlamp are actually used so refer to your before photos or strip down notes to work out which to leave unconnected. On our USA bike there is no sidelight position on the bar switch - so those connections are not needed on the sealed beam unit.
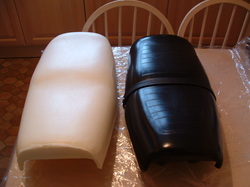
New Seat Foam
One of the items that can deteriorate more in hot dry climates is the foam used for seat units and to damp the instruments. This seat had it's strap recovered just after we got it but you could tell that the foam where the rider sits was starting to age. After two years desperately seeking a new factory seat we have taken the replacement seat foam route thanks to our friends at P & P Seating in Birmingham.
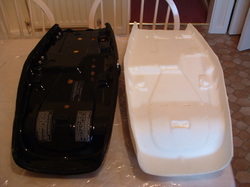
Under Seat Contours
They do a model specific foam for this bike. As you can see from the under side it will be a good fit onto the seat pan. The pan is in remarkably good condition for it's 34 years and even the factory stickers are virtually perfect. That presents a dilemna - do we re-finish the pan and lose the stickers or fit the new foam to the old pan? What would you do?
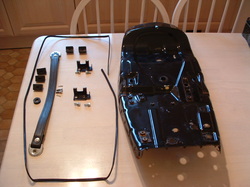
Seat Components
Having stripped the seat down the pan is still pretty good on the inside - but you can just see a bit of corrosion starting around some of the joints. The long thin plastic strip is a U section that goes arond the outer lip of the pan to stop the metal cutting into the vinyl cover when it is stretched on. Don't attempt to re-cover one without it.
The original seat cover from 1978 has the correct pattern and "kawasaki" embossed into the rear. Removing and re-fitting it is very delicate and best done in a warm area to make the old vinyl a bit more supple.
The original seat cover from 1978 has the correct pattern and "kawasaki" embossed into the rear. Removing and re-fitting it is very delicate and best done in a warm area to make the old vinyl a bit more supple.
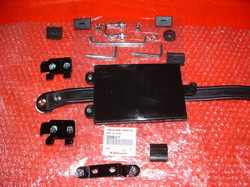
New Seat Parts
All the seat damper rubbers had glue traces removed and got cleaned up. The hinges and seat pan were blasted and re-finished in gloss black. All the tiny fitting bolts, hinges and seat stay rod were re-zinc plated. A final touch was to fit a new genuine plastic document holder. Now what are we going to do about all those missing warning decals?.
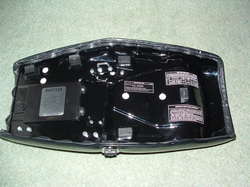
Rebuilt Seat Unit & New Decals
Luckily Dave and Phil at Z Power have supplied a Z650 decal set. So after checking the before pictures, and the under seat owners manual - which shows where every decal should go - we managed to get them all back on like this. Because the pan was solid and we were very careful not to overbend the spikes - none have broken and the new black finish has stayed intact. RESULT!!
TIP - To get the seat cover to stay in shape at the rear of this unit the factory threaded wire around the back edge - under the tuck. If you have a replacement cover without this wiring it will not sit right.
TIP - To get the seat cover to stay in shape at the rear of this unit the factory threaded wire around the back edge - under the tuck. If you have a replacement cover without this wiring it will not sit right.
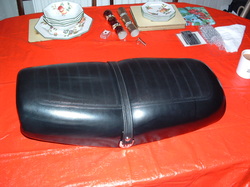
Back In One Piece Again
Here's the finished seat with the new foam fitted. You don't want to know how long it took to wrestle the old cover back onto the new bouncy foam without ripping it!!
You will be very lucky to find a professional seat restorer willing to tackle stretching 34 year old vinyl back into shape. I approached a couple and was greeted with hysterical laughter and quotes for a new cover.
The whole lot is now boxed up and settling down for a few months whilst the mechanical stuff gets sorted.
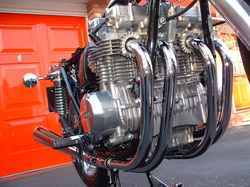
See Exhaust System Link
The exhaust system was restored using a mixture of new kawasaki parts, modern replacement silencers, and re-plated original items.
To see more about this and how we fitted it all back onto the bike click on this image or use the Exhaust System link at the top of this page.
To see more about this and how we fitted it all back onto the bike click on this image or use the Exhaust System link at the top of this page.
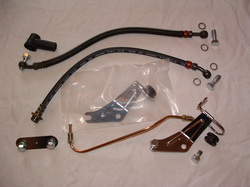
Brake Hoses & Brackets
We prefer not to fit the front fender until the exhaust system is in place. This prevents damage to the chrome on the fender & down pipes. Now it's on we can get the master cylinder and front caliper connected. The bracket for speedo cable and brake hose is part of the fender fittings.
On our bike the chrome spacer (lower left) fits on the other side to stop the forks marking the fender. On a twin disc bike you would put the bracket shown (middle) there instead. We are using a new lower hose and a re-finished upper hose. Both show original red ID bands from 1978.
On our bike the chrome spacer (lower left) fits on the other side to stop the forks marking the fender. On a twin disc bike you would put the bracket shown (middle) there instead. We are using a new lower hose and a re-finished upper hose. Both show original red ID bands from 1978.
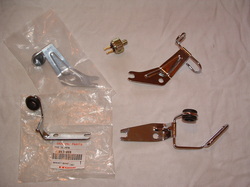
Front or Rear Calipers?
Our bike has early front of fork calipers. Most later versions mount them behind the fork leg. The top pair of fender brackets are for front calipers. The lower pair are needed for rear ones. You can see the difference. Early bikes have a shorter speedo cable because it does not have to loop under a rear caliper.
TIP - If you fit a later bracket by mistake it will try and pull the short cable too far away from the fork and it will fit badly.
Our brake pressure switch is being re-used but these good reproductions are available on the Cool Parts page if you need one.
TIP - If you fit a later bracket by mistake it will try and pull the short cable too far away from the fork and it will fit badly.
Our brake pressure switch is being re-used but these good reproductions are available on the Cool Parts page if you need one.
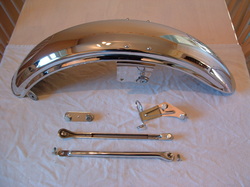
Front Fender & Fittings
The fender and supports have been rechromed. Supports join the forks with zinced 10mm bolts. At the rear use the special chrome plated, domed headed, pan head screw. We can still get new ones if you are desperate to get your Z650 looking right. We treated the inside of the supports and all threads with clear Waxoyl preservative before fitting.
TIP - Wrap newspaper round the main fender mounting points before you slide it between the forks. It will stop the chrome marking and slip out easily when you are ready to bolt it up.
TIP - Wrap newspaper round the main fender mounting points before you slide it between the forks. It will stop the chrome marking and slip out easily when you are ready to bolt it up.
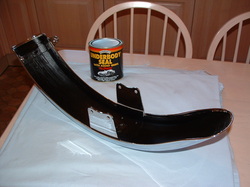
Treating the Inner Fender
There is little space between tyre and fender so we have treated the inside with Waxoyl Underbody Seal. This preserves metal and deadens sound. It should prevent any corrosion starting on the inside and giving us a nasty surprise in a few years. On the rear fender there is much more room to keep the inside clean and rust free - if you are that way inclined. We use clear waxoyl rubbed on with a cloth - after wiping down with a damp cloth - every few months on the chrome inner rear fender. The main fender bracket is strong and links both forks - acting as a fork brace.
Check Fork Fittings Now
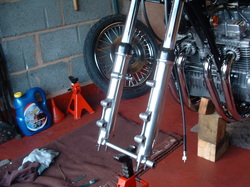
The cable bracket (left) or spacer (right) fits between the fork and the fender. Lube & check all bolts fit well by hand before you offer the fender up.
You have very limited space to get the two bolts (shown here) in between the tyre and fender so it needs to go smoothly - if you have to keep taking the fender in and out it will easily get marked.
TIP - fit one bolt loosely at front first with no spacer, then fit the other bolt through fender and spacer - before swinging the spacer up into place and re-fitting the first bolt fully.
Fitted Fender & Brackets
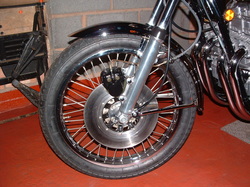
Here's the finished result showing how the brake hose and cable route through the bracket. Don't forget the large rubber grommet which sits between the bracket and the brake hose.
TIP - The speedo cable drive needs to point higher on a front caliper bike - like this.
On later models it is more horizontal to meet the longer cable which loops back around the rear caliper. If you look at the Brochures & Posters page the Z650 B1 & B2 centrefolds clearly show the different brackets and cable routes.
Front Caliper & Hoses Connected
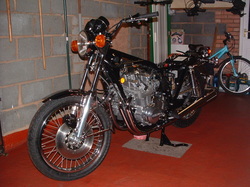
So here's how she looks with the fender & front brake all connected up properly. Next step will be to bleed the front brakes and then we're nearly done.
TIP - Use new copper crush washers (two per joint) when re-building the brake hoses. Old ones will have developed a lip from previous fitting and you will have to over torque them to get a good seal.
Fitting the seat, chain cover, tank, side panels, tail piece and new original mirrors will only take a few minutes so the finishing line is near - now where's that nice weather??
Original 1978 Tool Kit & Bag
We got the front brake to bleed up pretty well. Left the bleed pipe connected overnight and finished any last few remaning air bubbles the next day.
TIP - Make sure the tiny hole in the reservoir base nearest to the hose is not blocked - or air and pressure cannot escape properly during bleeding.
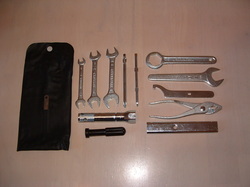
Now we can turn our attention to some of the finishing touches. Here's one - an original 70's thin plastic tool bag complete with feeler gauge and nicely re-zinced tools. The driver handle was missing but a new factory one was still available.
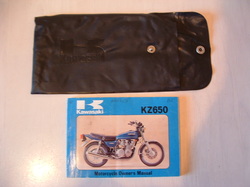
Owners Manual Available Here
It is really unusual to see one of these thin tool bags in one piece with no tears after 34 years. Let's hope we won't be needing it too often.
The Owners Manual lives inside a plastic document holder beneath the seat. It contains stacks of good info such as chain adjustments, cold starting tips and where all the warning decals should go.
TIP - If you need a Z650 B1 or B2 Owners Manual you can download a copy from the Manuals & Info link above. Could help to keep oily prints off your mint one!
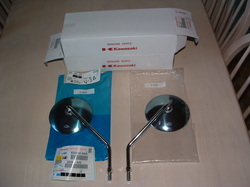
New Original Factory Mirrors
We have got some modern chrome mirrors with dampers in the head to reduce vibration. But this new factory original set made by TOYO seemed to good to pass by so we'll give them a go for local trips.
The new 650s in the Brochures & Posters section are all wearing these so it will hopefully add a bit more of a 1978 showroom look to our ride. Back then most standard mirrors were replaced by Z1 style copies - along with a lot of original exhaust sytems and Dunlop tyres which never made it out of the dealerships.
The new 650s in the Brochures & Posters section are all wearing these so it will hopefully add a bit more of a 1978 showroom look to our ride. Back then most standard mirrors were replaced by Z1 style copies - along with a lot of original exhaust sytems and Dunlop tyres which never made it out of the dealerships.
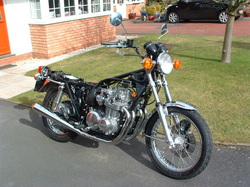
New Mirrors & Sunny Days!
Finally got a bit of sunshine - so we wheeled out the old lady in all her naked glory - before she puts her painted panels and seat back on to cover up her modesty.
Just making some final checks on smooth idle speed and cold starting performance - before the tank goes back on.
Managed to get a short video taken before the sun went back into hiding so watch this space!
Just making some final checks on smooth idle speed and cold starting performance - before the tank goes back on.
Managed to get a short video taken before the sun went back into hiding so watch this space!
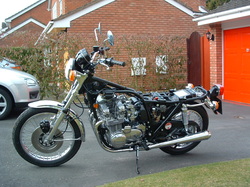
Front Disc & Hub Detailed
Here's the other side of the machine.
We have been getting on with a bit of detail cleaning on the front and rear wheel hubs because the wheels were to good to strip down and rebuild.
You can see the front disc and hub are starting to buff up well to match the re-finished parts now.
We have been getting on with a bit of detail cleaning on the front and rear wheel hubs because the wheels were to good to strip down and rebuild.
You can see the front disc and hub are starting to buff up well to match the re-finished parts now.
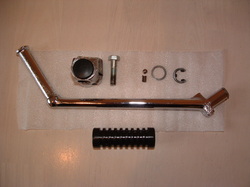
Kick Starter Components
Did you notice the missing Kick Starter? We have a new genuine rubber and the shaft has been re-chromed. The number 4 headed bolt has been re-zinced and the locking mechanism cleaned and lubed.
The black blanking plug is no longer available from Kawasaki. It has a mark on the outside to show which way it needs to fit onto the chrome boss. These starters tend to develop a little groove on the shaft with use and our friend Graham at ACF Howells did a great job in getting that out - without leaving the shaft looking over polished.
The black blanking plug is no longer available from Kawasaki. It has a mark on the outside to show which way it needs to fit onto the chrome boss. These starters tend to develop a little groove on the shaft with use and our friend Graham at ACF Howells did a great job in getting that out - without leaving the shaft looking over polished.
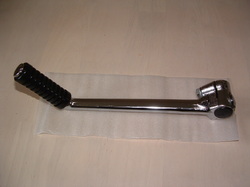
Restored Kick Starter
Here is the assembled Kick Starter ready to go back onto the bike. Depending on which factory pictures you look at the starter can fit at one of two angles. We chose the forward angle to give maximum leverage if it ever needs to be used.
TIP - When fitting the rubber we heated it in boiled water for a few minutes and then lubed the shaft with WD-40 spray to get it to go on easily.
The Made in Japan logo on the end of the rubber needs to face innermost or it will not be legible against the flared end.
TIP - When fitting the rubber we heated it in boiled water for a few minutes and then lubed the shaft with WD-40 spray to get it to go on easily.
The Made in Japan logo on the end of the rubber needs to face innermost or it will not be legible against the flared end.
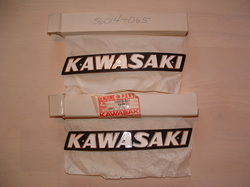
New Tank Badges
Our bike had picked up a tiny mark on one of the tank badges. Luckily after several months of searching a brand new matching pair were found lurking over in North America. A deal was struck and they were soon jetting across the Atlantic to be fitted onto a bike at long last. Luckily the side panel badges have remained in excellent condition since 1978 and will not need anything more than a clean.
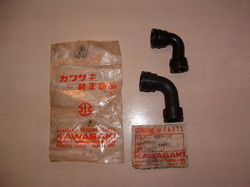
New PCV Tube
A Zed fan in Germany was able to supply the long lost replacement PCV crank to air box tube that we had been seeking, and that will be fitted at a later stage. We are too close to the finishing line to start stripping bits back off now. Even the sun is starting to get a bit hotter and the clocks will soon be altered to give us lighter evenings to ride in.
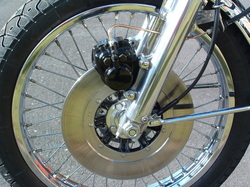
Front Wheel & Brake Finished
The detail cleaning on the wheel hubs and disc brake has paid off pretty well and justified the decision not to strip the wheels down. There is very little wear on this original disc and the new pads should polish it up nicely once they have bedded back in.
There is a date code on the disc which shows that this is the right one for this year and model.
There is a date code on the disc which shows that this is the right one for this year and model.
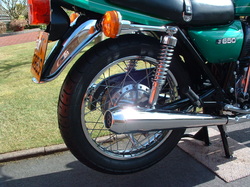
Rear Wheel & Brake Finished
Likewise the rear brake plate and hub have responded well to a bit of elbow grease and they are now starting to match the finish on some of the brighter components - just as they would have done when new.
As you can see the seat and body panels have also made a re-appearance after months in storage so the whole project is running out of steam fast and it's really down to road testing and tuning from now on.
As you can see the seat and body panels have also made a re-appearance after months in storage so the whole project is running out of steam fast and it's really down to road testing and tuning from now on.
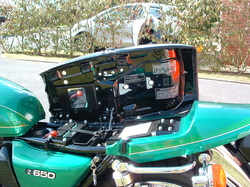
Restored Seat Unit
The seat unit looks well up to new factory standards now it is fitted - except that we lined the under seat decals up a bit straighter than the guy on the mass production line all those years ago.
TIP - It's worth taking some time to adjust the seat catch - it needs to hit the centre of the gap in the lock catch and not go too low once it is engaged - or it will grind away at the catch when your weight gets on it.
The owners manual should live under the document case with the silver Battery Hose Routing decal showing.
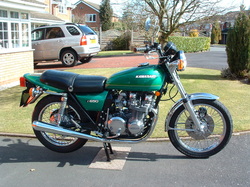
Right Side View
Here is the finished article for the first time - you can see how we angled the Kick Starter now it has been re-fitted. We are using some basic 10-40 oil to run the bike up again but that will be changed after a couple of weeks on the road - to remove any disturbed material following the engine work.
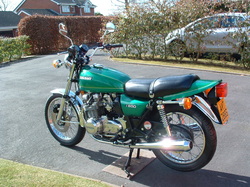
Left Side View
Here is the other side - all complete now. Just lacking that expensive little piece of paper to go into the tax disc holder! Roll on April 1st.
The Candy Emerald Green paint scheme remains one of the most popular colours for this model and we were pleased to pick the bike up with a decent set already fitted.
Will try and upload a movie of the finished effort later for you.
The Candy Emerald Green paint scheme remains one of the most popular colours for this model and we were pleased to pick the bike up with a decent set already fitted.
Will try and upload a movie of the finished effort later for you.
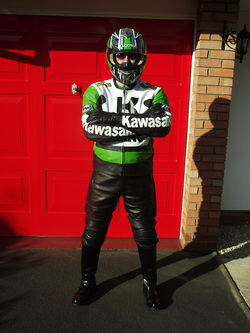
A Zedrider Again at Last!
If only we could find a restored 1970's motor cyclist to go with the bike.......
Luckily one of the Zedrider team owned two Z650s from new back in the late 1970's - so we gave him the chance to use this machine.
No it's not Eddie Lawson by the way, or one of the Stig's biker cousins. And if you're thinking of the Green Power Ranger you are way to young to be on this website - try the GPZ club next door!
Keep an eye out on here for other members of the Zedrider team - they are all a bit mad on Kawasaki Zed bikes as you would imagine.
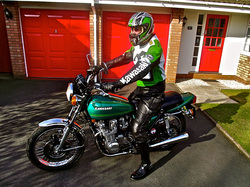
On the Road Again
It feels like ages since we were on the road with this machine in 2011 and a bit of March Staffordshire sunshine makes all the difference to the way the bike looks after the rebuild.
Did those leathers shrink during the winter? or was this Zedrider too much of a Fedrider this winter??
Oh well - no excuse not to exercise again now the bike is sorted.
Did those leathers shrink during the winter? or was this Zedrider too much of a Fedrider this winter??
Oh well - no excuse not to exercise again now the bike is sorted.
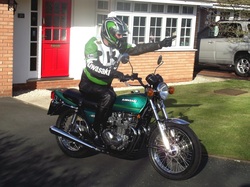
To the 70's...........AND BEYOND!
The bike is back together now. We have really enjoyed working on her over the last few seasons and we have made some great friends & contacts along the way.
Remember it's never to late for you to become a Zedrider again - if we can help you in any way it would be a pleasure to do so.
Zedrider March 2012
Remember it's never to late for you to become a Zedrider again - if we can help you in any way it would be a pleasure to do so.
Zedrider March 2012
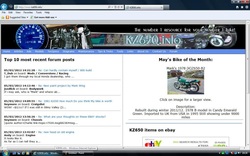
Kz650.info Home Page May 2012
It's now May 2012 and whilst the UK is struggling to get out of it's winter weather pattern we did get one little ray of sunshine -
Many thanks to all the friends and members of the worldwide KZ650 Owners Club who voted our Green Z650 as Bike Of The Month this month. Here it is on the www.kz650.info home page. Take a look and see what bike is featured there now.
Many thanks to all the friends and members of the worldwide KZ650 Owners Club who voted our Green Z650 as Bike Of The Month this month. Here it is on the www.kz650.info home page. Take a look and see what bike is featured there now.

