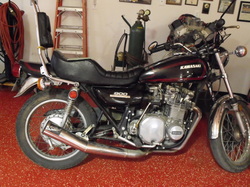
Z1-B Easy Rider
Amongst Kawasaki fans the Z1 900cc Super Four machine, launched in 1972, has become one of the most admired models ever made. It's continuing world wide popularity has created a new industry - providing replacement parts for discontinued factory items. Even now you can get virtually all the parts needed to build a 1972 bike.
Kawasaki Guru Rick Brett spotted this bike hiding away in Michigan USA. In
February 2010 the big Z1 joined the Zedrider family.
Kawasaki Guru Rick Brett spotted this bike hiding away in Michigan USA. In
February 2010 the big Z1 joined the Zedrider family.
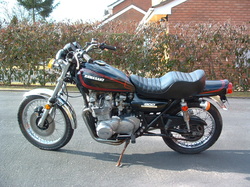
Back in the UK
On closer inspection the machine was wearing Z1000 LTD bars and seat and a four into one exhaust system. The non standard paint added to the Harley inspired look. More importantly the frame and engine number were correct for a 1975 Z1-B and this matched the data on the headstock sticker (USA bikes only). The frame was intact and a missing main stand and fittings were quickly sorted out from Rick's stockpile of kawa parts. The main problem appeared to be that the carbs had become blocked and the bike had then been left to stand for some years.
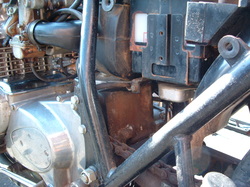
Nasty Brown Chain Lube?
The chain and sprockets were well past their use by date and we knew that the whole transmission would be renewed before she could be used safely on the road again. The original front tyre from 1975 was still fitted - a good sign that the low mileage was genuine - and both tyres and inner tubes would be replaced before any road work could happen. As you can see the frame and fittings were starting to show their age and the engine etc. all needed a good clean up.
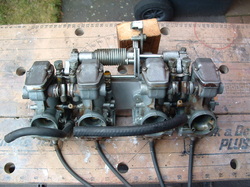
Blocked Carbs
Whilst the new chain, sprockets, cush rubbers and a load of other bits were coming it was time for the Zedrider team to get a crash lesson in stripping and cleaning Z1 carbs. After a couple of attempts there was enough improvement for the engine to spring back to life - very satisfying as we had never paid this much for a broken down vehicle!!
Once the MOT items were sorted the bike could be insured on the frame number and taken for an MOT - then we could apply for a UK age related registration number from 1975 - hopefully!
Once the MOT items were sorted the bike could be insured on the frame number and taken for an MOT - then we could apply for a UK age related registration number from 1975 - hopefully!
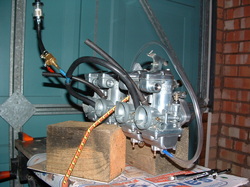
Carb Float Levels
Here's the offending carbs looking a bit tidier with new internal repair kits fitted. They are now undergoing float level testing and also being tested for any petrol leaks before they go back onto the bike. It's a lot easier to sort leaks out on the bench.
TIP - You can fabricate a float level gauge from aquarium clear air line and a straight junction piece like this for a few pence.
TIP - You can fabricate a float level gauge from aquarium clear air line and a straight junction piece like this for a few pence.
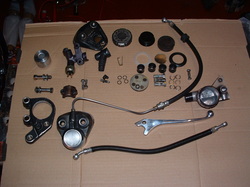
Front Brake Assembly
The front brake had been left for so long that the fluid had turned almost solid - actually not a bad sign - as it showed that no-one had been messing with the bike whilst it was laid up - unlike us Brits eh!!
Anyhow the master cylinder was stripped and rebuilt with a genuine factory repair kit and the caliper was rebuilt with a replacement piston from Z Power using new factory seals and rubbers. The rear brake was cleaned and adjusted when the wheel went back on so with two working brakes the MOT was getting close now.
Anyhow the master cylinder was stripped and rebuilt with a genuine factory repair kit and the caliper was rebuilt with a replacement piston from Z Power using new factory seals and rubbers. The rear brake was cleaned and adjusted when the wheel went back on so with two working brakes the MOT was getting close now.
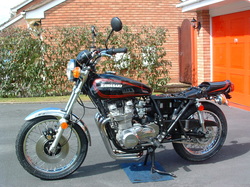
Just a seat now - then MOT time
So this was with the new transmission and tyres fitted almost ready for MOT. Carbs were re-fitted and working, new correct Z1 bars, mirrors and headlamp brackets were added and the indicators were tidied up. Oh yes and a lot of Zedrider elbow grease and cleaning went into the mix as well.
TIP - You can get good replacement indicators and stems on the Cool Parts link above
TIP - You can get good replacement indicators and stems on the Cool Parts link above
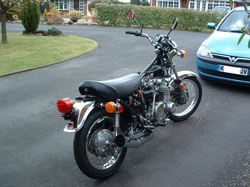
That's more comfortable!!
Dave Marsden at Z Power came to the rescue with a replacement Z1 seat unit and the King & Queen unit was consigned to history. The body panels have now gone off for a quick daub of blue paint as we wanted the bike to get it's first UK Registration document in one of the correct colours for that model year (red or blue). After spitting out a few acorns when it first fired back up the exhaust has cleaned up well and gives a meaty but road legal growl - so it will be staying for a few months. It's too early to decide whether we can afford a new standard system or another four into one which is far cheaper.
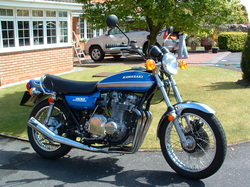
Back from the MOT - reg plates next
Here's the first version of the paintwork. We did a lot of the preparation ourselves. The inside of the tank was very clean and any traces of rust were dealt with using Proscale 650 water based rust dissolver from a local company. Image works in Derby made and fitted the gold and white decals and then the black tank lines were air brushed in by our friend Lee Chambers in Wednesfield who gave the tank and tail unit a final coat of laquer to seal it all up ready for polishing.
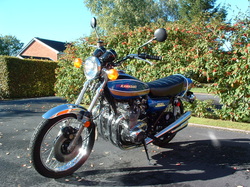
Proper Exhausts at last!
We ran the bike and established that there were no expensive horror stories lurking anywhere. Then bit the bullet and got a set of reproduction silencers from the Z Power guys. There's never a cheap time to do this - and the exchange rate to Japan meant they would soon be even more expensive - but the plan for the winter was a complete tear down and restoration of the frame, chrome work and all the fittings that were showing their age. The new silencers would be the finishing touch. Here they are going on for a trial fit before the bike came to pieces.
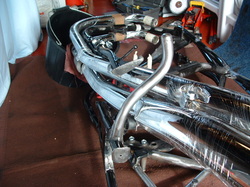
Adjusting the stands & silencers
Because the bike had been missing left side exhausts for many years, and the main stand was not originally from this bike, some adjustments to clearances were made to ensure the stands would park correctly on the silencer stops when the bike was rebuilt. The frame was also checked for alignment and tig weld was used to dress where the side stand had marked one of the tubes. Once we were happy the whole frame and loads of fittings went off to be blasted clean and coated in gloss black. Only the lamp brackets were done in satin black.
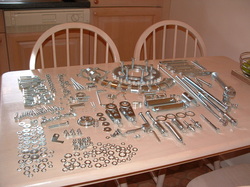
Re-zincing Returns (Mecanno Set?)
Whilst the frame was being re-finished all the zinc plated parts we could find were de-rusted, threads cleaned, heads polished and then de-greased before going off for bright zinc plating with a clear passivate finish. Even parts we had fitted new - such as sprockets - got put back in for an extra zincing to match the rest of the machine. The platers were really good and didn't even lose the tiny screws and springs from the petrol cap mechanism - which meant we could lose the pattern one and re- fit the original unit.
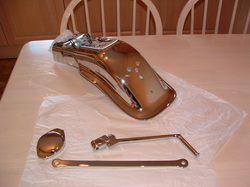
Re-chroming Returns
Our friend Graham at ACF Howell in Walsall did a cracking job on the few items that got re-chromed. The exhausts didn't need it and the front fender was replaced with a genuine new one. The wheel rims were good enough to re-use so this wasn't the big job it could have been.
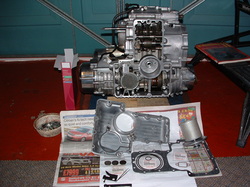
Sump & Oil Pump Strainer
The sump came off and the oil pump strainer (lower left of filter tunnel) was removed and cleaned. New gasket and O rings were used to re-fit the sump.
The factory tool (bottom left) got the valve shims out and they were adjusted.
TIP - There is a baffle plate in the Z1 sump which stops all the oil rushing backwards under hard acceleration. Unfortunately the baffle also makes it hard for normal oil changes to get all the debris out of the sump pan - no matter how many times you do it. So this is worth a check and a clean if you have just picked up an older machine.
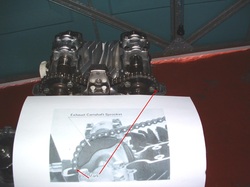
Check Cam Timing
We used the factory tool to re-set the valve shim clearance so there was no need to remove the cam shafts or idler wheel. But there's no guarantee that it has always been done right and these engines are so strong that they will still run if the chain is out by one or two links. So it is a good chance to check the cam timing by aligning the T1&4 marks on the crank with set points on the two cam sprockets (see your manual for details).
Then when you are happy the cam cover can go back on with a new gasket and you should not need to mess in there for a while.
Then when you are happy the cam cover can go back on with a new gasket and you should not need to mess in there for a while.
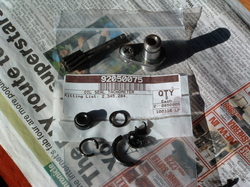
Tacho Drive & Seals
It is a fairly common problem for the tacho drive O ring and oil seal to give up over the decades and let hot oil ooze out onto the front upper cylinder head area. The philips screw that holds the drive holder onto the head is an absolute pain to shift. Much easier when the engine is out so that's when we did it. Later bikes used an allen headed bolt instead of the philips screw - have a look on the Z650 B page above and you can see.
TIP - Fit an allen headed bolt to hold the tacho drive holder into place and secure it with loctite.
TIP - Fit an allen headed bolt to hold the tacho drive holder into place and secure it with loctite.
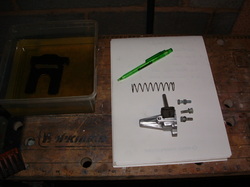
Cam Chain Tensioner
We checked the cam tensioner mechanism and it was all ok so it could be re-fitted with a new gasket. We didn't re-fit it until after the cam sprockets have been checked for correct timing as it will give some slack if adjustment is needed.
TIP - Once the cams have been timed it is vital to refit the tensioner and let it take up any play - before the engine is turned over - otherwise the chain could jump a tooth and you will need to re-time the whole lot.
Use of a KAWASAKI pen is also bound to make it run better!!
TIP - Once the cams have been timed it is vital to refit the tensioner and let it take up any play - before the engine is turned over - otherwise the chain could jump a tooth and you will need to re-time the whole lot.
Use of a KAWASAKI pen is also bound to make it run better!!
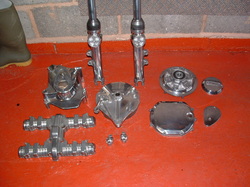
Polished Alloy Parts
A few of the alloy parts were polished up by the Zedrider team ready to be re-fitted.
The outer dust covers were replaced on the forks, the inner seals which did not leak, were left in situ.
The fork internals and springs were washed out and the springs checked for length within service limits - which was fine. Note the spring is tightly wound at one end and this should fit towards the top of the fork.
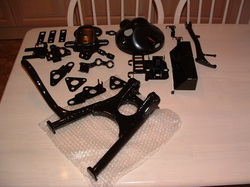
Re-finished Brackets & Stands
The frame and attachments have now come back. The engine brackets and main stand will be needed first to get the engine back into the frame.
TIP - Always re-fit the main stand and it's spring as early as you can. Once swinging arms etc. go on the clearance is reduced and it becomes very hard to stretch the spring over the retaining hooks by hand without damaging new paintwork.
TIP - Always re-fit the main stand and it's spring as early as you can. Once swinging arms etc. go on the clearance is reduced and it becomes very hard to stretch the spring over the retaining hooks by hand without damaging new paintwork.
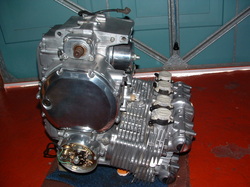
Engine Fin Cleaning
Here's the engine which had spent several days rolling round on the floor at all angles having the crank cases and cooling fins cleaned by hand. Almost ready for the frame again once the points are re-covered. The engine will lie on it's points cover side on a pile of cushions and old blankets - whilst the frame is lowered onto it.
Before that the frame will be wrapped to protect the new finish and the steering bearings and lower yokes rebuilt onto it. The main stand and fittings is also added BEFORE the frame meets back up with the engine.
Before that the frame will be wrapped to protect the new finish and the steering bearings and lower yokes rebuilt onto it. The main stand and fittings is also added BEFORE the frame meets back up with the engine.
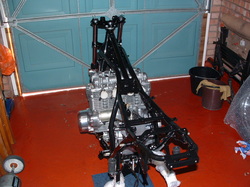
Engine & Frame Together Again
The idea is to lower the frame onto the engine with a helper at each end. Once the mounting bolts and brackets are secured the whole assembly lifts and the main stand goes down. One of us slots the forks in and adds the front wheel. At this point - if you have done it right, the whole structure should become self supporting once more. Like this.
Sure there are plenty of other ways to get engines and frame together - the factory manual suggests lifting the engine into an upright frame - surely as a last resort when all the other wheels & fittings are still in place??
Sure there are plenty of other ways to get engines and frame together - the factory manual suggests lifting the engine into an upright frame - surely as a last resort when all the other wheels & fittings are still in place??
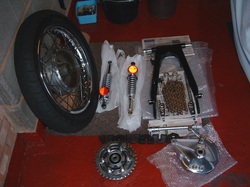
Rear wheel Fitting Kit
Put the rear brake pivot arm in next and get the spring tensioned up with the pedal fitted. It is easier before the other items are built around it. We also prefer to use one piece drive chains - so they need to go onto the front sprocket and be opened up before the swinger is fitted.
TIP - Grease the arm well before it is fitted and make sure you are getting excess grease from both ends before it is assembled.
We fitted a set of new cush rubbers from Z Power after removing all residues from the old ones. The Z1 was notorious for stretching chains under hard use.
TIP - Grease the arm well before it is fitted and make sure you are getting excess grease from both ends before it is assembled.
We fitted a set of new cush rubbers from Z Power after removing all residues from the old ones. The Z1 was notorious for stretching chains under hard use.
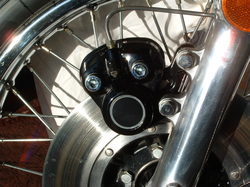
Front Caliper Bolts & Decal
Here you can see the re-zinced caliper bolts which hold the caliper to the fork mount and allow the fixed inner pad to "float" so you get even braking from both pads.
The silver circle on the caliper face is actually a black decal with a silver edge which came as part of a set from Z Power.
The silver circle on the caliper face is actually a black decal with a silver edge which came as part of a set from Z Power.
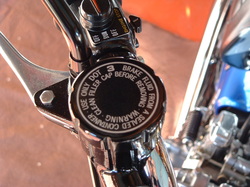
Master Cylinder & Cap Decal
The master cylinder also had a re-spray and got crowned with a new cap warning decal. The under tray owners manual shows exactly where all the decals are located on USA and Euro machines.
The bar switches were in good condition and just needed a clean up as you can see.
The bar switches were in good condition and just needed a clean up as you can see.
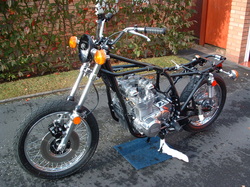
Z1-B Rolling Chassis
Once the swinging arm and rear shocks are back on the rear wheel fitting kit can be applied. Make sure you know which order the spindle spacers go in and which way the shaft bolt nut should face. Your rebuild notes and before photos will help you here.
We used new reproduction shock absorbers at the rear. They are an exact replica of the originals and these ones came with a red upper reflector as the bike is a USA machine. UK and Euro bikes had a plain rear shocker and a chrome disc on the front forks where the orange reflector can be seen.
We used new reproduction shock absorbers at the rear. They are an exact replica of the originals and these ones came with a red upper reflector as the bike is a USA machine. UK and Euro bikes had a plain rear shocker and a chrome disc on the front forks where the orange reflector can be seen.
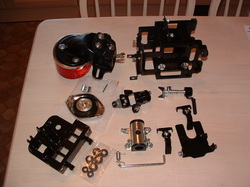
Brackets & Seat Lock
Here's a few of the components re-assembled ready to go back onto the frame. The petrol cap is the original which has been re-chromed with re-zinced internals and a new genuine gasket. It somehow felt right to re-use it even though a good repro one is much less hassle.
TIP - Reproduction petrol caps are available on the Cool Parts page above.
TIP - Reproduction petrol caps are available on the Cool Parts page above.
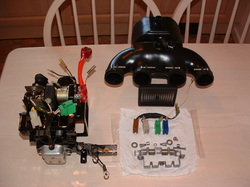
Electrics and Airbox
The electric panel has been reassembled to the battery box and the original air box cleaned and polished with a new top grille cap from Z Power.
It's a good idea to do a trial assembly off the bike so that you can see how it all fits together from all angles before trying to squeeze it into place on the frame. To get the wiring to the panel correct you need lots of before pictures and strip rebuild notes. The bracketry below the block connectors should all be finished in a yellow/ gold colour so that is ready to go off to the platers.
It's a good idea to do a trial assembly off the bike so that you can see how it all fits together from all angles before trying to squeeze it into place on the frame. To get the wiring to the panel correct you need lots of before pictures and strip rebuild notes. The bracketry below the block connectors should all be finished in a yellow/ gold colour so that is ready to go off to the platers.
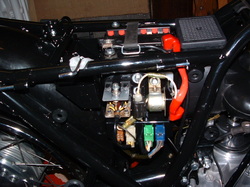
Electrics & Airbox fitted
Here you can see all the components from the previous shot fitted into place with the two pronged bracket from the battery box being used to support the airbox in it's position.
The white single fuse unit is all that stands beetween a Z1 and electrical melt down - unlike later Zeds which have at least three fuses to protect various parts of the bike. It should carry a spare main fuse inside the rubber damper where the fuse unit is clamped. Our bike still did but it's well worth a check!
TIP - New genuine main fuse assemblies are available on the Cool Parts page.
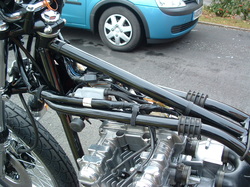
Wiring Harness Routing
The main wiring harness can now be fitted and hooked up to the electric panel. This shot shows the route we used and where the cable ties were positioned.
TIP - On a Z1 there is only a small gap between the front edges of the tank and the frame - especially on the early 1972/3 tanks with smaller brand badges fitted. So be really careful to spread the cables and harness evenly over both sides of the tank or it will chafe and cause problems.
TIP - On a Z1 there is only a small gap between the front edges of the tank and the frame - especially on the early 1972/3 tanks with smaller brand badges fitted. So be really careful to spread the cables and harness evenly over both sides of the tank or it will chafe and cause problems.
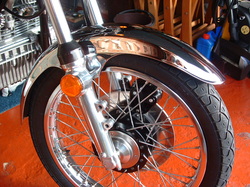
New Genuine Fender
We added a new genuine fender because this ia a highly visible area.
TIP - You will be amazed how many £10k Z1s have fitted the front fender backwards. The curved end goes to the front and the flat end to the rear but it fits on either way.
Ours had all newly plated bolts and washers to fix it on and it got undersealed with Waxoyl before it went on. There is quite a hefty reinforced section inside a genuine front fender which acts as a fork brace. Fit a cheap or plastic one at your peril!!
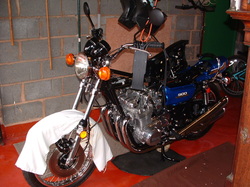
Firing Up Again
The new silencers are back on and stands now park correctly on the rubbers located on the left pipes.
The carbs were then set up correctly (mixture & vacuum). It is the first time the bike had breathed properly through four pipes for at least three decades so some minor adjustments were expected.
TIP - Always set the mixture a little to the rich side. Too lean will over heat the engine and discolour those expensive header pipes!! Also invest in a Sealey remote fuel tank to save damaging your real tank.
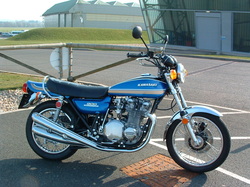
Back Where She Started
There's loads more pictures we could show you but you get the point by now. We really love our Zed machines and we hope that if we have achieved a reasonable result - based on a very basic mechanical skill level - it may be of some encouragement to others.
The bike is not finished - they never are - and it hasn't been restored to make a quick profit - but it's back into good safe rideable shape and can trigger a nice conversation wherever we park her up near any bikers. Isn't that what it's all about?
Check out our other pages for more ideas and examples of Zed restoration
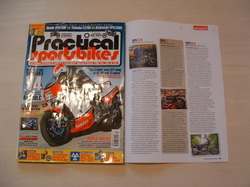
Practical Sportsbikes March 2012
Oh yeah..... I almost forgot, she got a mention and a picture on page 101 of Practical Sportsbikes March 2012 if you ever get to read that one.
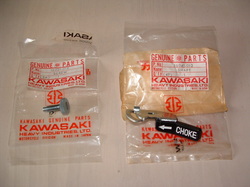
NOS Idle Adjust Screw & Choke Lever
It's never quite finished - after months of searching we have now replaced the choke lever and idle adjusting screw with new genuine factory parts. These have been unavailable from dealers for many years. Because they are easy to adjust by hand they tend to get more wear than most parts.
TIP - the plastic cover on the lever is prone to cracking at the angle so do not operate it by the far tip - grip nearer to the shaft.
Idle adjust screws now available on the COOL PARTS link above
TIP - the plastic cover on the lever is prone to cracking at the angle so do not operate it by the far tip - grip nearer to the shaft.
Idle adjust screws now available on the COOL PARTS link above
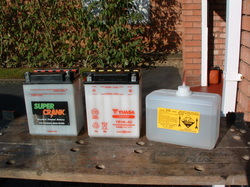
New OEM Yuasa Battery
To get the bike a little closer to factory standard we fitted a brand new YUASA battery.
This is the factory item as mentioned in the Kawasaki Service Manual.
It needs to have acid added carefully up to the marks, this gets topped up after an hour or so then it's a good charge and only distilled water from now on.
This is the factory item as mentioned in the Kawasaki Service Manual.
It needs to have acid added carefully up to the marks, this gets topped up after an hour or so then it's a good charge and only distilled water from now on.
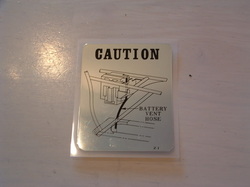
Battery Vent Hose Routing Decal
Be careful to route the battery drain tube correctly as shown on the under seat sticker or you may get acid stains on your silencers etc.
This should be fitted to the underside of the the seat unit at the rear.
If the hose gets pinched an explosion can result so it's worth a check. This was mentioned in the factory service bulletins.
This should be fitted to the underside of the the seat unit at the rear.
If the hose gets pinched an explosion can result so it's worth a check. This was mentioned in the factory service bulletins.
From Japan via America
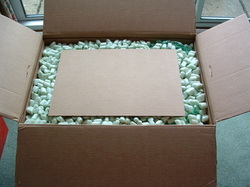
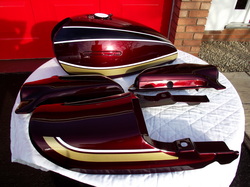
As this bike was originally assembled with Candy Super Red paintwork we took the plunge and ordered a complete new body kit in the correct original colour. These are still being made for the Z1 range by the PMC Corporation in Japan.
Our good friend and Z1 Guru Jeff Saunders from Z1 Enterprises shipped this set across the Atlantic to us. Many thanks for all the polystyrene chips Jeff!
Our good friend and Z1 Guru Jeff Saunders from Z1 Enterprises shipped this set across the Atlantic to us. Many thanks for all the polystyrene chips Jeff!
New Candy Super Red Bodywork
So here's what we got - no badges, petcock or gas cap fitted.
Needless to say great time and care was taken in getting those into place correctly without marking the new paintwork.
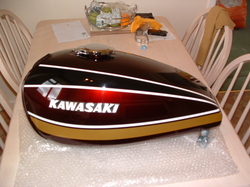
We have cleaned up and touched in the paint on the original tank and side panel badges before re-fitting them - to keep an original feel to the bike.
The re-chromed original gas cap was also moved across from the old tank.
New Z1-B Petcock
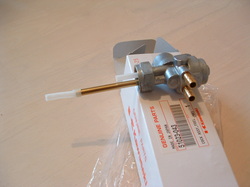
A new original petcock (fuel tap) was sourced and fitted to the gas tank.
Note the two nylon strainer gauzes. One or both of these is often missing or damaged - Check yours!
The lower gauze is for the reserve pipe - the changeover happens when there is a couple of inches depth of gas remaining.
There is an extra metal fine strainer gauze inside the tap - which can be accessed for cleaning by removing the lower bowl.
Petcock, Gas Cap & Badges fitted
Note - the correct short, flat ended screws must be used to mount tank badges. They are not expensive and the wrong ones can easily puncture your lovely gas tank, so be warned!
TIP - if you compress the gas cap latch spring and put the prongs into a small female spade connector, it is easier to get into place. Once the pin is through just pull off the spade connector to release the spring.
TIP - if you compress the gas cap latch spring and put the prongs into a small female spade connector, it is easier to get into place. Once the pin is through just pull off the spade connector to release the spring.
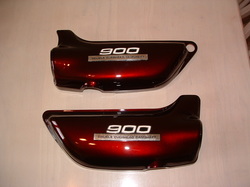
Side Panel Badges fitted
Here are the new side panels complete with badges. These badges were only used for the 1975 model. There is a hole on top of the nearside panel - which is left over from the chain oiler tank that was fitted to earlier Z1s.
TIP - Keep those new side panels safely attached by checking the rubber frame grommets that they plug into are in good condition. The can wear though in the middle without being noticed. If in doubt they are a nice cheap fix.
TIP - Keep those new side panels safely attached by checking the rubber frame grommets that they plug into are in good condition. The can wear though in the middle without being noticed. If in doubt they are a nice cheap fix.
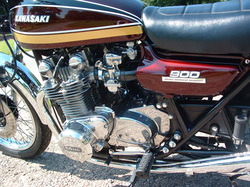
Fitted Close Up
Here's a close up of the fitted panels on a sunny day. Good light brings out the beauty of the paintwork and you can see different colours depending on which angle you view.
The new petcock and CHOKE lever we recently fitted are also in view.
TIP - the front of the seat unit will rub on the rear edge of the petrol tank when you put the seat down. We fitted a hidden strip of clear plastic film to stop this happening.
The new petcock and CHOKE lever we recently fitted are also in view.
TIP - the front of the seat unit will rub on the rear edge of the petrol tank when you put the seat down. We fitted a hidden strip of clear plastic film to stop this happening.
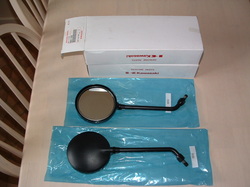
New Genuine Factory Mirrors
Another 2012 update was to upgrade the reproduction mirrors, fitted when the bike was re-commissioned, to genuine items.
The reproductions look very similar, but in use they vibrate far more than the genuine equipment - so not as safe.
TIP- wrap cloth around the adjusting nuts when tightening because the paint finish will mark easily.
The reproductions look very similar, but in use they vibrate far more than the genuine equipment - so not as safe.
TIP- wrap cloth around the adjusting nuts when tightening because the paint finish will mark easily.
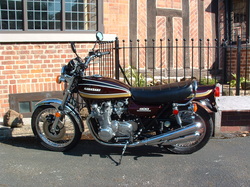
Up to Date (back to 1975)
So here we are for Autumn 2012.
This is how the bike will look for a while now.
You can see a few more finished images if you click on Zedrider Posters which is off the main Gallery Page.
Feel free to share the images with your friends or any biking websites that you visit.
This is how the bike will look for a while now.
You can see a few more finished images if you click on Zedrider Posters which is off the main Gallery Page.
Feel free to share the images with your friends or any biking websites that you visit.
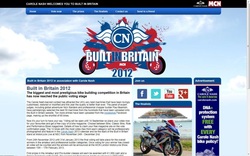
Built In Britain 2012 Website
Wow! the Z1 has made it through to the last 60 bikes in the Motorcycle News and Carole Nash Built In Britain 2012 Competition. http://www.mcnbuiltinbritain.co.uk/
Public votes will now decide the winners & we are in the Concours & Restored category.It is a great honour to be among the experienced bike builders here - so if we get no further it will still be excellent.
Public votes will now decide the winners & we are in the Concours & Restored category.It is a great honour to be among the experienced bike builders here - so if we get no further it will still be excellent.
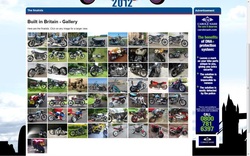
Built In Britain 2012 Gallery Page
Here's our bike - http://www.mcnbuiltinbritain.co.uk/bgbt_gallery.php?page=40
She could now be in a 2013 calendar, and go to the NEC Bike Show.
Voting closes September 14th - lend your support by clicking below if you read this before then. Who knows - we may be seeing you at the NEC !
http://www.mcnbuiltinbritain.co.uk/bgbt_voting.php?cat=4
Oh and there's a free Bike Magazine for all voters
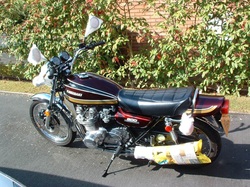
Booted & Suited for Filming
Amazing news! our Z1-B is a Built in Britain finalist!
She will now be photographed for the Carole Nash 2013 Calendar.
Hope we get December!!
Here she is all cleaned & wrapped ready for the photos.
Massive thanks to everyone who voted for her.
She will now be photographed for the Carole Nash 2013 Calendar.
Hope we get December!!
Here she is all cleaned & wrapped ready for the photos.
Massive thanks to everyone who voted for her.
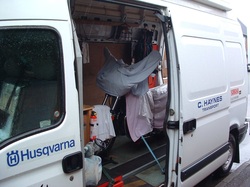
Lashed Down for the storm!
Our friend Jeff Haynes helped to get the bike over to the calendar photo shoot in Northampton.
Here she is loaded up and tied down for the journey.
It's about a 200 mile round trip and she probably wouldn't have looked very photogenic if we had ridden her there!
Here she is loaded up and tied down for the journey.
It's about a 200 mile round trip and she probably wouldn't have looked very photogenic if we had ridden her there!
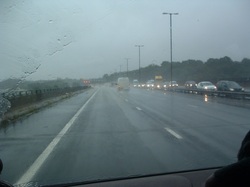
Fine English Weather
The english weather did it's best to spoil proceedings but we were all safe and dry in the van. Even the M6 motorway traffic jams seemed to be trying to foil our progress!!
You would not normally see our bike out on the road on a day like this but the paparazzi were waiting...
You would not normally see our bike out on the road on a day like this but the paparazzi were waiting...
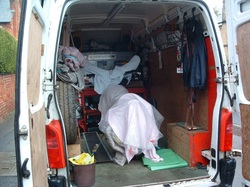
Come Out, Don't be Shy !
100 miles later and the weather was still grim - but she was persuaded out of the van with the aid of some golf umbrellas and a Gazebo.
Let's hope the tie downs and wrappings had prevented any damage.
Let's hope the tie downs and wrappings had prevented any damage.
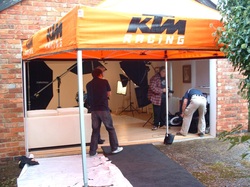
The Studio
Here is the photo shoot. David and Jess from Carole Nash were on hand to help Adam with the cameras and computers.
The previous finalist was still being filmed when we arrived but I had better keep his bike a secret for now.
The bike was made in England though.
The previous finalist was still being filmed when we arrived but I had better keep his bike a secret for now.
The bike was made in England though.
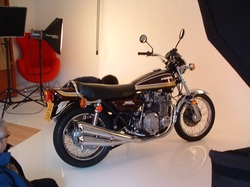
Mucky Tyres !
Today's shoot was against a white background - not the best when you have arrived in pouring rain.
Here is the crew removing muddy tyre tracks before the photos could start.
Here is the crew removing muddy tyre tracks before the photos could start.
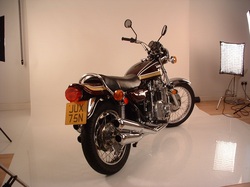
Nicely Posed
The final photos are not ready yet but we took a few during the shoot.
This kind of shot seemed to be a popular angle with the team.
Don't worry their cameras are a lot better than ours though.
You can pick up a free calendar from Carole Nash in a few weeks time.
This kind of shot seemed to be a popular angle with the team.
Don't worry their cameras are a lot better than ours though.
You can pick up a free calendar from Carole Nash in a few weeks time.
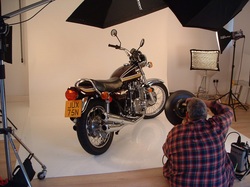
Up Close & Personal
Adam takes a shot of each owner for the back page of the calendar.
He also took a few close up shots as well.
Perhaps they will end up in his bike magazine?
You can see some of his car & bike work here - http://www.adamduckworth.com/
He also took a few close up shots as well.
Perhaps they will end up in his bike magazine?
You can see some of his car & bike work here - http://www.adamduckworth.com/
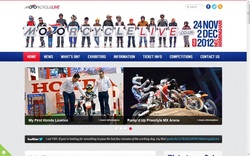
Motorcycle Live 2012
Our bike will also get a place on the Carole Nash Stand at the Birmingham NEC this November. Please come over and collect a free calendar.
The details of the show are here http://www.motorcyclelive.co.uk/
You can see a preview of the show below -
The details of the show are here http://www.motorcyclelive.co.uk/
You can see a preview of the show below -
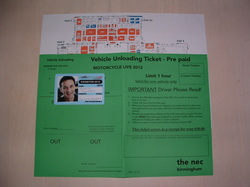
It's Show Time Folks !!
Mid November 2012 and we now have our Bike Unloading Permit & Exhibitor's Pass for the NEC Motorcycle Live Show. We hope to see some of you on the Carole Nash Stand in Hall Three.
Don't forget to grab your free 2013 Calendar featuring our Z1.
Don't forget to grab your free 2013 Calendar featuring our Z1.
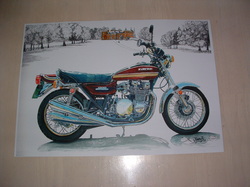
Bike Show Art Print
To celebrate the bike making it into the final twelve our friend Karen created this picture in inks and wash. It was parked outside Chillington Hall in Staffordshire, England at the time.
Guess what will be on the front of our Christmas Cards this year ??
Guess what will be on the front of our Christmas Cards this year ??
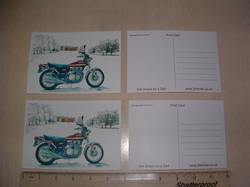
Z40 Celebration Post Cards
The picture is now on postcards which you can get from us at the NEC Show.
Just come and say Hi if you would like one.
Stay tuned for details of the next round which will select the four overall prize winners from the twelve finalists.
Just come and say Hi if you would like one.
Stay tuned for details of the next round which will select the four overall prize winners from the twelve finalists.
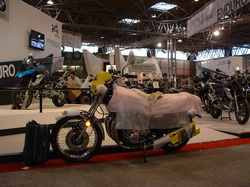
Wrong Stand !!
Friday November 23rd - all the contestants were taken to the NEC in Birmingham for display on the Carole Nash Stand.
Here is the Z1 fresh out of the van with her overnight bag, ready for 8 days away from home.
The guys from the BMW stand were quite interested in the new arrival.
Here is the Z1 fresh out of the van with her overnight bag, ready for 8 days away from home.
The guys from the BMW stand were quite interested in the new arrival.
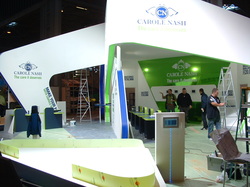
Main Carole Nash Stand NEC 2012
The Carole Nash Stand was still under feverish construction when we arrived.
The show opens in less than 24 hours.
All the bikes were lined up waiting to go.
The show opens in less than 24 hours.
All the bikes were lined up waiting to go.
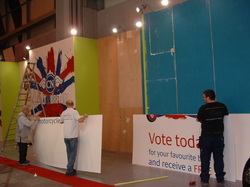
Built In Britain Display
The Built In Britain Display is being erected in this shot. All 12 finalists appear in the order of their calendar pages.
The Z1 got April which meant the bike went into an alcove.
That was good because the machine is quite long compared to some of the modern ones.
The Z1 got April which meant the bike went into an alcove.
That was good because the machine is quite long compared to some of the modern ones.
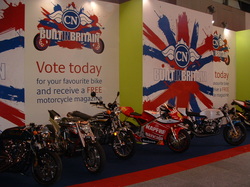
The Contestants Unveiled
Here are six of the finalists lined up ready for the show to start.
The Barbarian bike to the left of the Z1 has been largely built from scratch using designs and calculations made by the owner Shaun Wainford. A real one off design !!
The Barbarian bike to the left of the Z1 has been largely built from scratch using designs and calculations made by the owner Shaun Wainford. A real one off design !!
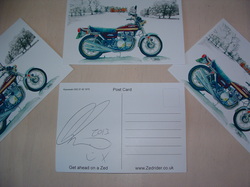
Spot the Famous Z1 Fan
We gave lots of postcards out during the opening weekend and the Press Day on Monday.
Can you spot who the famous biking celebrity we met was?
He really liked the display and the Z1 won the autograph.
Hope he will vote for her as well !!
Can you spot who the famous biking celebrity we met was?
He really liked the display and the Z1 won the autograph.
Hope he will vote for her as well !!
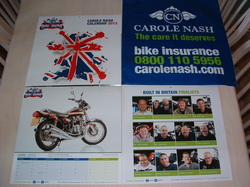
Free Goody Bags
Here is the free goody bag you can collect at the show.
You can vote on a slip if you attend before 2nd December.
Internet voting is open here...
http://www.mcnbuiltinbritain.co.uk/
... until 31.01.2013 when the overall winners will be decided.
Please continue to support the Z1
You can vote on a slip if you attend before 2nd December.
Internet voting is open here...
http://www.mcnbuiltinbritain.co.uk/
... until 31.01.2013 when the overall winners will be decided.
Please continue to support the Z1
Press Day Coverage
We gave away loads of Z1 postcards to Kawasaki fans during the show and met a lot of nice people on the Z40 Kawasaki Anniversary Display.
On Press Day our stand was visited by famous biker Charlie Boorman.
He gave the bike a good examination and left us with an autographed Z1 postcard!
On Press Day our stand was visited by famous biker Charlie Boorman.
He gave the bike a good examination and left us with an autographed Z1 postcard!
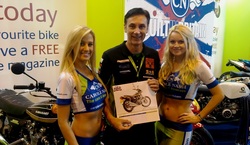
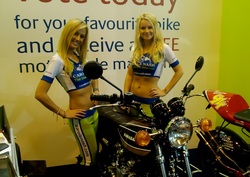
2013 Calendar Girls
We gave out 8,500 calendars during the show. If you missed out please contact Carole Nash or visit the London Excel Bike Show between 15th and 17th February 2013 for your copy.
Please vote again before the end of January if you would like to see the Z1 as a competition winner at the London Excel Show.
Please vote again before the end of January if you would like to see the Z1 as a competition winner at the London Excel Show.
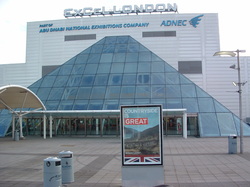
London Excel Arena
The weather for the London Show was great.
The bike park was busy and everyone was looking forward to the warmer weather and some good riding after the winter.
The bike park was busy and everyone was looking forward to the warmer weather and some good riding after the winter.
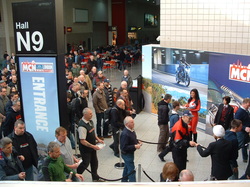
Opening Time
More Carole Nash calendars showing our Z1 were given out in London.
Motorcycle News gave us great support and accommodation.
Once again our stand was very popular with the crowds.
Motorcycle News gave us great support and accommodation.
Once again our stand was very popular with the crowds.
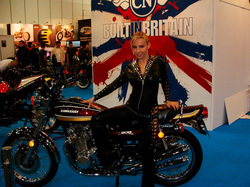
It's a hard life !
There were a number of modified Z1, Z900 and Z1000 bikes at the show.
Ours was the only standard machine displayed.
Many visitors could not believe that this bike was made back in 1975.
That shows how timeless the great design really was.
Original Z1 stylist Mr Norimasa TADA even sent us a personal message of support for the bike from Japan.
Ours was the only standard machine displayed.
Many visitors could not believe that this bike was made back in 1975.
That shows how timeless the great design really was.
Original Z1 stylist Mr Norimasa TADA even sent us a personal message of support for the bike from Japan.
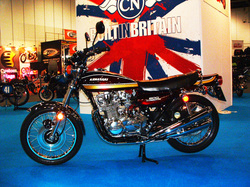
London Excel Show 2013
We had a great time at the London Bike Show and ended up as top concours and restored bike along with a great old Vincent machine.
She is now advertised on eBay if anyone would like to enjoy her.
http://www.ebay.co.uk/itm/KAWASAKI-Z1-1975-MODEL-MINT-LOW-MILEAGE-SHOW-STANDARD-IN-BIKE-MAGS-/230997889052?ssPageName=ADME:B:SS:GB:1123
Many thanks for all the support she has received at the shows and on our Facebook page.
She is now advertised on eBay if anyone would like to enjoy her.
http://www.ebay.co.uk/itm/KAWASAKI-Z1-1975-MODEL-MINT-LOW-MILEAGE-SHOW-STANDARD-IN-BIKE-MAGS-/230997889052?ssPageName=ADME:B:SS:GB:1123
Many thanks for all the support she has received at the shows and on our Facebook page.

