
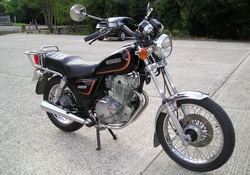
Back in 1988 Kawasaki Fan Guy Martin paid just £525 for this Z650 bike.
They have been together for most of the last 25 years, through various paint schemes, crashes, magazine articles and bike shows.
Guy is now a little older but the 650 just looks fresher every season.
Join their incredible journey now . . . .
They have been together for most of the last 25 years, through various paint schemes, crashes, magazine articles and bike shows.
Guy is now a little older but the 650 just looks fresher every season.
Join their incredible journey now . . . .

He quickly set about restoring the machine for the 1989 season.
Now in a blue paint scheme, the front fender and seat were replaced.
A new exhaust and fresh chrome work completed the first makeover.
The braced swinging arm was also updated and improved.
Now in a blue paint scheme, the front fender and seat were replaced.
A new exhaust and fresh chrome work completed the first makeover.
The braced swinging arm was also updated and improved.
A few months later UK roads had taken their toll on bike and rider.
Luckily the damage was superficial and Guy was able to quickly put things right.
After all he had recent memories of how it all went together !!
The tank is still kept as a souvenir.
Luckily the damage was superficial and Guy was able to quickly put things right.
After all he had recent memories of how it all went together !!
The tank is still kept as a souvenir.
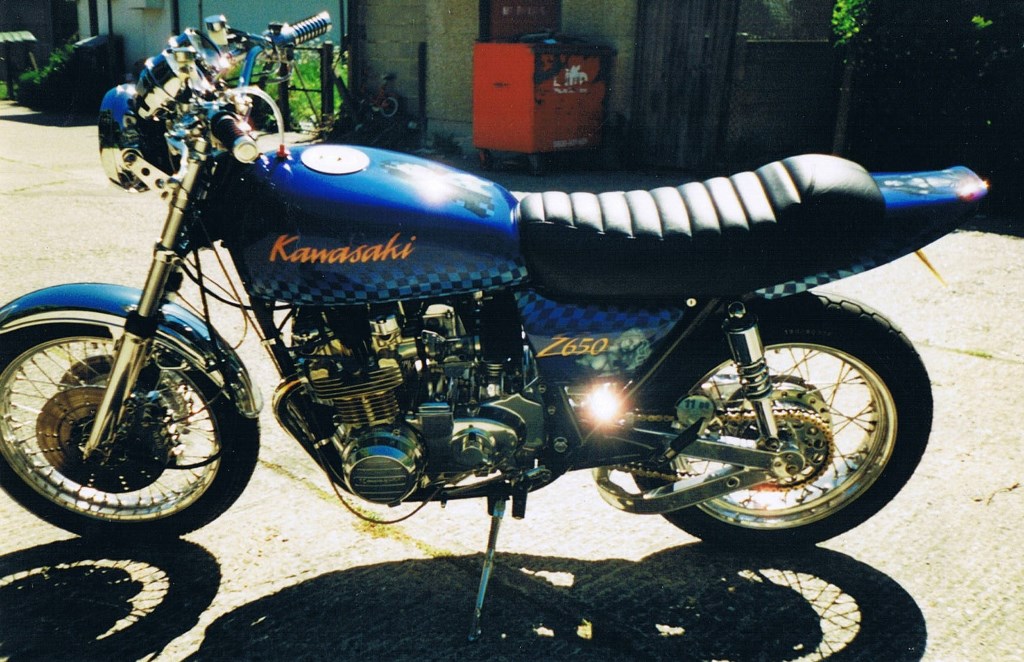
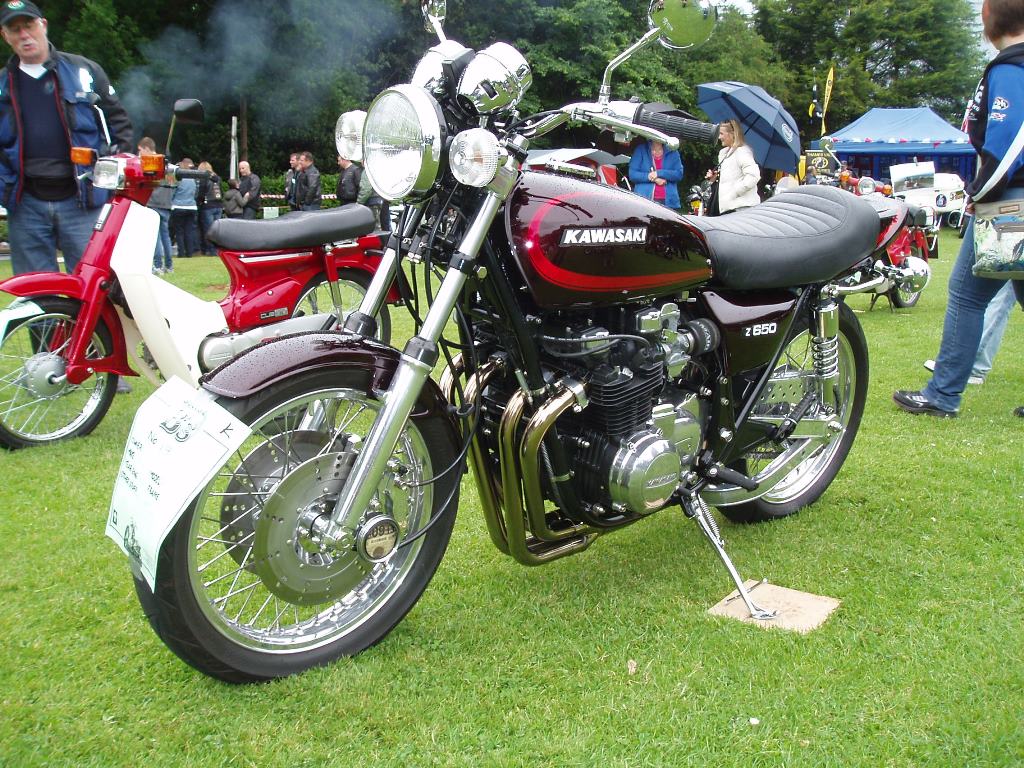
Still Moody in Blue, but now with a new look tank and re-covered seat.
Mag wheels were replaced by early spoked versions.
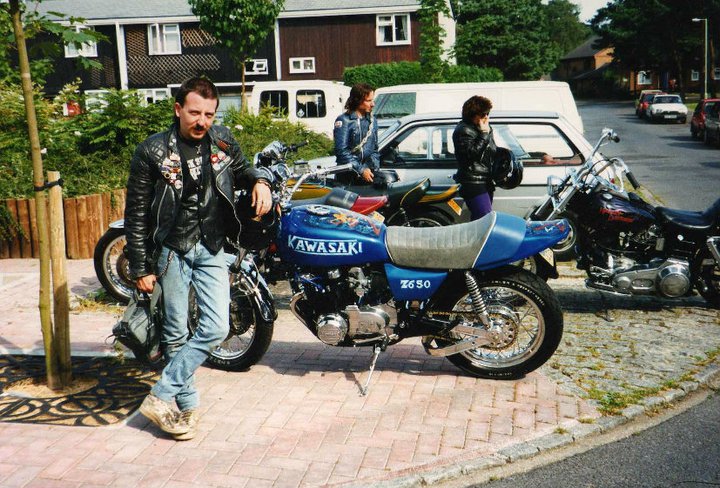
Our hero is in the foreground, with his brother and his Z1A nearby.
Kawa love runs in the family !!
Mag wheels were replaced by early spoked versions.
Our hero is in the foreground, with his brother and his Z1A nearby.
Kawa love runs in the family !!
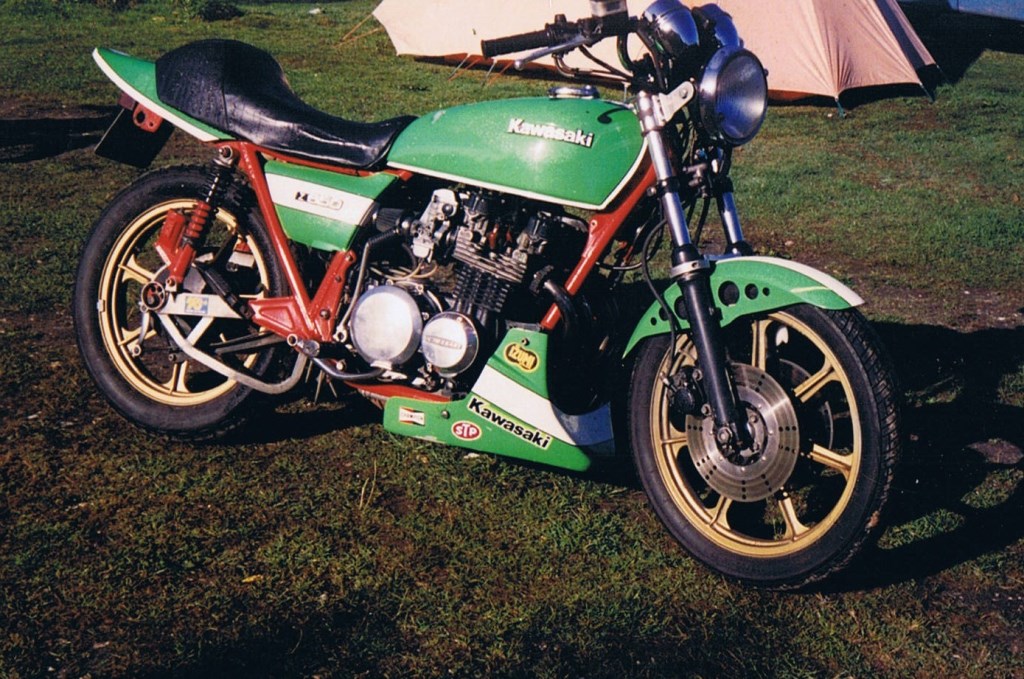
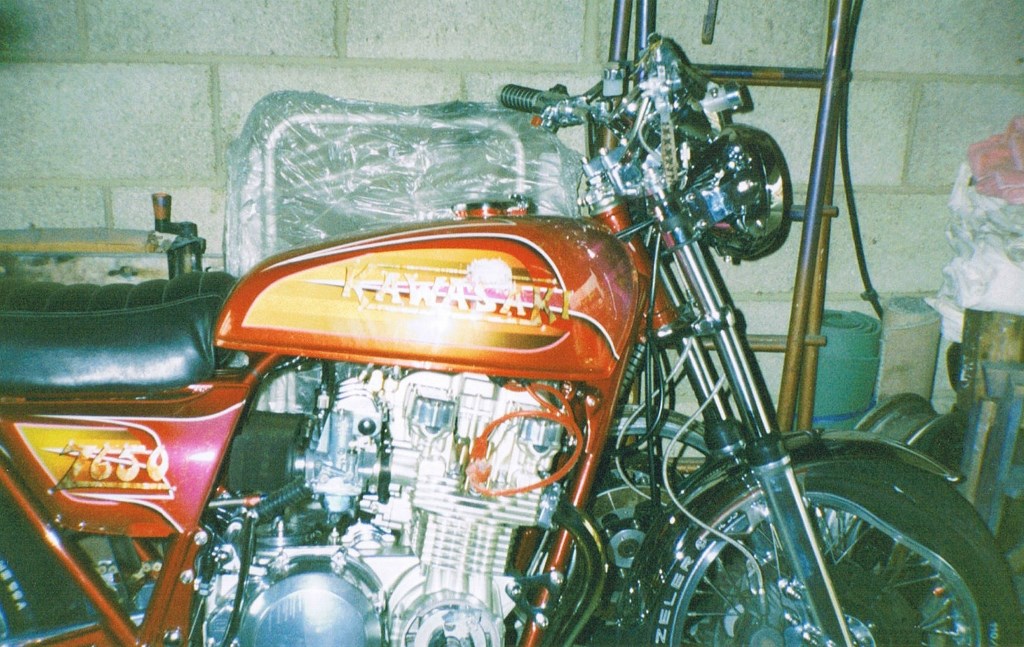
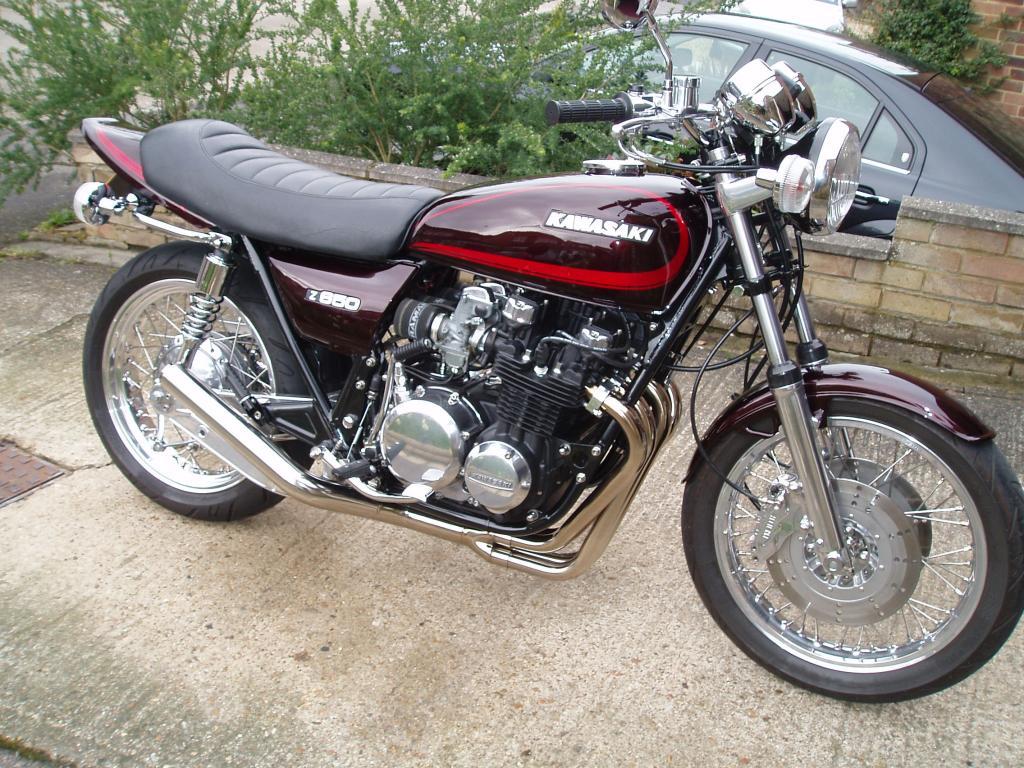
By 1996 the bike had received red bodywork, a different seat style and Lockheed disc brakes.
The bike won "Best Paint & Mural" at the South West Custom & Classic Bike Show that year.
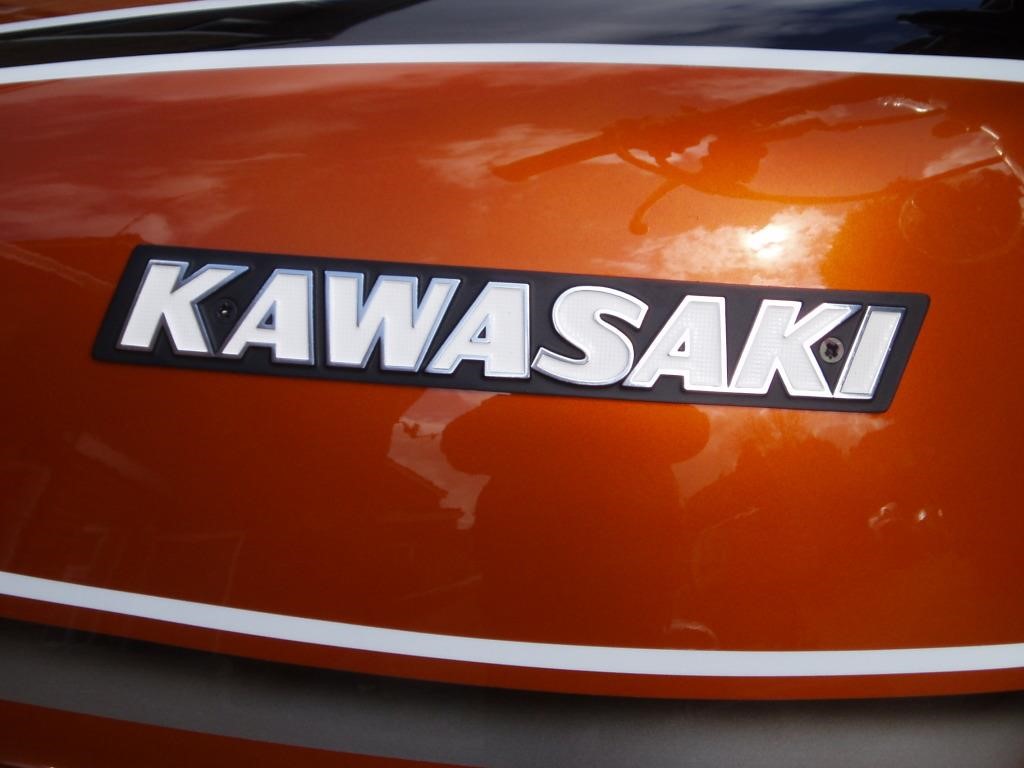
Amazingly Kawasaki & Z650 were written in gold leaf - and a further 28 colours were used to get the overall effect.
The bike won "Best Paint & Mural" at the South West Custom & Classic Bike Show that year.
Amazingly Kawasaki & Z650 were written in gold leaf - and a further 28 colours were used to get the overall effect.

Not surprisingly the UK Bike Press picked up on this Z650 story.
In November 1996 Back Street Heroes Magazine ran this article entitled "Ruby Red Zed"
The extract shows Guy in action on the machine and some detail from the paint scheme.
It was issue number 151 if you ever get a chance to read it.
In November 1996 Back Street Heroes Magazine ran this article entitled "Ruby Red Zed"
The extract shows Guy in action on the machine and some detail from the paint scheme.
It was issue number 151 if you ever get a chance to read it.
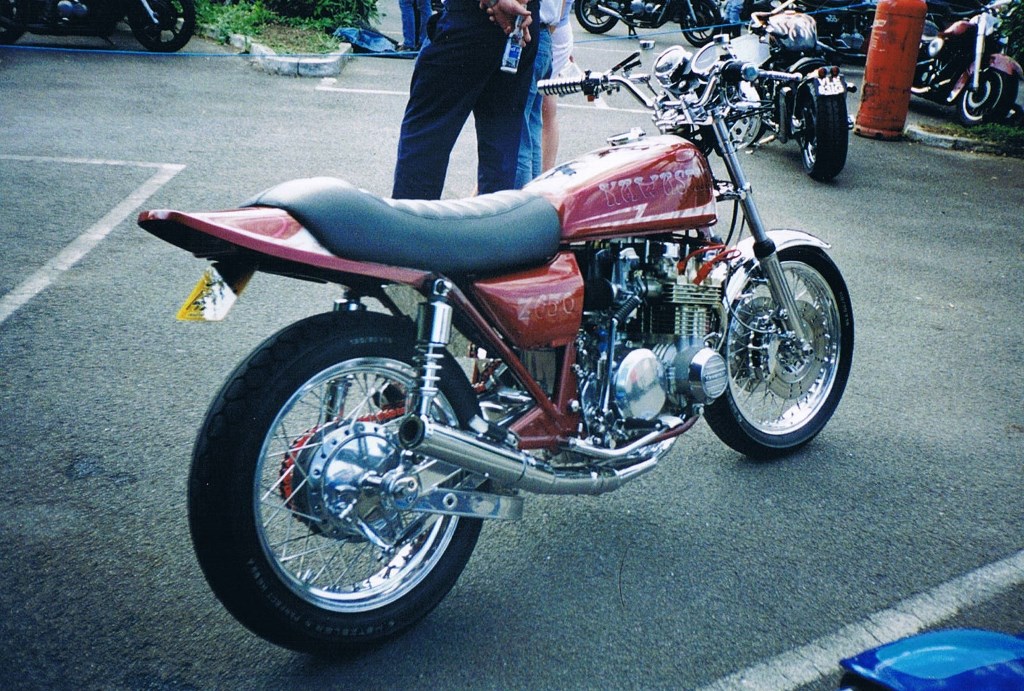
By 1997 the frame had also been powder coated in red to match.
The engine was now in a plain alloy finish.
Soon after this a car pulled out in front of Guy and the bike sustained front end damage once more.
Note the slight buckle to the front wheel !!
It's spanner time again Mr. Martin.
The engine was now in a plain alloy finish.
Soon after this a car pulled out in front of Guy and the bike sustained front end damage once more.
Note the slight buckle to the front wheel !!
It's spanner time again Mr. Martin.
Reborn for 1998 - the machine received a new paint scheme.
A special hydraulic clutch conversion was installed.
Marving supplied the exhaust system.
Pertech Brake Callipers completed the new look.
Yes you did spot a matching red chain !!
A special hydraulic clutch conversion was installed.
Marving supplied the exhaust system.
Pertech Brake Callipers completed the new look.
Yes you did spot a matching red chain !!
In 2000 the bike had it's last makeover before being sold.
After 12 years and many adventures they had finally parted company.
Guy was kept busy working on a Z1000 Kawasaki.
but that is another story . . . .
After 12 years and many adventures they had finally parted company.
Guy was kept busy working on a Z1000 Kawasaki.
but that is another story . . . .
In 2011 Guy was able to buy the bike back again.
She had become neglected and the frame had rusted badly in places.
Armed with a spare frame and a friendly polishing service it was time to get her back into top condition.
She had become neglected and the frame had rusted badly in places.
Armed with a spare frame and a friendly polishing service it was time to get her back into top condition.
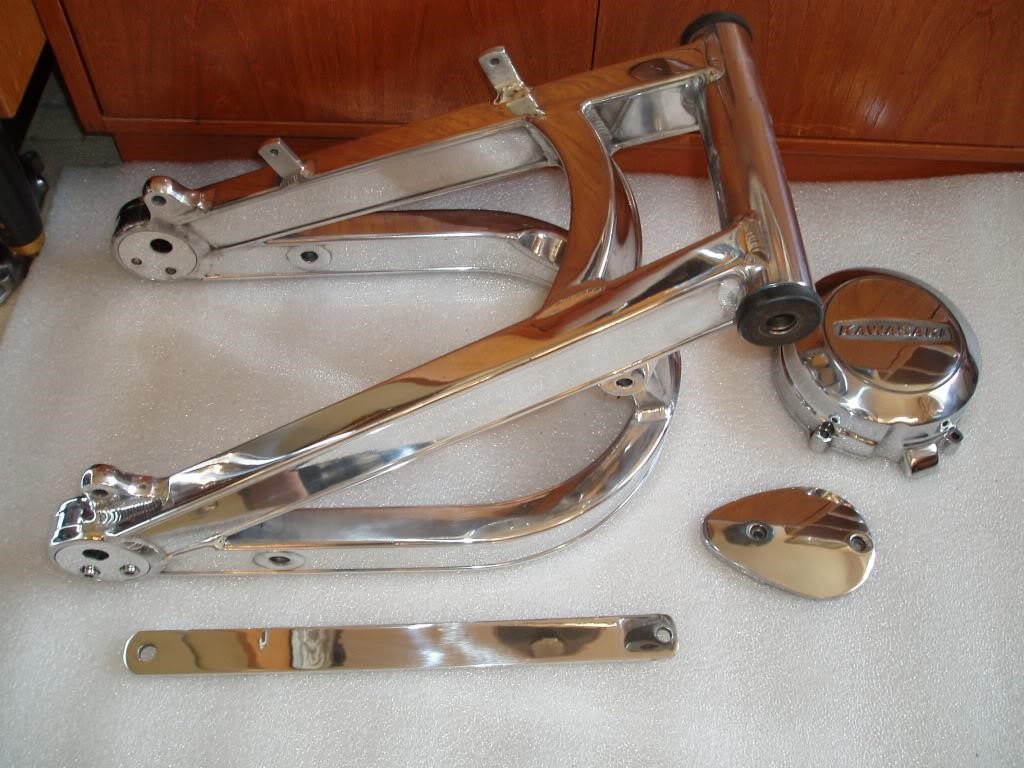
Mikey from the Z1 Owners Club worked really hard to polish up all the alloy parts.
The braced swinging arm was soon looking better than new again.
The braced swinging arm was soon looking better than new again.
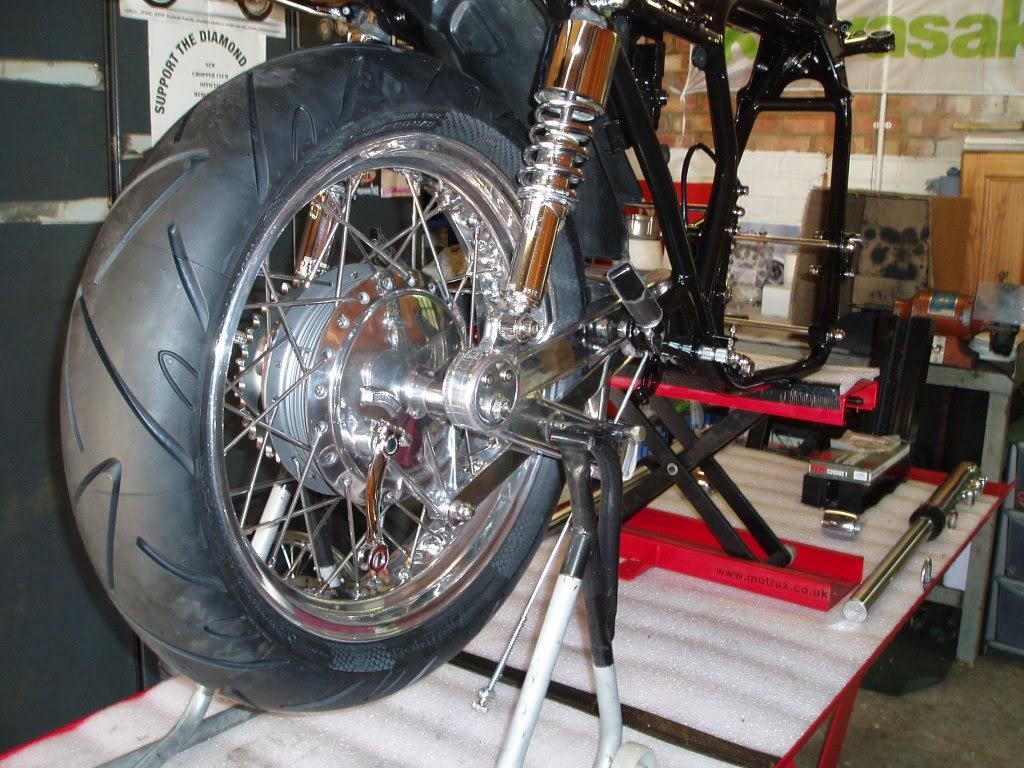
Here is the final (or is it the latest?) rebuild taking shape.
You can see the newly polished swinging arm in place.
Modern low profile tyres add to the dynamic look.
You can see the newly polished swinging arm in place.
Modern low profile tyres add to the dynamic look.
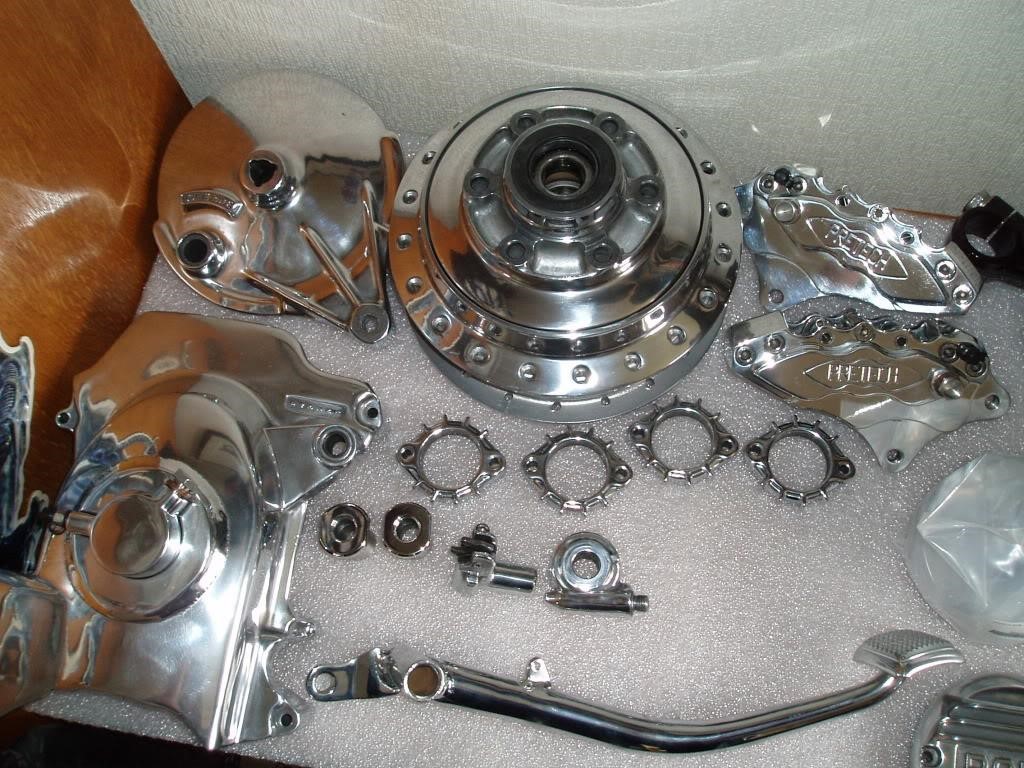
Mikey was able to strip and re-polish most of the chrome plated parts from the bike.
His attention to detail was awesome.
If you leave parts in the chrome stripper for too long the base metal can be eaten away and will never look good when it is re-plated.
As you can see he did a great job.
His attention to detail was awesome.
If you leave parts in the chrome stripper for too long the base metal can be eaten away and will never look good when it is re-plated.
As you can see he did a great job.
A great bike needs zinc plated parts to set off the chrome and paintwork.
Mikey was able to restore the zinc finish to a great factory standard.
Now the rebuild could really get going.
Mikey was able to restore the zinc finish to a great factory standard.
Now the rebuild could really get going.

Gauges are always difficult to restore on these bikes.
Here is a set which Guy started to work on.
The orange highlights on needle tips and tacho red line often fade out over the decades.
Splitting the shiny crimp ring to open the glass and dial for repair and cleaning needs special care and tools.
Here is a set which Guy started to work on.
The orange highlights on needle tips and tacho red line often fade out over the decades.
Splitting the shiny crimp ring to open the glass and dial for repair and cleaning needs special care and tools.
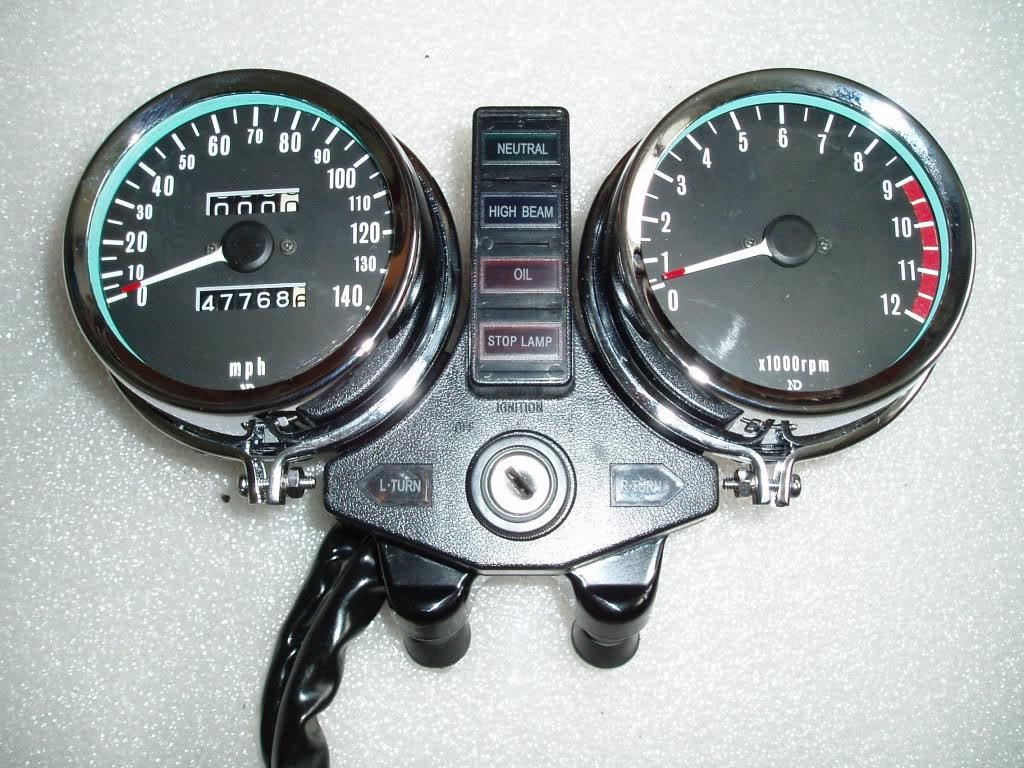
Here is the finished result.
The glass is clean, The highlights are visible once more and new chrome outer covers have been fitted.
It is good to test all the bulbs inside the gauges at this stage - when they are easy to replace.
The glass is clean, The highlights are visible once more and new chrome outer covers have been fitted.
It is good to test all the bulbs inside the gauges at this stage - when they are easy to replace.
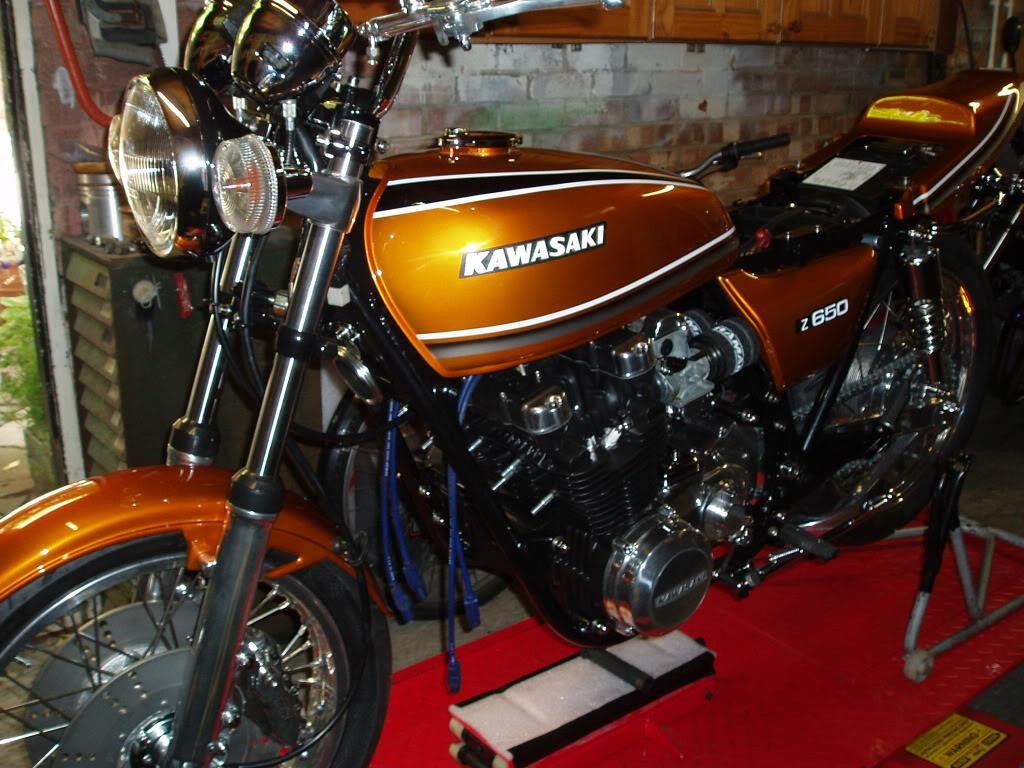
Here is the 2011 paint scheme.
The striping is similar to a 1975 Z1B machine.
The background colour is more like a golden H2 Triple Machine or perhaps an early CB750 (but don't tell Guy we said that !!)
The striping is similar to a 1975 Z1B machine.
The background colour is more like a golden H2 Triple Machine or perhaps an early CB750 (but don't tell Guy we said that !!)

Z650 Gas Tank - 2011 style.
Keeping the tank rust free inside during storage is a hard job.
Guy has a special Zed Room to help keep things safe and dry.
Keeping the tank rust free inside during storage is a hard job.
Guy has a special Zed Room to help keep things safe and dry.
New tank badges were found in the USA and imported to England.
Sadly the extra import charges made them very expensive.
Sometimes only the best will do.
Sadly the extra import charges made them very expensive.
Sometimes only the best will do.
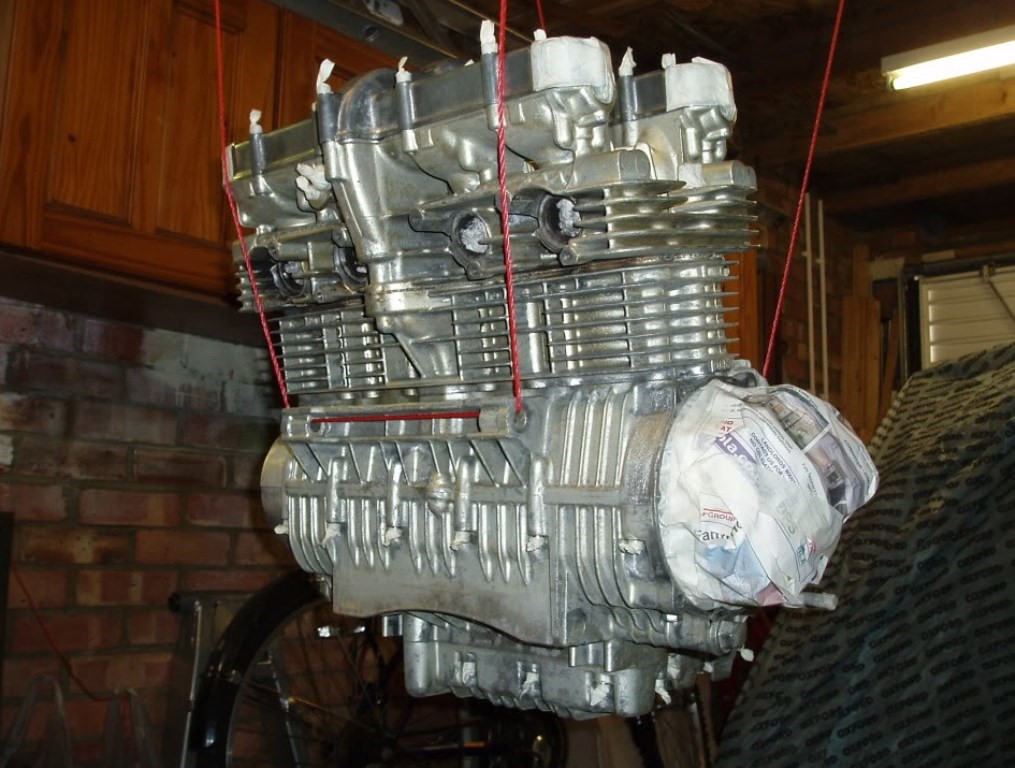
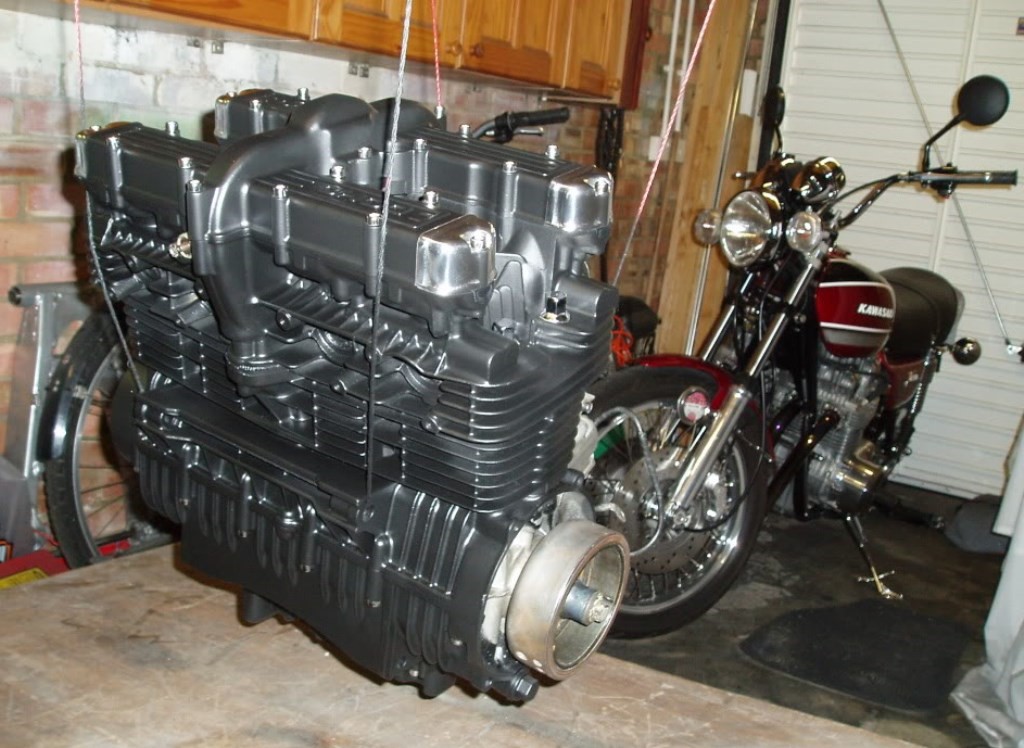
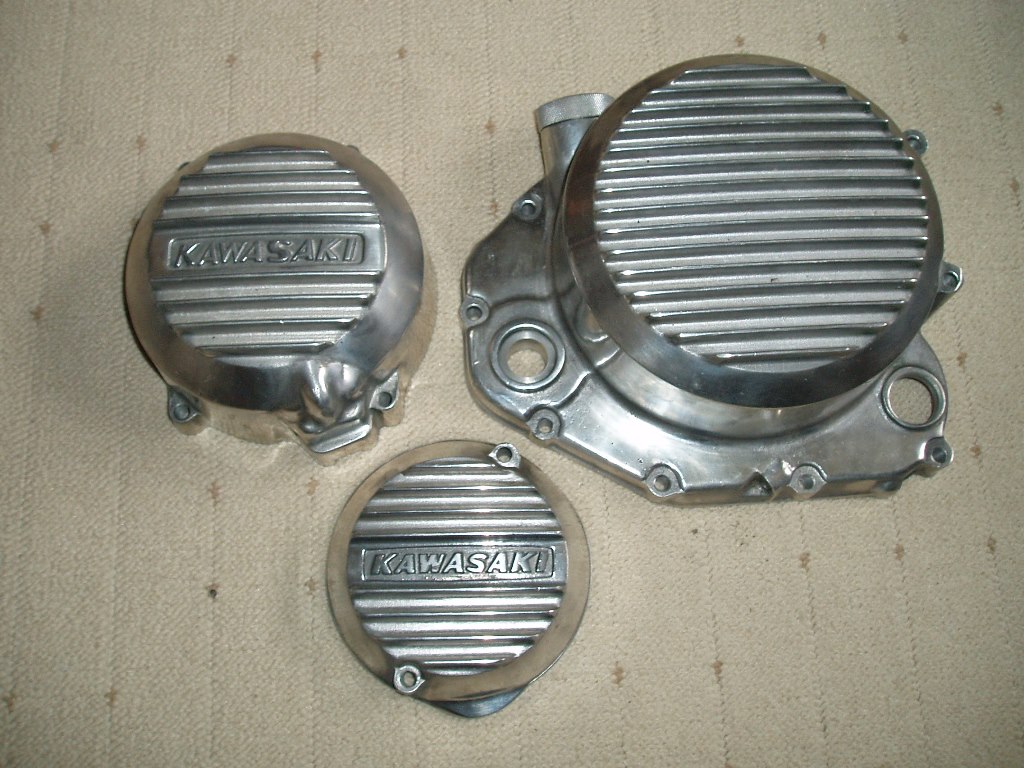
Here is the engine after cleaning with wire brushes.
Note the square Cam End Covers which will be left unpainted.
This look was used on the first Z1 engine in 1972, and was picked up again on the final Z650 bikes.
Note the square Cam End Covers which will be left unpainted.
This look was used on the first Z1 engine in 1972, and was picked up again on the final Z650 bikes.
Now you can see the finished effect on the engine.
You might also notice Guy's Kawasaki Z1000 bike in the background.
So he did have one to ride whilst all this work was going on !!
You might also notice Guy's Kawasaki Z1000 bike in the background.
So he did have one to ride whilst all this work was going on !!
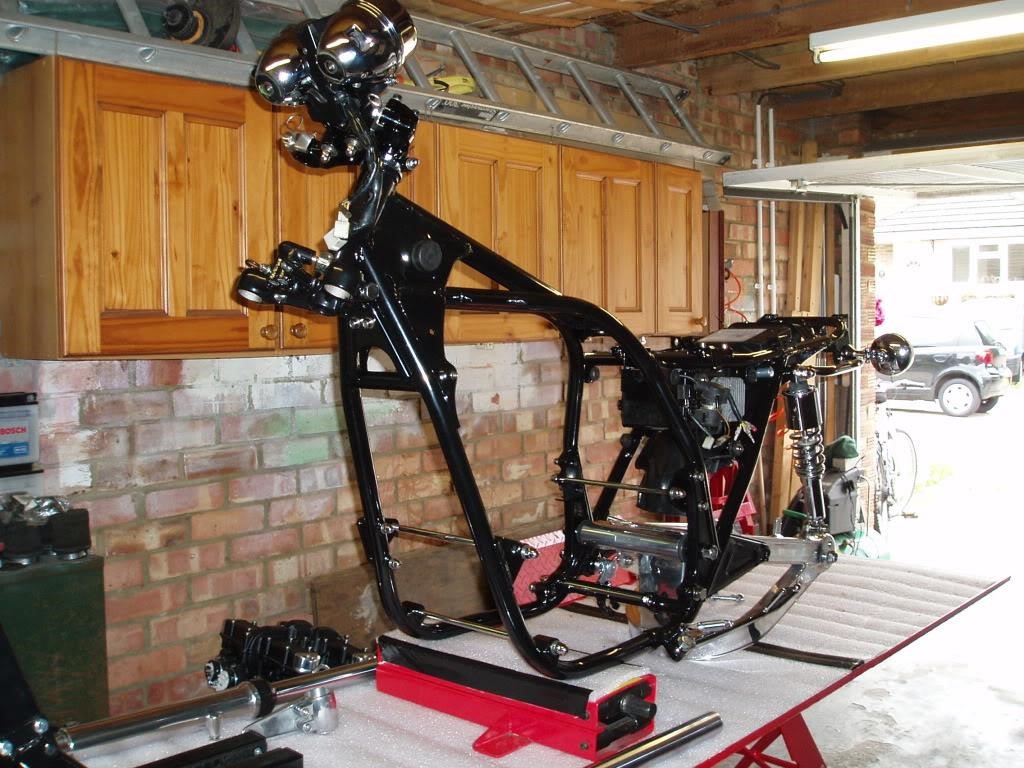
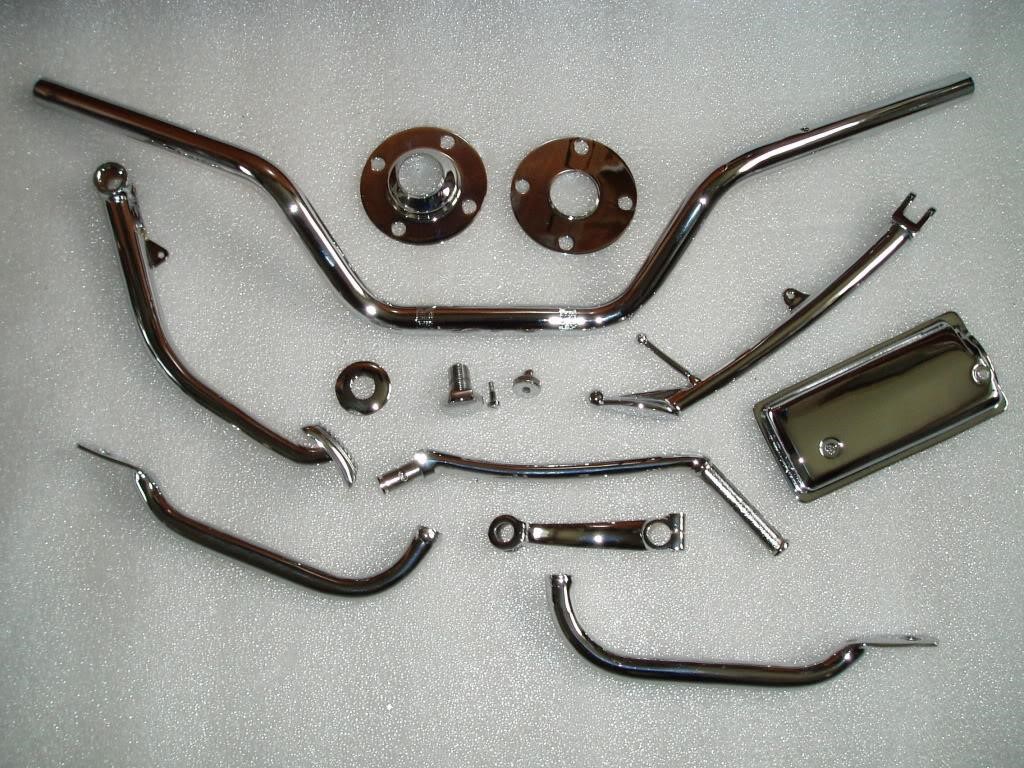
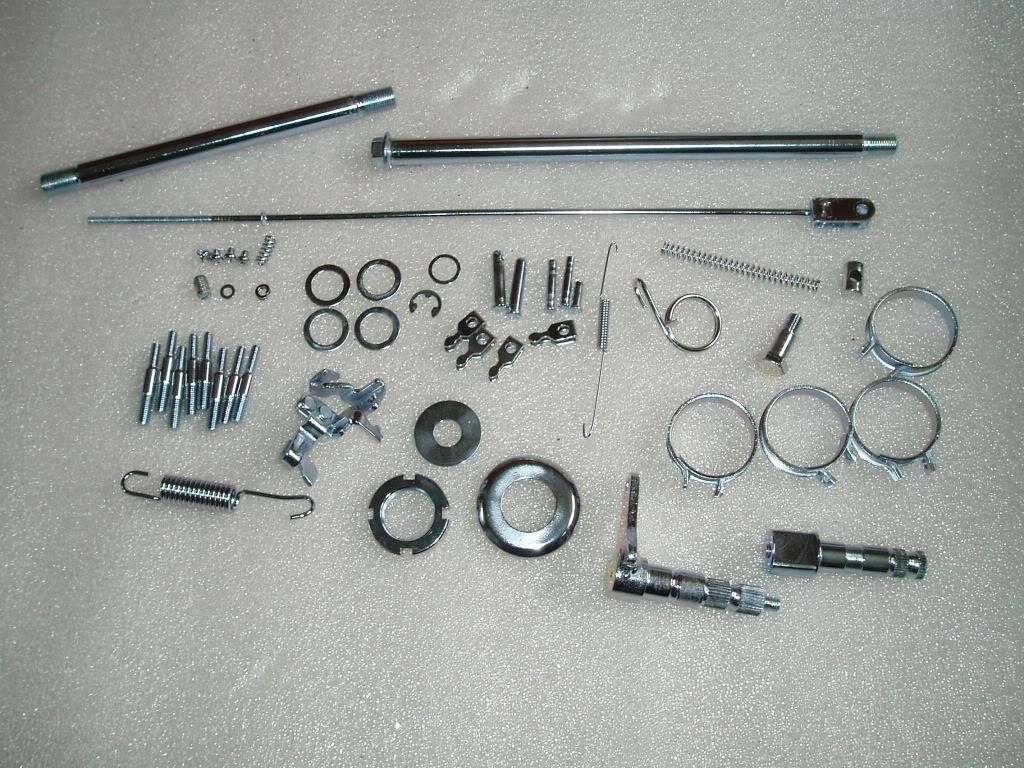
Frame is repainted. Fork Yokes and Gauges are installed and the rear suspension is in place.
Don't forget to refit the main stand and spring BEFORE the swinging arm if you can.
This gives better access and makes it easier to install the spring without damage to paint.
Don't forget to refit the main stand and spring BEFORE the swinging arm if you can.
This gives better access and makes it easier to install the spring without damage to paint.
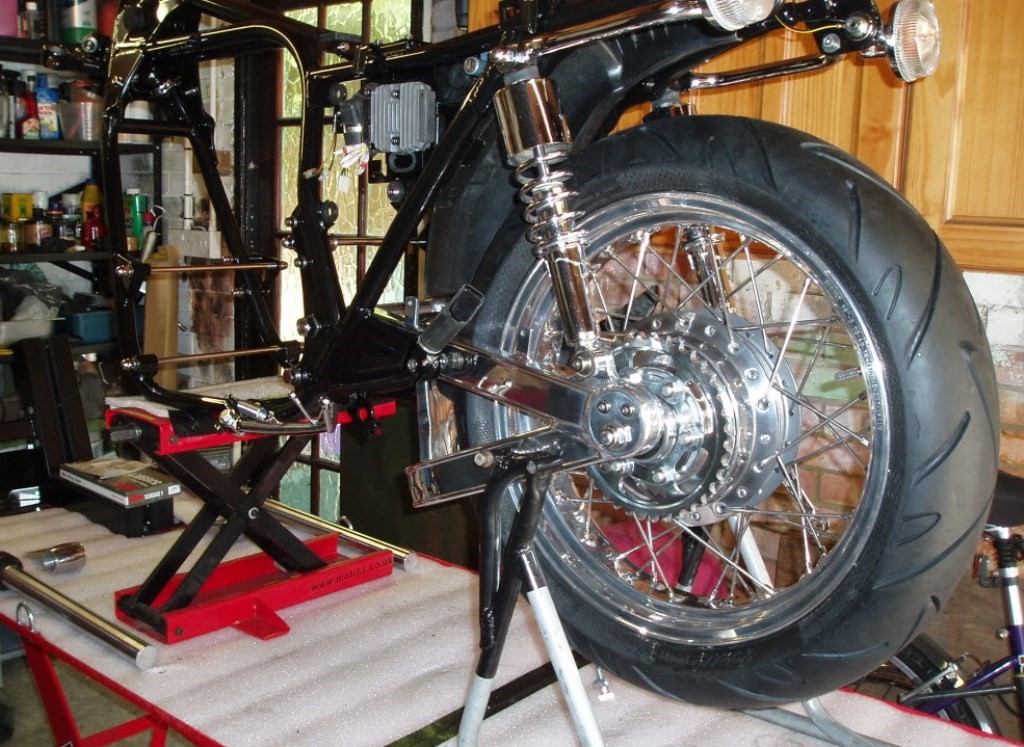
Final fit for the rear wheel and sprocket carrier.
Note the indicators now have yellow bulbs and clear lenses.
He uses this modern look on the Z1000 as well .
Note the indicators now have yellow bulbs and clear lenses.
He uses this modern look on the Z1000 as well .

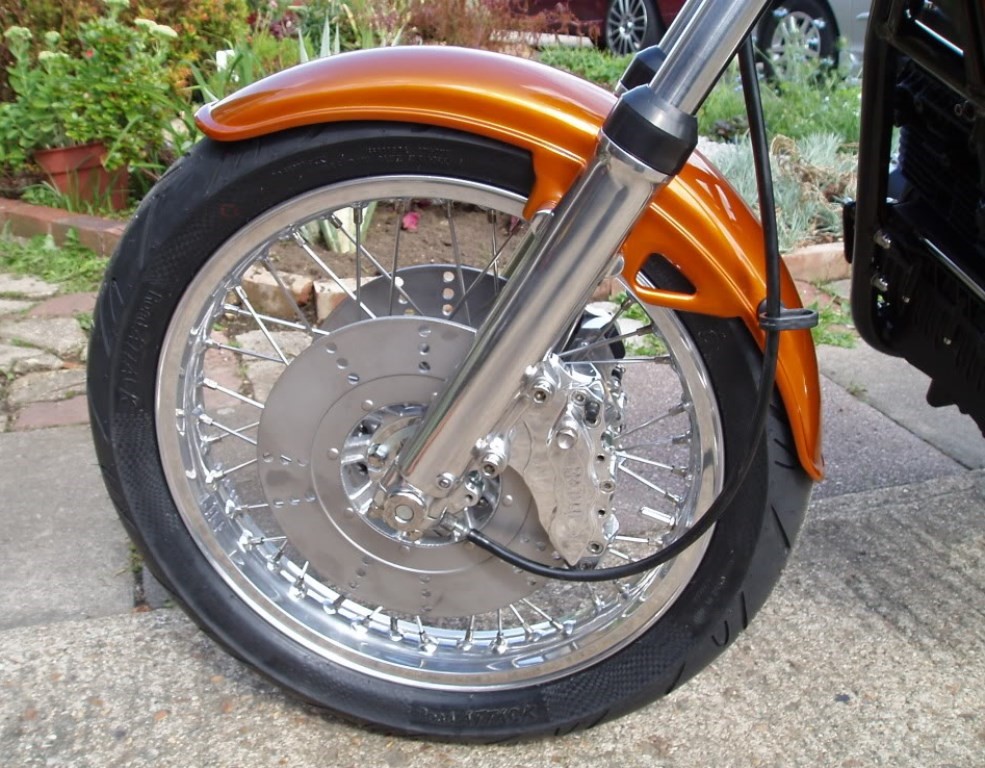
The front double disc was standard on some Z650 bikes.
The original factory discs were solid and not drilled.
This wheel now has an 18 inch rim.
The standard wheel was an inch smaller.
The original factory discs were solid and not drilled.
This wheel now has an 18 inch rim.
The standard wheel was an inch smaller.
Here is the front wheel and fender fully assembled.
To prevent the Speedo cable catching the front tyre some models used a loop bracket on the left hand front fender stay.
These short fenders do not have that attachment so excess cable slack must be avoided.
To prevent the Speedo cable catching the front tyre some models used a loop bracket on the left hand front fender stay.
These short fenders do not have that attachment so excess cable slack must be avoided.
Why has this Suzuki GN250 turned up here ??
Keep reading for the answer !
Keep reading for the answer !
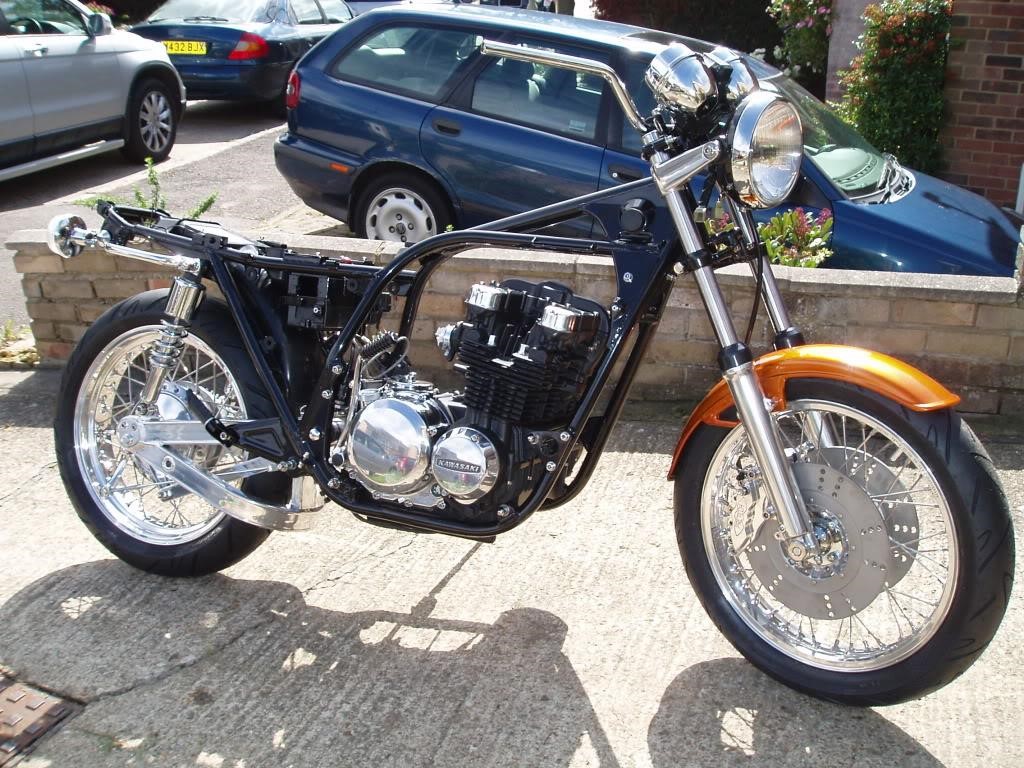
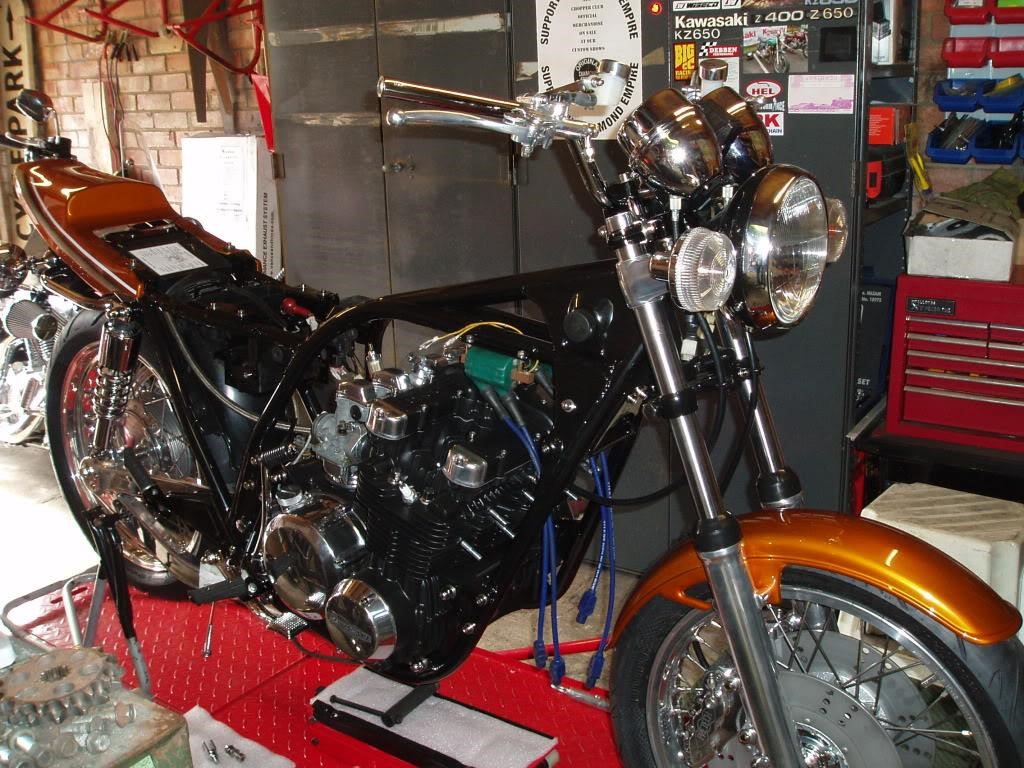
The 2011 rolling chassis makes it's first appearance from the workshop.
Completion always feels near when the bike can move around and support it's own weight again.
Completion always feels near when the bike can move around and support it's own weight again.
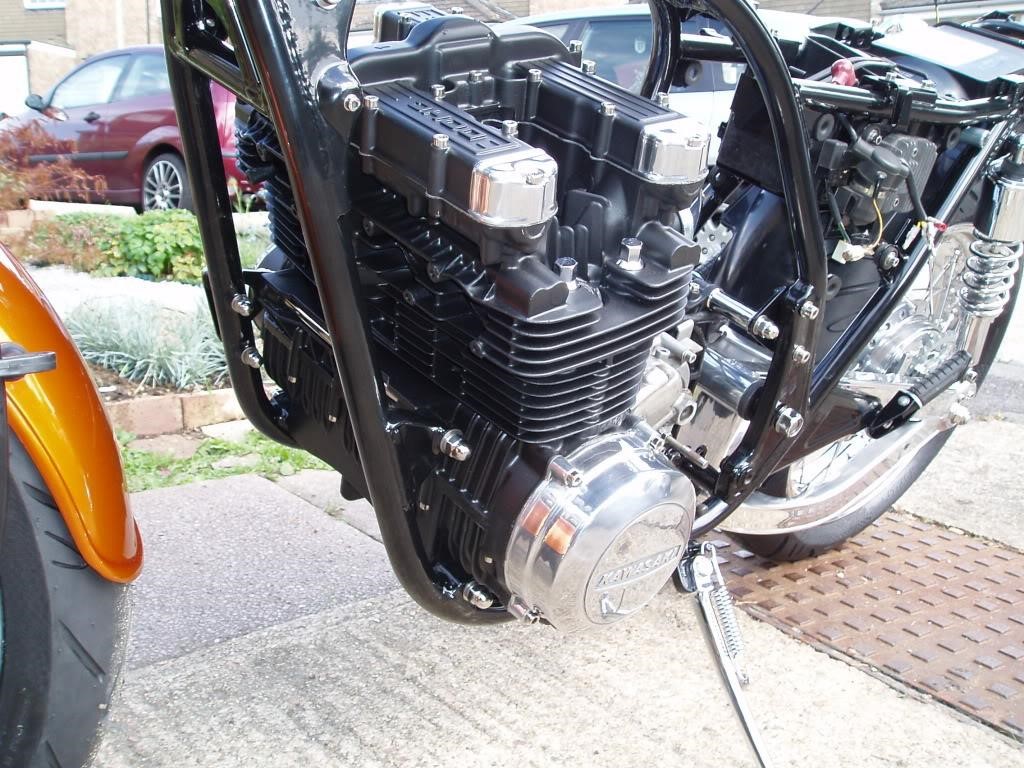
Engine & Frame reunited.
Polished alloy engine cases and covers are set off against the black cylinders and crank cases.
Polished alloy engine cases and covers are set off against the black cylinders and crank cases.
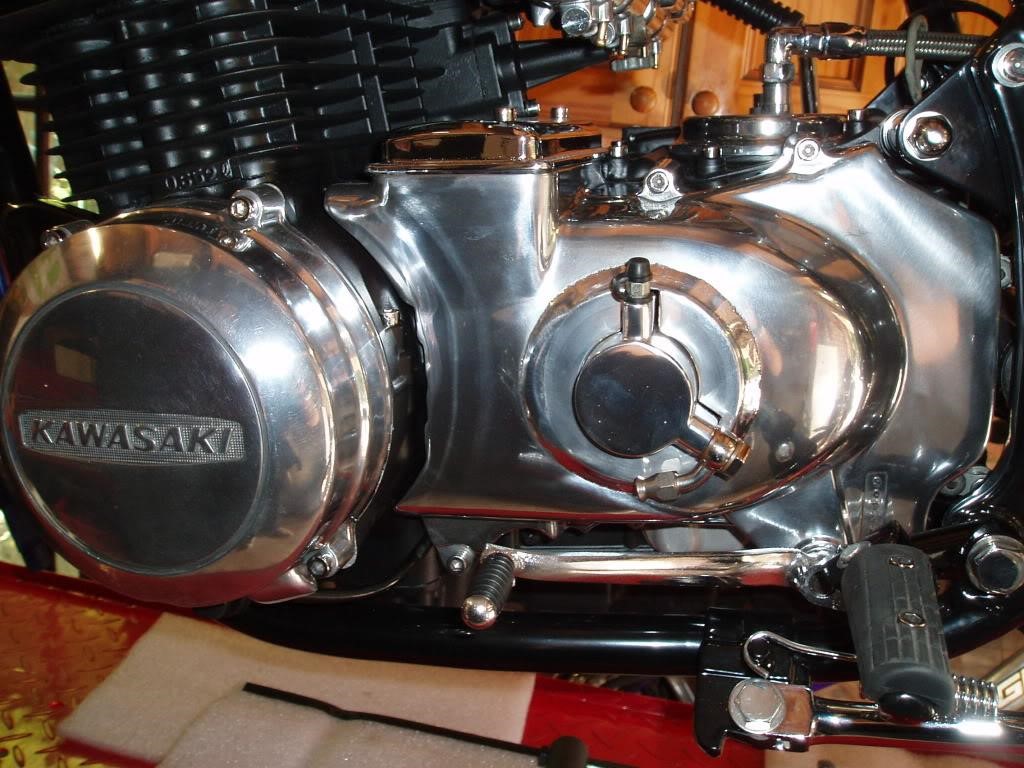
An engine close up showing the unique hydraulic clutch mechanism.
You can see the take off tube from the crank case vent breather.
On a standard machine this would lead to the Air Box to allow recycling of the waste gases.
We will see his solution for this shortly.
You can see the take off tube from the crank case vent breather.
On a standard machine this would lead to the Air Box to allow recycling of the waste gases.
We will see his solution for this shortly.
The carbs are now fitted again after a thorough clean up.
Green Dyna Coils and special HT leads can be seen before the Gas Tank is re-fitted.
The ignition system will be electronic, like the last few production 650s.
Green Dyna Coils and special HT leads can be seen before the Gas Tank is re-fitted.
The ignition system will be electronic, like the last few production 650s.

The tail piece for 2011 is upswept and has been tidied to give a modern, sleek look. You can see the non standard tail light here.
The original chrome rear fender is long gone.
UK bikes had rear indicators mounted on the rear number plate and stop lamp holder. Guy has mounted them on the frame - using the same points as USA bikes.
The original chrome rear fender is long gone.
UK bikes had rear indicators mounted on the rear number plate and stop lamp holder. Guy has mounted them on the frame - using the same points as USA bikes.
Here is the first trial fitting of the complete paint set.
It looks awesome and it is always very tempting to get the panels on early to get an idea of the finished look.
Just remember to keep them protected or take them back off before you get the spanners out again Guy !!
It looks awesome and it is always very tempting to get the panels on early to get an idea of the finished look.
Just remember to keep them protected or take them back off before you get the spanners out again Guy !!

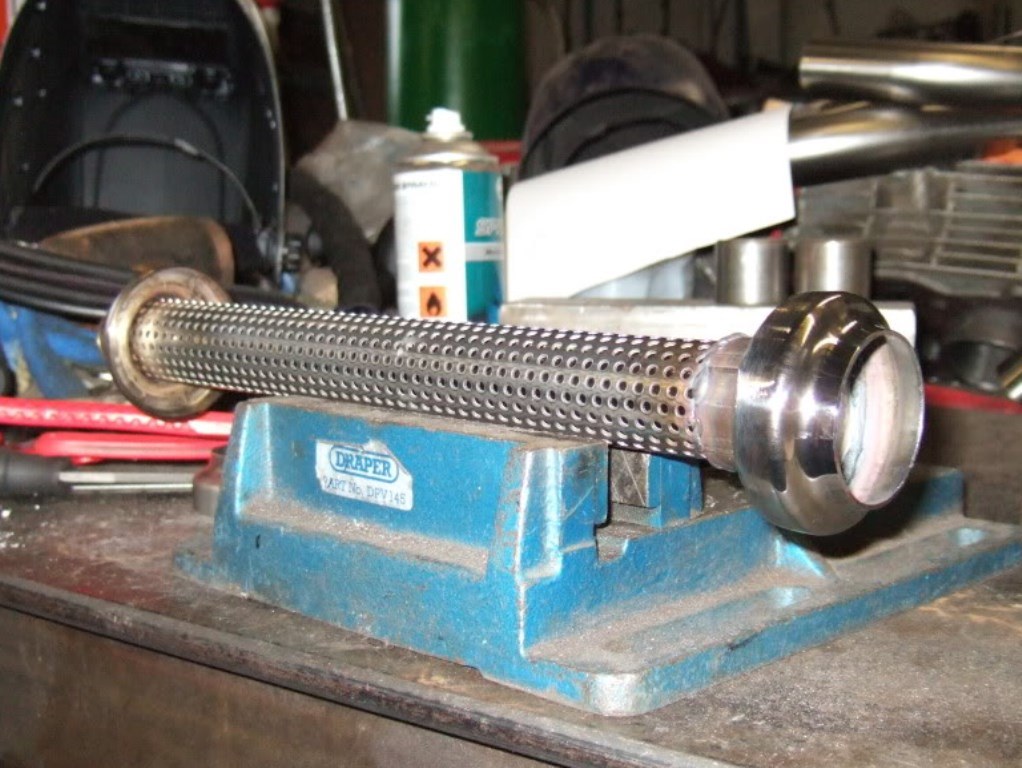
Zed fan Dave from Exhaust Craft was commissioned to produce a one off stainless exhaust system for the bike.
He has an old Z650 engine & frame which he uses as a jig to make the pipes to the correct measurements.This saves the need for customers to send their whole machine up to Cumbria for a fitting.
Here are the pipes before final polishing.
He has an old Z650 engine & frame which he uses as a jig to make the pipes to the correct measurements.This saves the need for customers to send their whole machine up to Cumbria for a fitting.
Here are the pipes before final polishing.
Dave has also made a custom, removable baffle for the silencer.
Let's hope Guy can remember to keep it fitted and add some silencer wadding.
He wouldn't want a loud racy exhaust note now would he ???
Let's hope Guy can remember to keep it fitted and add some silencer wadding.
He wouldn't want a loud racy exhaust note now would he ???
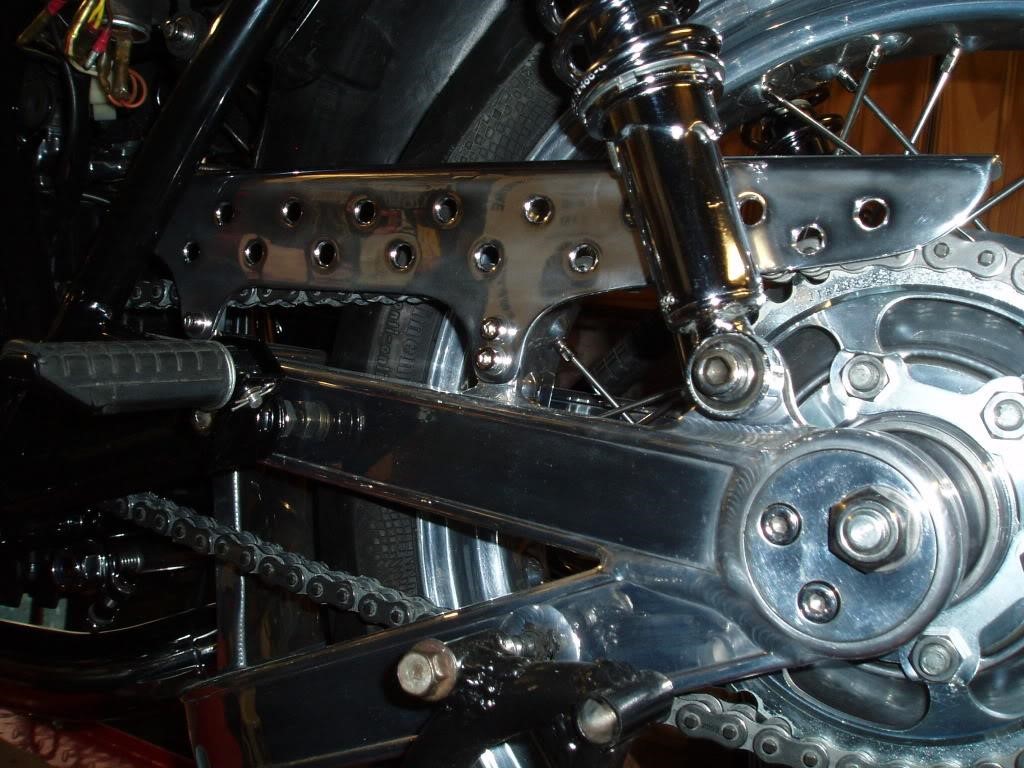
Back at Guy's garage a custom alloy chain guard has been fabricated and polished to match the swinging arm.
The holes are drilled to save a few precious grammes and improve the power to weight ratio of the machine.
Or was it just because it adds to the Bling Factor of the bike?
The holes are drilled to save a few precious grammes and improve the power to weight ratio of the machine.
Or was it just because it adds to the Bling Factor of the bike?
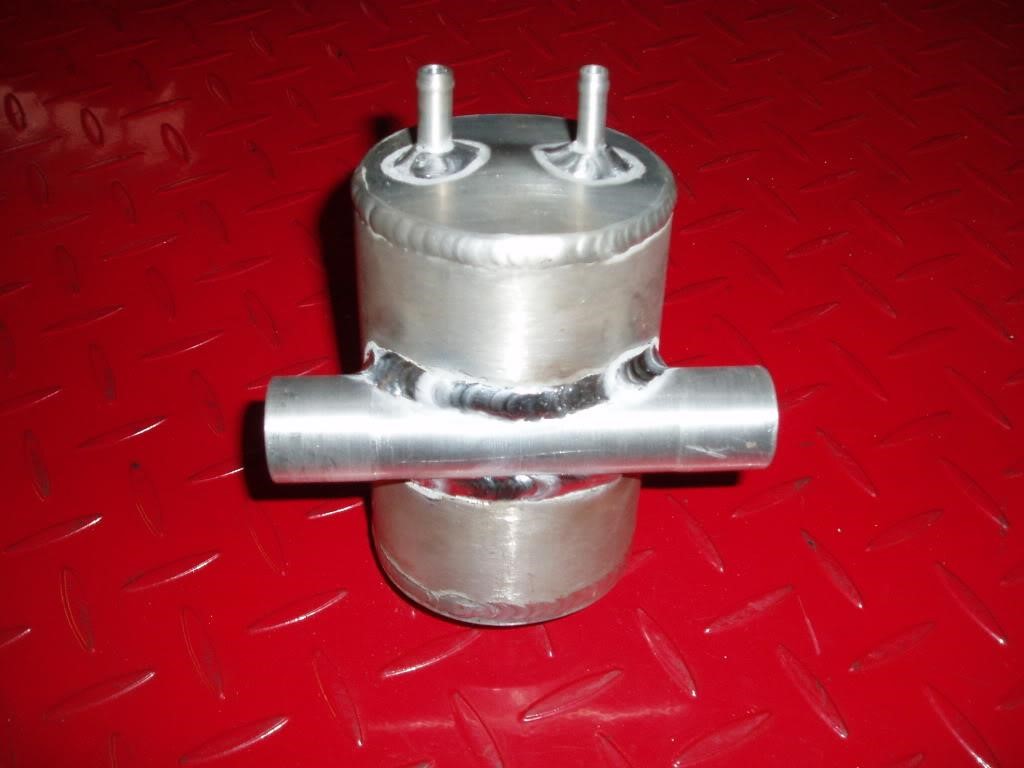
Here is the trap which will deal with the crank case breather gases.
Once polished it will fit between engine and swinging arm.
The crank case must be allowed to breath or internal pressure can develop.
On a standard bike these oily gases are re-circulated via the Air Box to reduce emissions.
Once polished it will fit between engine and swinging arm.
The crank case must be allowed to breath or internal pressure can develop.
On a standard bike these oily gases are re-circulated via the Air Box to reduce emissions.
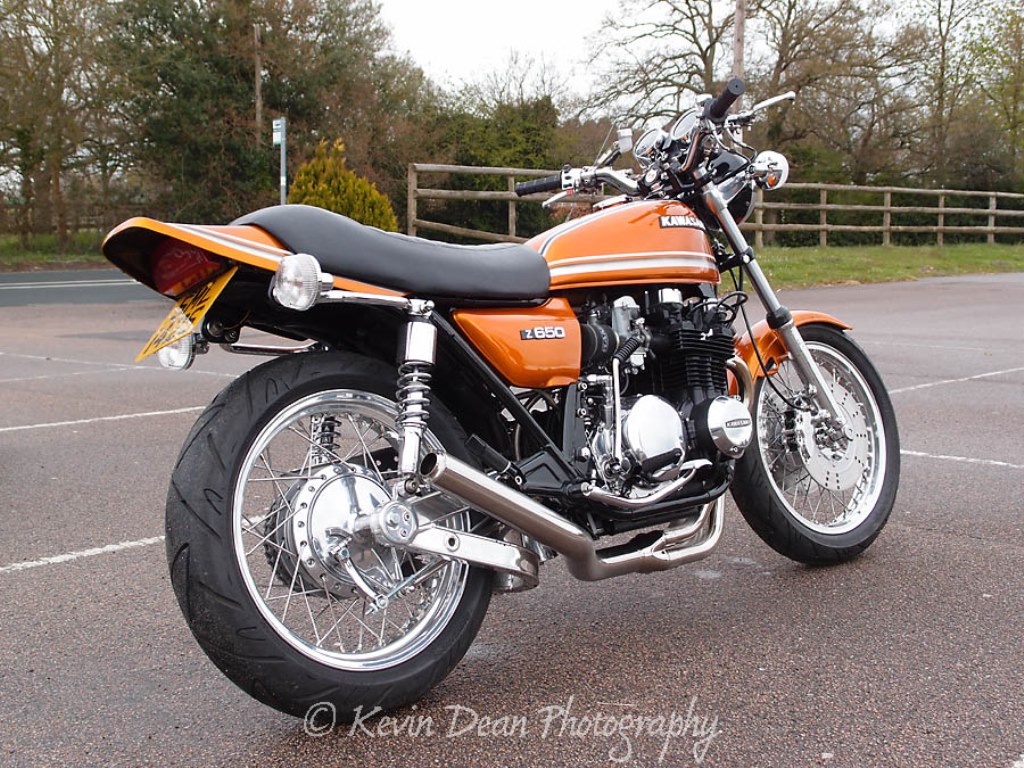
Photographer Kevin Dean kindly helped Guy out with some shots of the completed project in 2012.
He is also a big Kawasaki Zed fan so this job must have been a real pleasure for him.
He is also a big Kawasaki Zed fan so this job must have been a real pleasure for him.
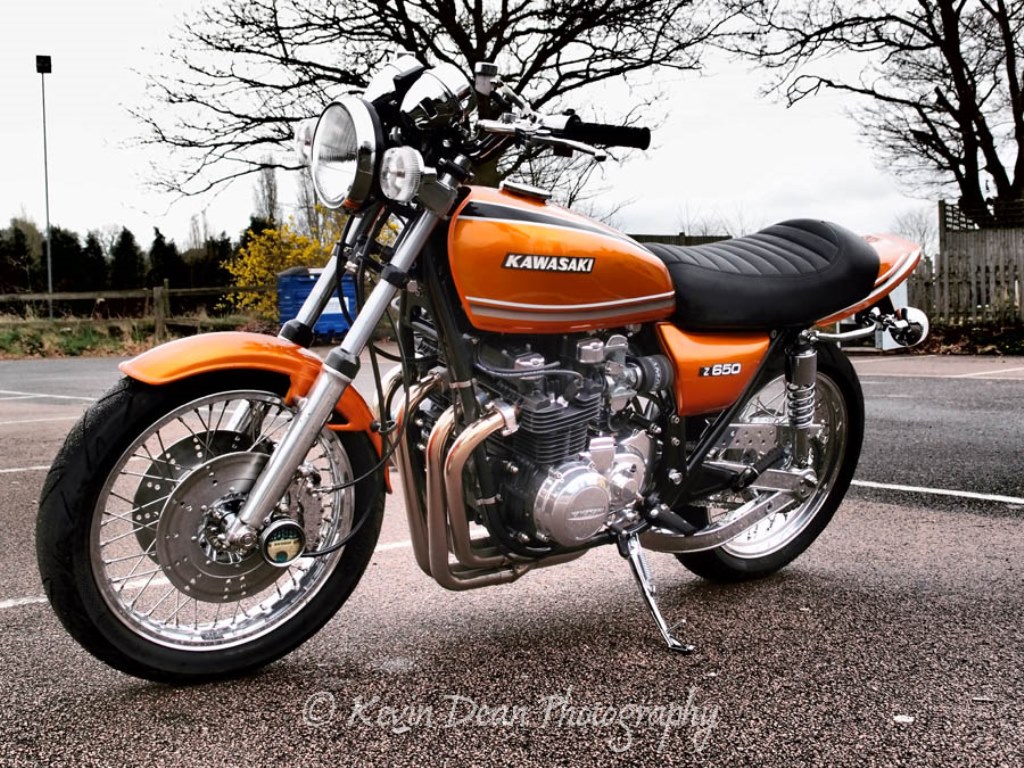
Here is the other side of the machine for comparison.
What an amazing result.
Every rebuild seems to better the last one.
Surely Guy must be satisfied now??
What an amazing result.
Every rebuild seems to better the last one.
Surely Guy must be satisfied now??
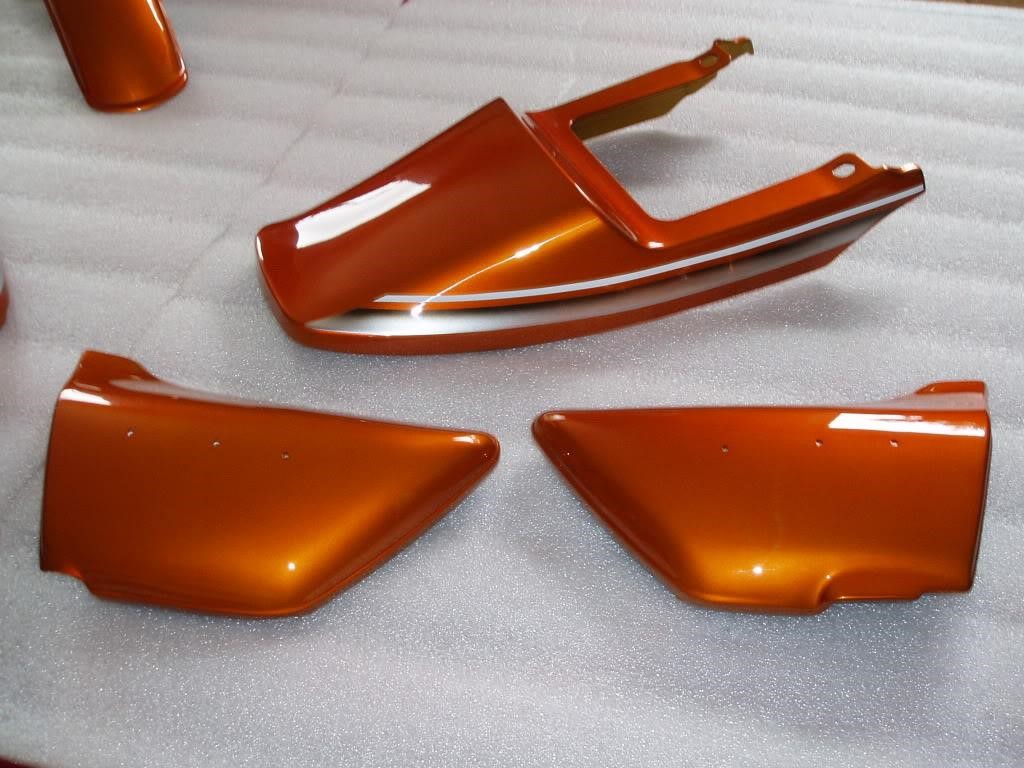
A great find in an auto jumble gave the chance to create a new set of bodywork for the bike in 2013.
Never one to miss an opportunity to improve his bike, Guy entrusted the job to Simon Crack from Flying Tiger Paintwork. His work on Kawasakis was already well known.
The new panels needed a lot of preparation as you can see.
Never one to miss an opportunity to improve his bike, Guy entrusted the job to Simon Crack from Flying Tiger Paintwork. His work on Kawasakis was already well known.
The new panels needed a lot of preparation as you can see.
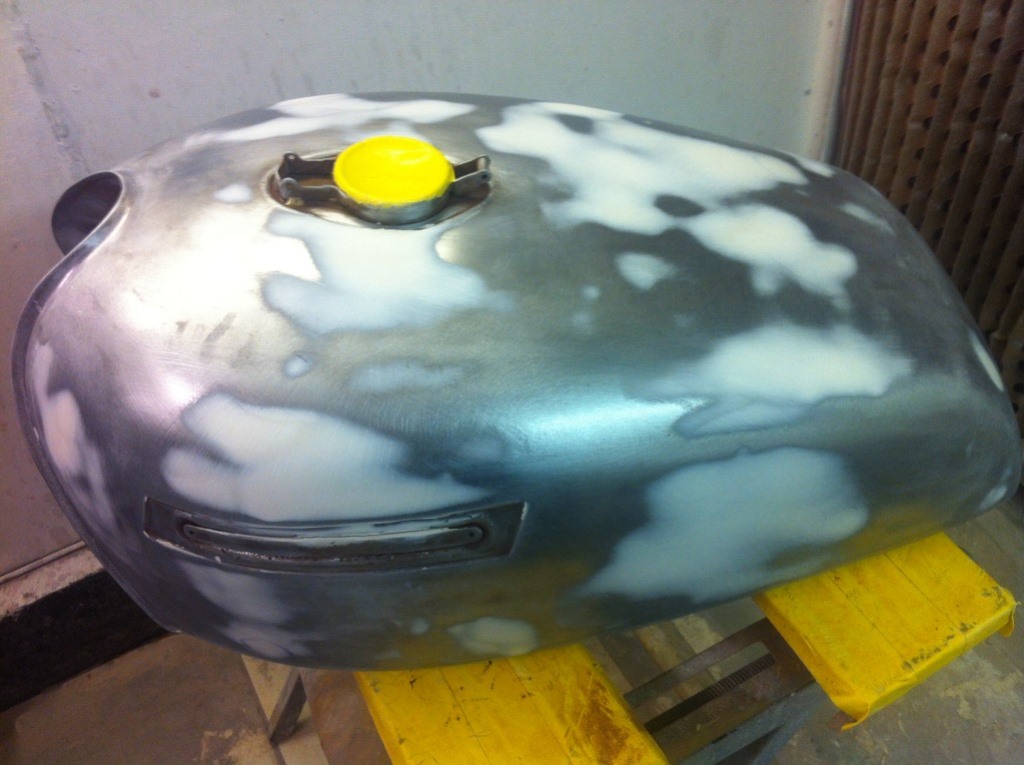
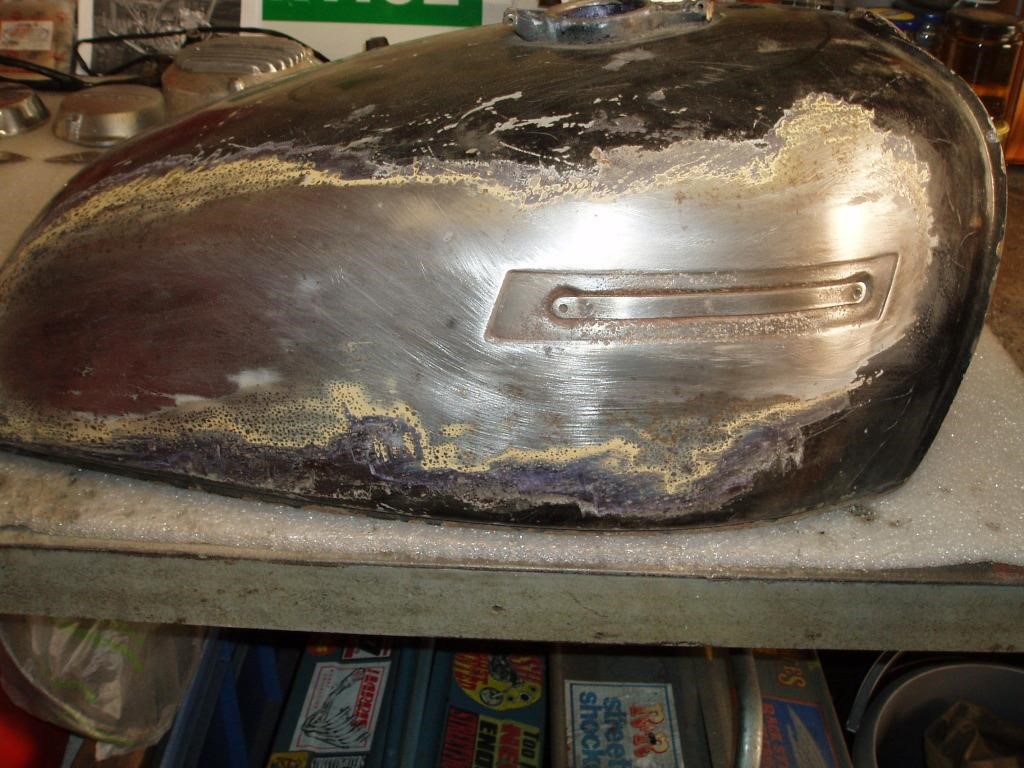
Here is the tank ready for primer following seam repairs and dent removal.

Initial Primer coat gives a good idea of how the imperfections have been hidden.
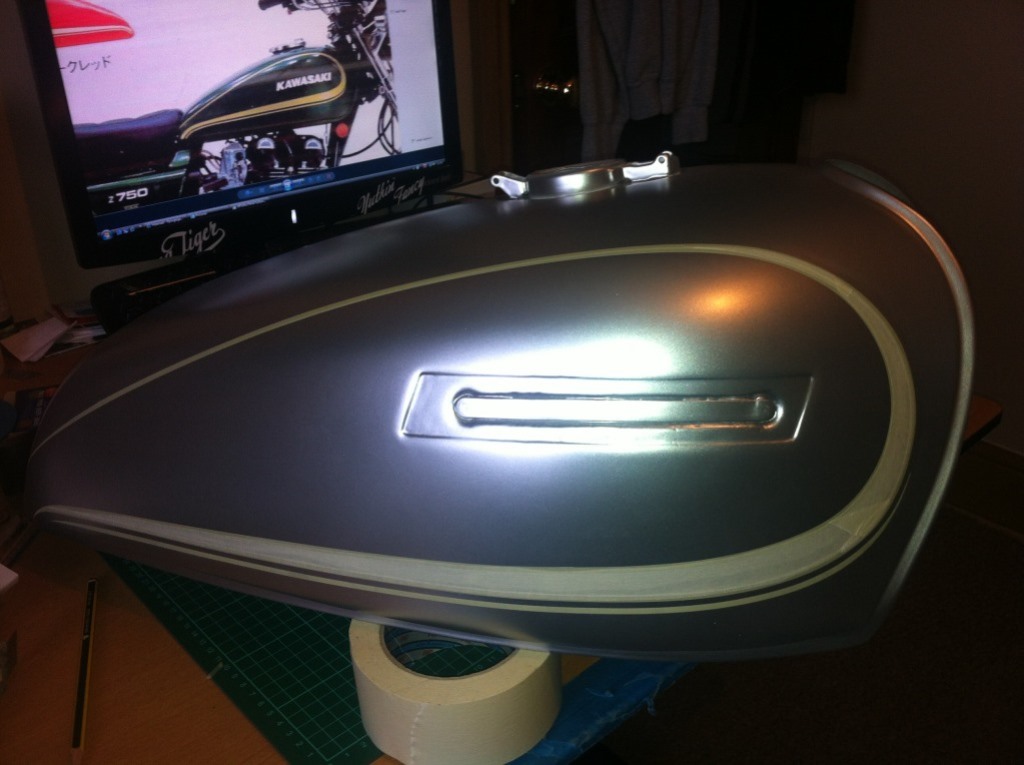
Planning the lining for the tank and tail piece was the next stage.
Guy wanted something based on the Z1000 A2 scheme from 1978.
Here is Simon working from an original tank image.
The Z650 tank is a different shape so this is a tricky job.
Guy wanted something based on the Z1000 A2 scheme from 1978.
Here is Simon working from an original tank image.
The Z650 tank is a different shape so this is a tricky job.

Once the lining scheme was agreed the Candy Pearl paint and striping could be applied.
Here is the finished article - resplendent in a coat of protective clear laquer.
What do you think of the colours they chose ?
Here is the finished article - resplendent in a coat of protective clear laquer.
What do you think of the colours they chose ?
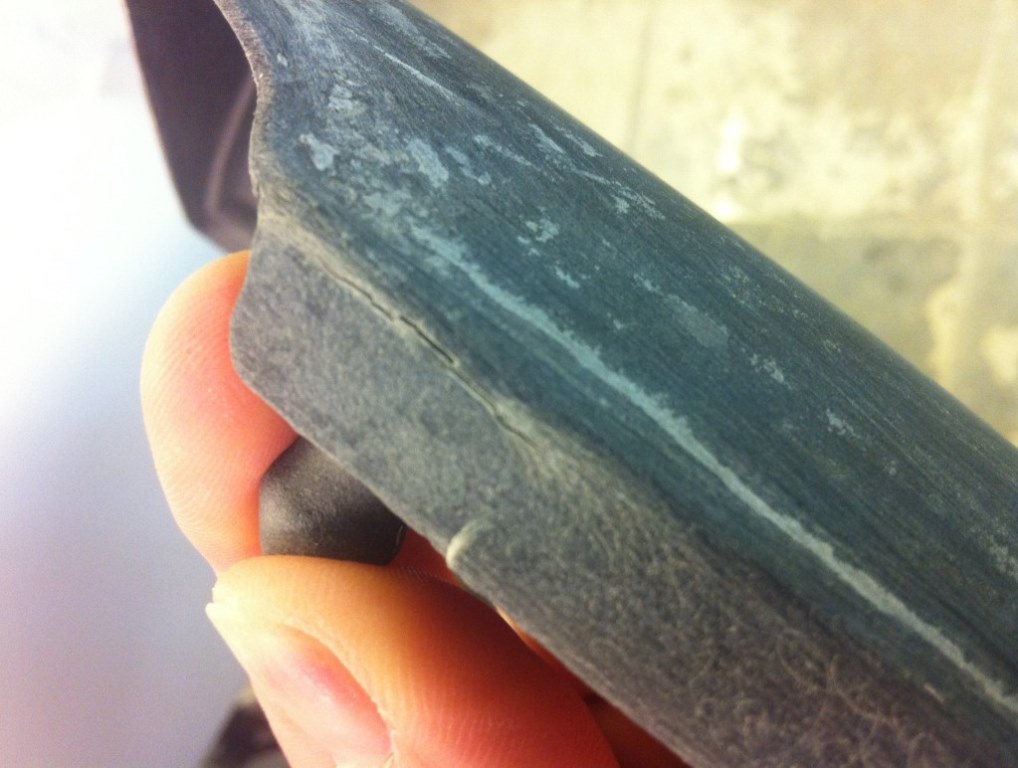
Z 650 side panels are known to split near the mounting lugs.
This one was no exception and would need to be repaired.
This one was no exception and would need to be repaired.

Luckily Simon has plastic welding amongst his skills.
Here is the panel with the split welded and dressed for painting.
Great job there !
Here is the panel with the split welded and dressed for painting.
Great job there !
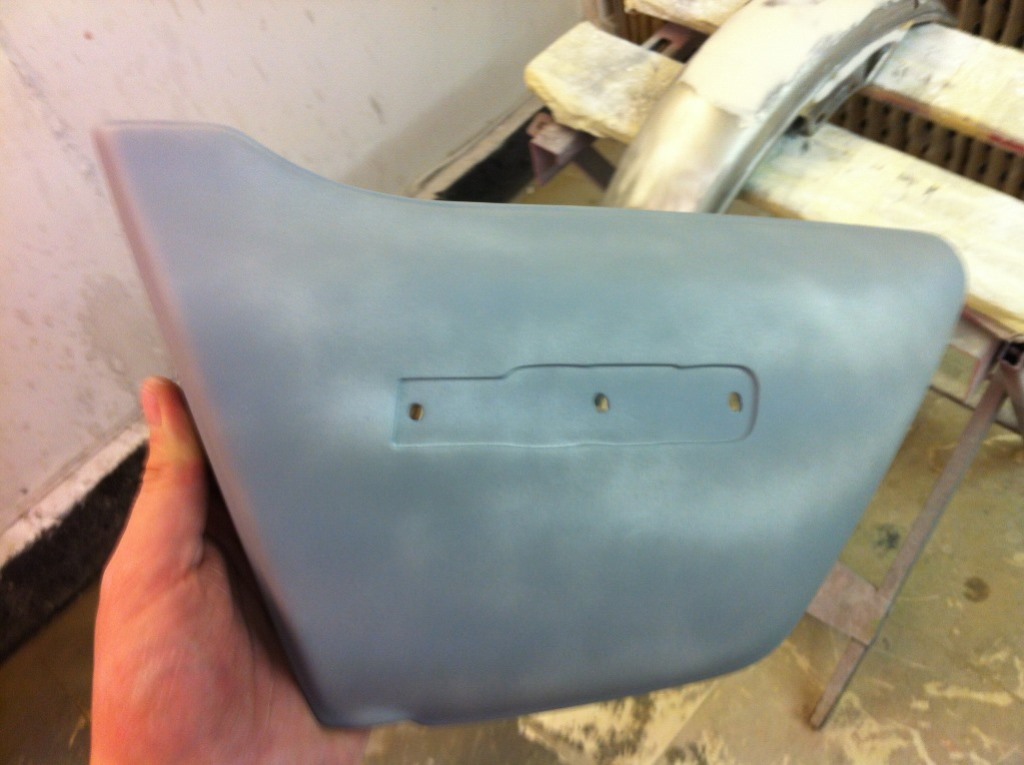
The repaired panels were then primed and checked for imperfections and smoothness before the top coats were applied.
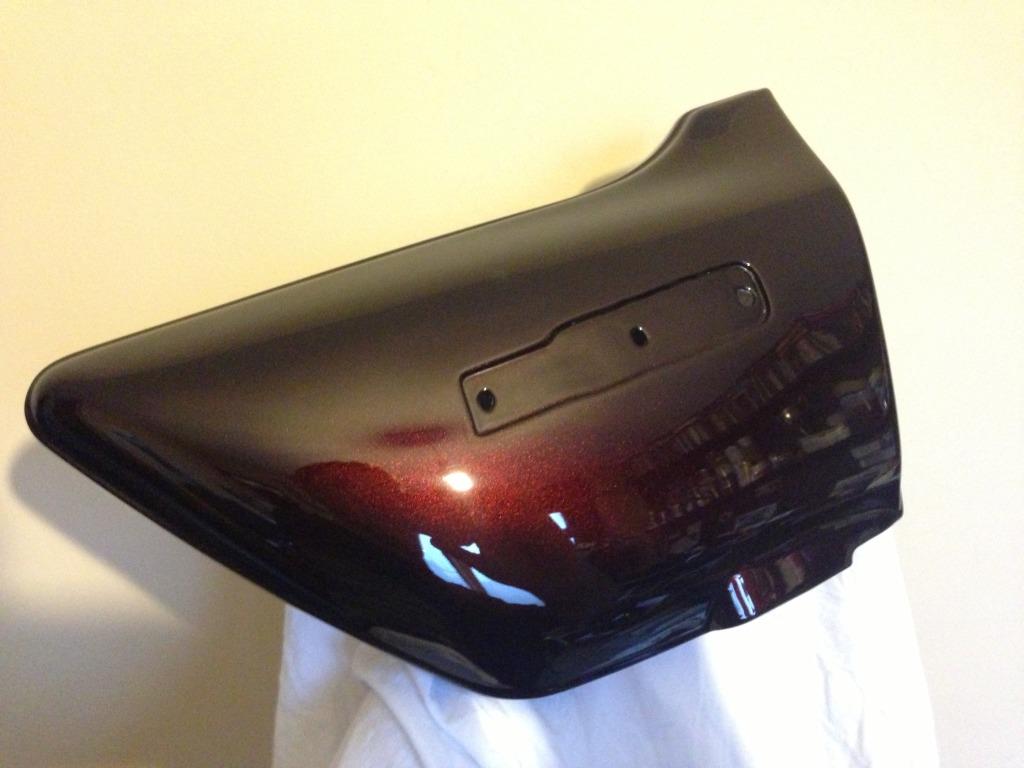
Here is a finished side panel ready for it's Z650 badge to be affixed.
No striping was used here. Sometimes less is more.
No striping was used here. Sometimes less is more.
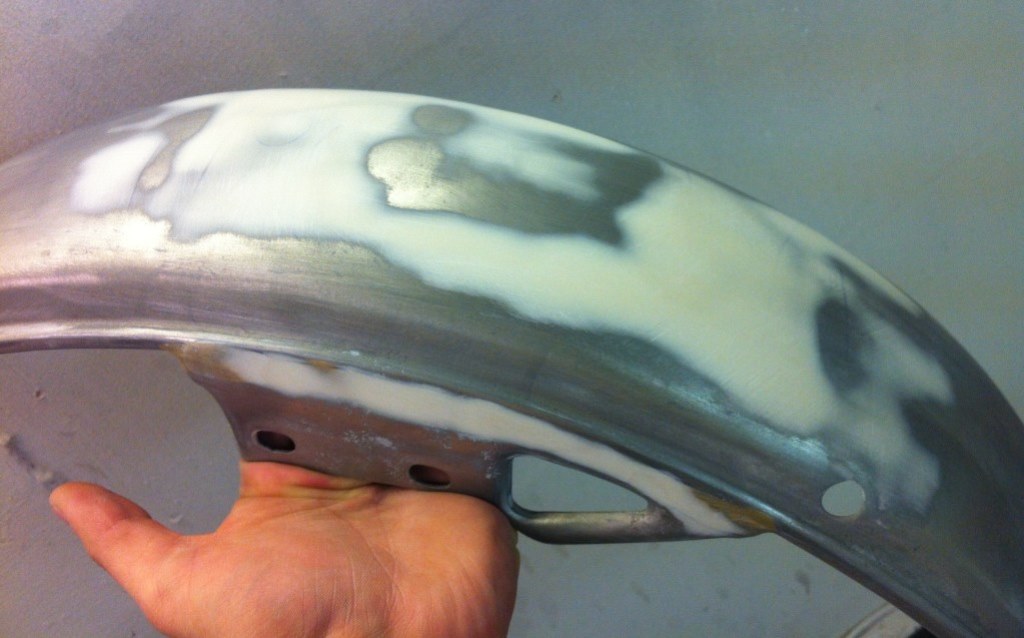
The new front fender recieved the same treatment.
The donor bike was a Suzuki GN250.
You can see one pictured earlier.
Did you spot why she was there ??
The donor bike was a Suzuki GN250.
You can see one pictured earlier.
Did you spot why she was there ??
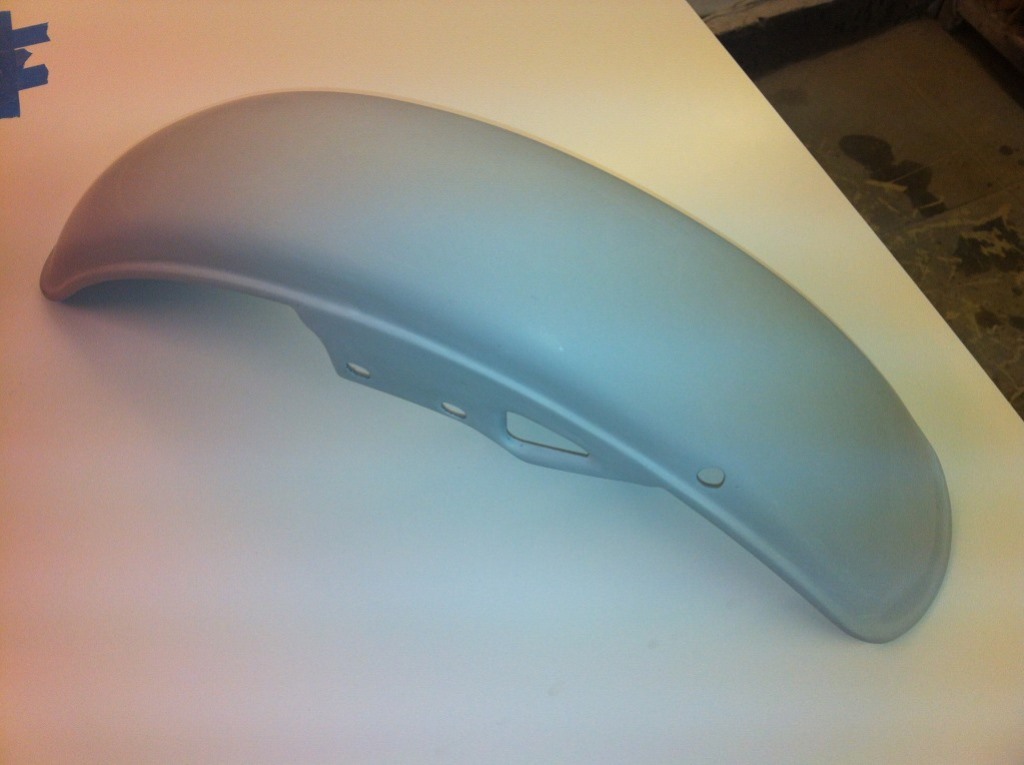
Here it is in primer ready for the top coats.
This fender will give extra clearance for the 18 inch rim.
This fender will give extra clearance for the 18 inch rim.
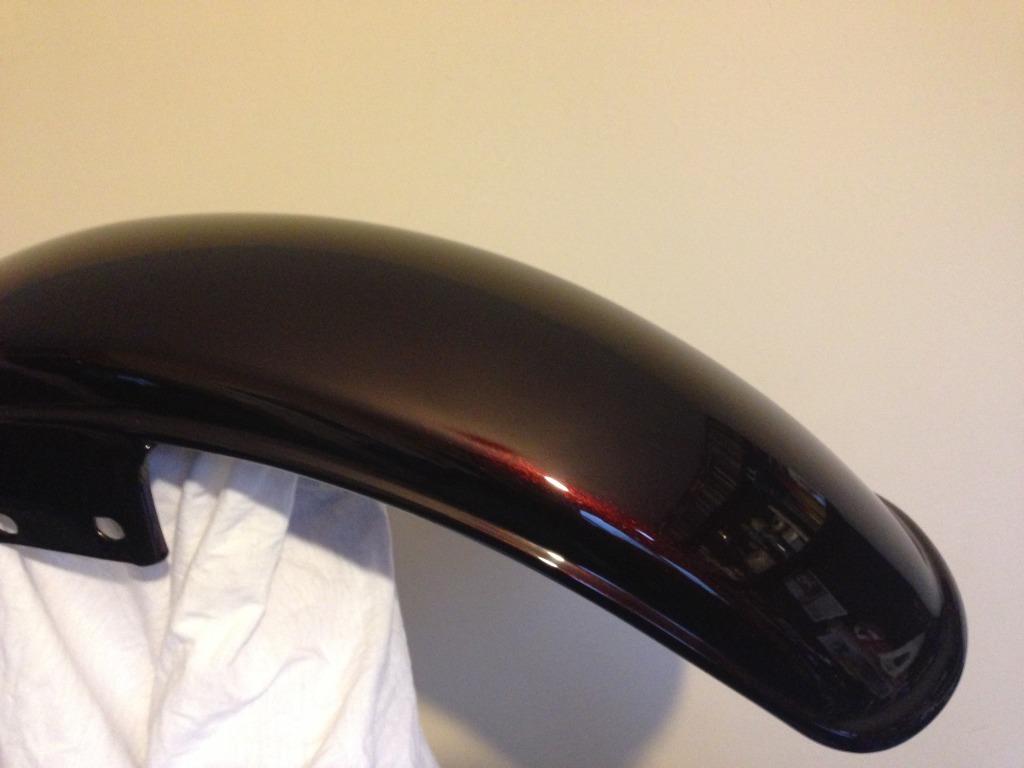
Here is the final result. Another great transformation !
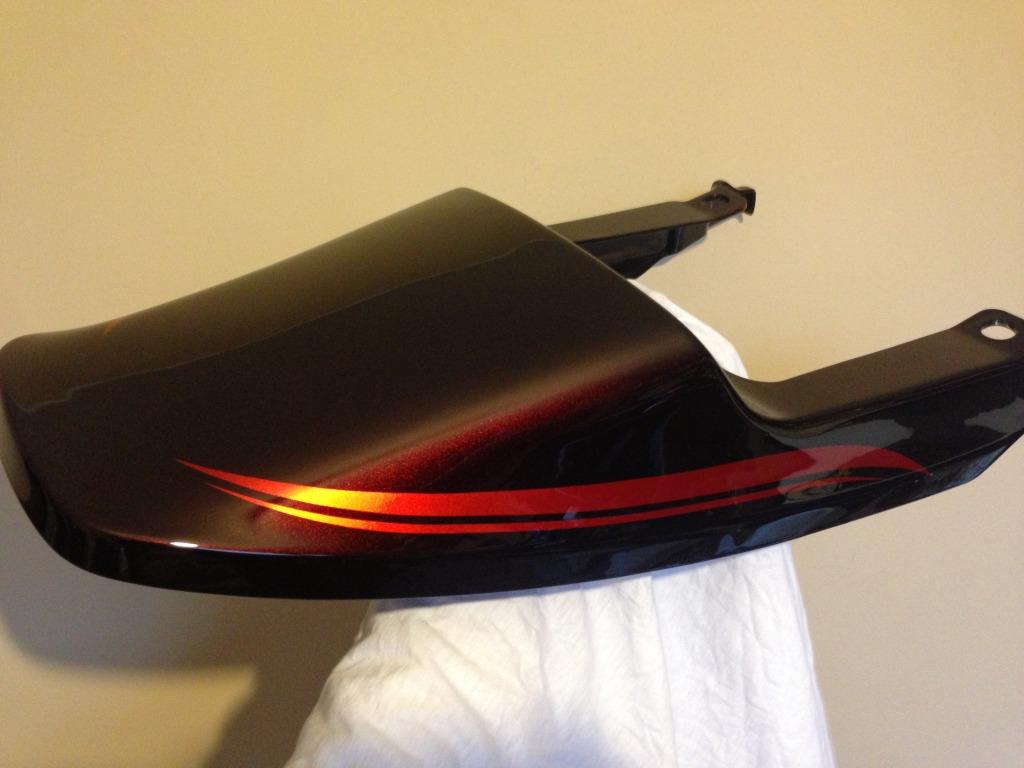
The tail piece had the same lining scheme as the tank.
This is the finished article. No badges needed here.
This is the finished article. No badges needed here.
All new for 2013 - 25 years later and 25 times better !!
The new stainless exhaust has polished up a treat.
All the painted panels and the front fender look great together on the bike.
Wonder if the Bike Mags will pick up on this latest incarnation ?
The new stainless exhaust has polished up a treat.
All the painted panels and the front fender look great together on the bike.
Wonder if the Bike Mags will pick up on this latest incarnation ?
Well it was no surprise to hear that Guy had won a prize when he took the restored bike to a recent competition.
That machine is now ready to take on all comers !
Many congratulations from everyone at Zedrider HQ.
That machine is now ready to take on all comers !
Many congratulations from everyone at Zedrider HQ.
Don't think there are no further improvements planned for the bike in 2014.
Our spy cameras have revealed that Guy is already stashing rare finned engine covers in his Zed Room this winter.
Guess where they will end up in 2014 ??
Our spy cameras have revealed that Guy is already stashing rare finned engine covers in his Zed Room this winter.
Guess where they will end up in 2014 ??
