For Sale Photo
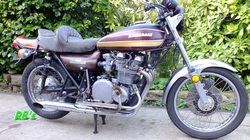
Kawasaki Expert Rick Brett found this 1973 Z1 machine in Minnesota USA.
Dave Mudie soon completed a deal back in the UK and the bike headed to Sunderland for restoration.
Note the unusual seat, pipes and running boards !! The paint scheme was from a later model (see Z1-B link above).
Dave Mudie soon completed a deal back in the UK and the bike headed to Sunderland for restoration.
Note the unusual seat, pipes and running boards !! The paint scheme was from a later model (see Z1-B link above).
Rare Chain Oiler Parts
On closer inspection the wheel rims, frame, engine, carbs, brake disc and torque arm were all correct for a 1973 machine with matching date codes.
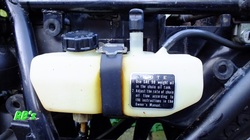
The original chain oiler assembly was all present and correct.
These have become very hard to find - so that was good news.
The original chain oiler assembly was all present and correct.
These have become very hard to find - so that was good news.
Unused Since 2003
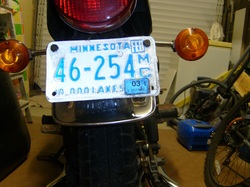
The bike had been unused since 2003, as can be seen from the sticker on the licence plate.
A lot of the surface finishes on the machine were starting to show signs of their 40 year life.
A lot of the surface finishes on the machine were starting to show signs of their 40 year life.
Damaged Gauges
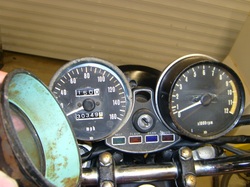
You can see damage and corrosion on the gauges.
The Speedometer was damaged, and the top rim was held on with tape !!
Each year of production had subtle changes to the faces on each gauge.
Brake light indicators were not fitted to the Tachometer on these early bikes.
The Speedometer was damaged, and the top rim was held on with tape !!
Each year of production had subtle changes to the faces on each gauge.
Brake light indicators were not fitted to the Tachometer on these early bikes.
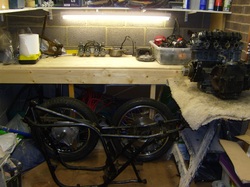
Stripped For Inspection
After a few hours the machine was stripped down.
The job of assessing which items were worth saving and which would need to be replaced could then begin.
Having worked on a Z1-A recently Dave had a good idea of what was entailed.
(see Z1-A link above).
The job of assessing which items were worth saving and which would need to be replaced could then begin.
Having worked on a Z1-A recently Dave had a good idea of what was entailed.
(see Z1-A link above).
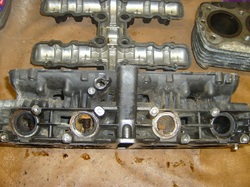
Sheared Exhaust Studs
The cylinder head was showing it's 40 years and despite plenty of heat and the use of proper stud extractors, five out of eight exhaust studs snapped clean off in the head.
This would now lead to drilling and thread repairs before the new studs could be fitted.
This would now lead to drilling and thread repairs before the new studs could be fitted.
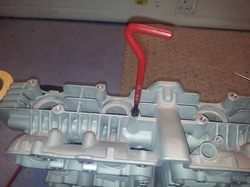
Helicoil Thread Repairs
A special jig was made to ensure that each stud was drilled out correctly, without damage to the softer alloy metal that it was fitted to. Then a set of Helicoil thread repair inserts were fitted to the drilled and threaded holes.
These would take the new exhaust studs.
The head has been blasted clean prior to the repair work..
These would take the new exhaust studs.
The head has been blasted clean prior to the repair work..
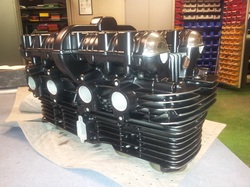
Early Black Engine Finish
Here is the top end of the engine after restoration.
The original black finish has been removed and the head was vapour blasted and polished.
The black engine colour was only used from 1972 -1973. Later bikes used a more durable plain alloy finish.
Note the edges of the cylinder fins are exposed alloy.
The original black finish has been removed and the head was vapour blasted and polished.
The black engine colour was only used from 1972 -1973. Later bikes used a more durable plain alloy finish.
Note the edges of the cylinder fins are exposed alloy.
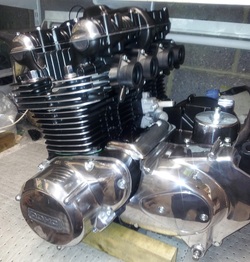
Completed Engine Rebuild
Here is a rebuilt Z1 903cc engine ready to go back into the machine.
This engine became very famous and was used as the benchmark by which other motorcycle engines were judged - for many years.
In later versions it continued for over thirty years, finally ending up in KZ1000P Police bikes in the USA
This engine became very famous and was used as the benchmark by which other motorcycle engines were judged - for many years.
In later versions it continued for over thirty years, finally ending up in KZ1000P Police bikes in the USA
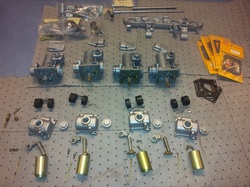
Carb Overhaul
Carbs are stripped down and rebuilt using a kit which replaces all the jets, gaskets and the fuel needle valve.
(see Cool Parts link above).
The associated brackets and shafts are re-plated or remanufactured.
There are a lot of small components involved in this job so attention to detail and organisation is the key.
(see Cool Parts link above).
The associated brackets and shafts are re-plated or remanufactured.
There are a lot of small components involved in this job so attention to detail and organisation is the key.
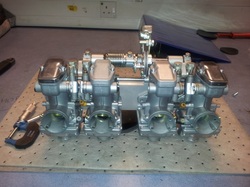
Restored & Adjusted Carbs
After reassembly they will undergo a full leak test on the bench
and the float heights will be set before finally being fitted to the bike.
Notice only the outside two carbs are given an extra polish as was the
original finish…. they are the only ones in view after all
and the float heights will be set before finally being fitted to the bike.
Notice only the outside two carbs are given an extra polish as was the
original finish…. they are the only ones in view after all
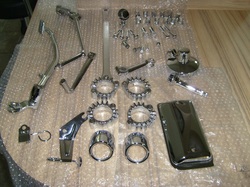
Chrome Plated Parts
The dull and rusty chrome parts were stripped, polished and re-plated where possible.
Mikey from the Z1 Owners Club gave a great service here.
A few items were beyond repair and these were all replaced with new parts
Mikey from the Z1 Owners Club gave a great service here.
A few items were beyond repair and these were all replaced with new parts
Re-Zinced Parts
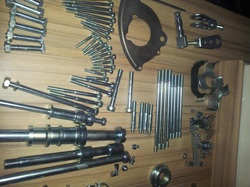
Not many firms will handle small batches of zinc plating.
Dave was lucky to find Hastings Metal Finishers only a few miles from home.
The owner Allan Hastings is a bit of a Classic bike enthusiast himself so he was happy to help.
Dave was lucky to find Hastings Metal Finishers only a few miles from home.
The owner Allan Hastings is a bit of a Classic bike enthusiast himself so he was happy to help.
Gauge Repairs
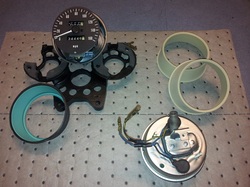
A complete restoration of the clocks was required.
Finding decent original parts to restore from eBay and elsewhere was a headache.
Eventually he ended up with enough good parts to make up a complete set of clocks.
Finding decent original parts to restore from eBay and elsewhere was a headache.
Eventually he ended up with enough good parts to make up a complete set of clocks.
Restored Brake Rotor
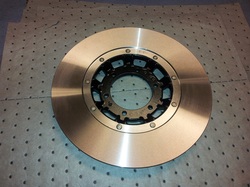
The front brake disc is given fresh paint and an “as new” finish on the ring grinder which also trues every thing up and ensures flatness.
This process only removes a few thousandths of an inch off the thickness of the disc which is still well within the service limit thickness.
This process only removes a few thousandths of an inch off the thickness of the disc which is still well within the service limit thickness.
Restored Hub & Brake
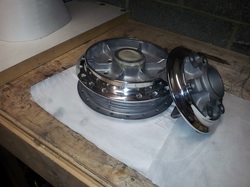
Here are the rear wheel hub and sprocket carrier all polished up and ready for the wheel rebuild.
The original spokes were in such good condition they could be polished and then re-zinc plated.
The nipples were given a yellow passivation finish to match the factory finish
The original spokes were in such good condition they could be polished and then re-zinc plated.
The nipples were given a yellow passivation finish to match the factory finish
Engine & Frame Reunited
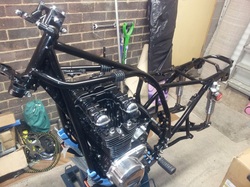
When you’re fitting a completely built up engine it makes life a lot easier to drop the frame over the engine which is positioned securely on its side.
The engine mounting bolts can then be loosely inserted and the two become one.
Here the engine and chassis are mounted onto a bike jack ready for the rest of the rebuild.
The engine mounting bolts can then be loosely inserted and the two become one.
Here the engine and chassis are mounted onto a bike jack ready for the rest of the rebuild.
New Seat & Paintwork
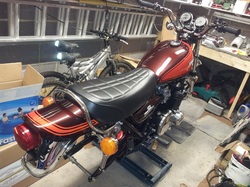
All of the major components are now in place, with a new wiring harness and a new fully charged battery fitted, all of the electrical functions can be tested.
Fresh oil, filters and fuel are now in the bike - just waiting for the tyres to be fitted to the rims and the exhausts will go on last.
Then she’s ready for the first start up in 10 years.
Fresh oil, filters and fuel are now in the bike - just waiting for the tyres to be fitted to the rims and the exhausts will go on last.
Then she’s ready for the first start up in 10 years.
1973 to 2013 - Identical !!
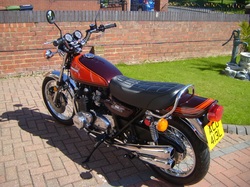
All goes to plan and on a lovely August day she is wheeled outside - looking just like she did back in 1973.
Thankfully on virtually the first press of the starter button she bursts into life…..
Another project completed and another Dead Zed resurrected.
Thankfully on virtually the first press of the starter button she bursts into life…..
Another project completed and another Dead Zed resurrected.

