

For Sale Photo
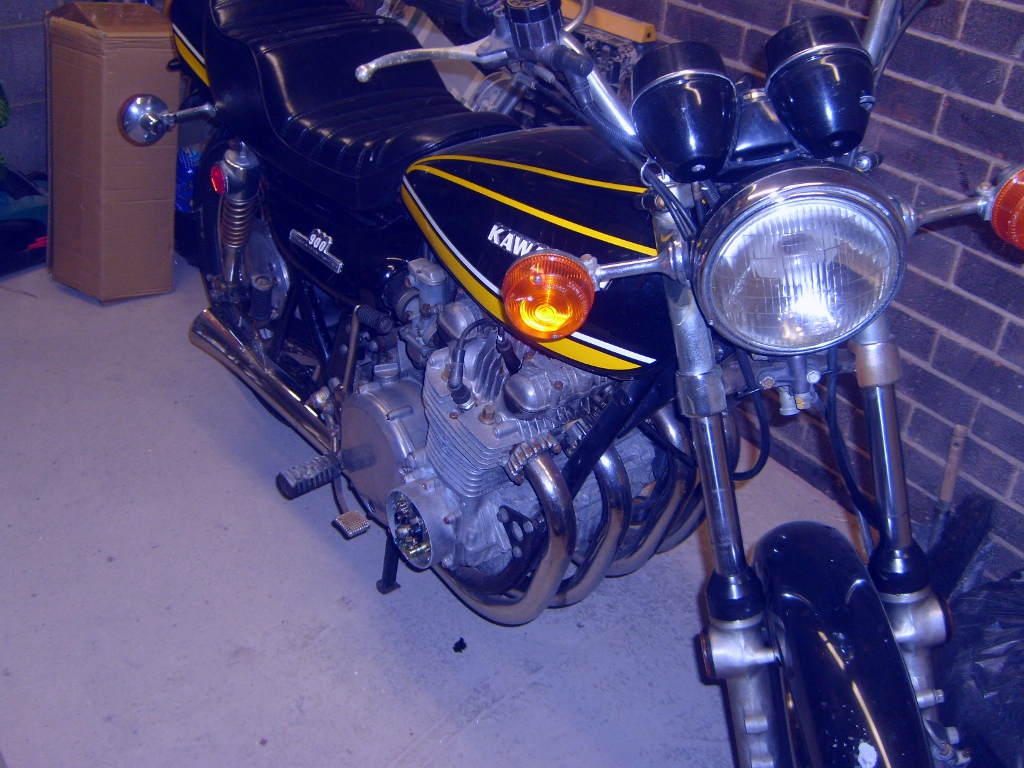
Dave Mudie told Zedrider "I responded to this internet advert because I had always wanted to restore a Kawasaki Z1" It turns out the bike was being prepared for MOT in County Durham, near to his home in Sunderland.
"The deal was soon struck and the bike came to me with MOT, V5 and a UK age related plate from 1974".
The A model is now the rarest Z1 in the UK.
"The deal was soon struck and the bike came to me with MOT, V5 and a UK age related plate from 1974".
The A model is now the rarest Z1 in the UK.
The Project Arrives
There was only minor pitting on the chrome and a little rust on the frame. Electrics all looked intact and the date codes on the main items (swing arm, brake disc, bar switches etc) - seemed to match up.
The original yellow factory torque marking paint was present in several places - indicating that the bike had not been taken apart to any extent.
Though that was about to change...
The original yellow factory torque marking paint was present in several places - indicating that the bike had not been taken apart to any extent.
Though that was about to change...
Painted Chromework
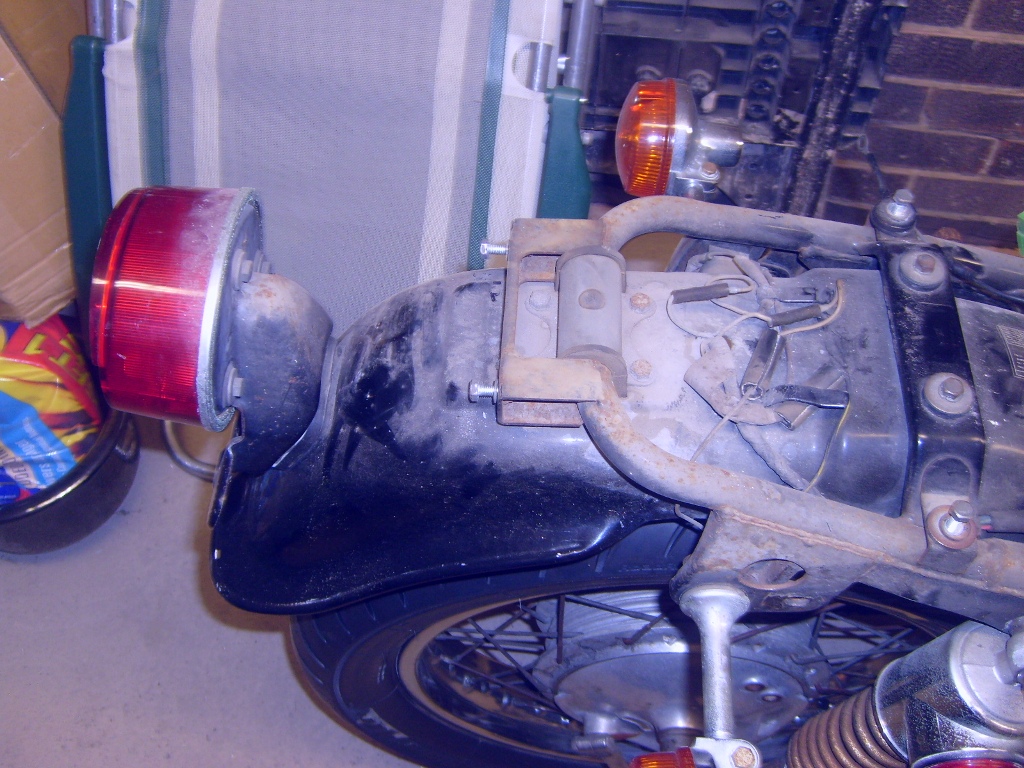
Without the tail piece you can see the state of the frame. Only surface rust, so a good basis for the project.
Both fenders had been painted gloss black. This actually preserved the metal underneath - ready for the re-chroming process.
The bike was now stripped and all parts bagged and tagged ready for re-finishing or replacement.
Both fenders had been painted gloss black. This actually preserved the metal underneath - ready for the re-chroming process.
The bike was now stripped and all parts bagged and tagged ready for re-finishing or replacement.
Back to Base
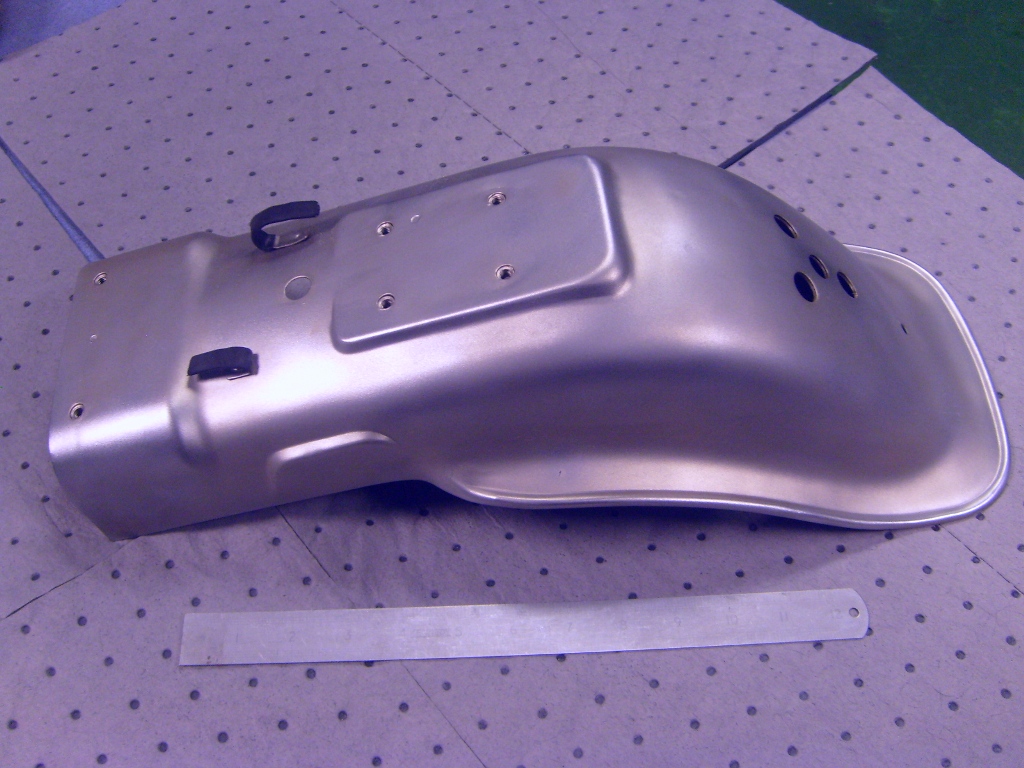
All the parts were blasted back to base metal and then assessed.
It leaves a good finish to take new paint and exposes any hidden damage that corrosion may have caused.
Then I had to decide what could be re-finished and what needed to be replaced.
It leaves a good finish to take new paint and exposes any hidden damage that corrosion may have caused.
Then I had to decide what could be re-finished and what needed to be replaced.

Engine Out
The motor was removed and placed on the bench.
It was going to be fully stripped so I didn't worry that I had not heard it run.
With the barrels off and the crank cases split the only problem was a broken front cam chain guide which was lying in the sump!
This was a common early fault - and a stronger guide was fitted to later models. So it will be an easy fix during the rebuild.
Gearbox Inspection
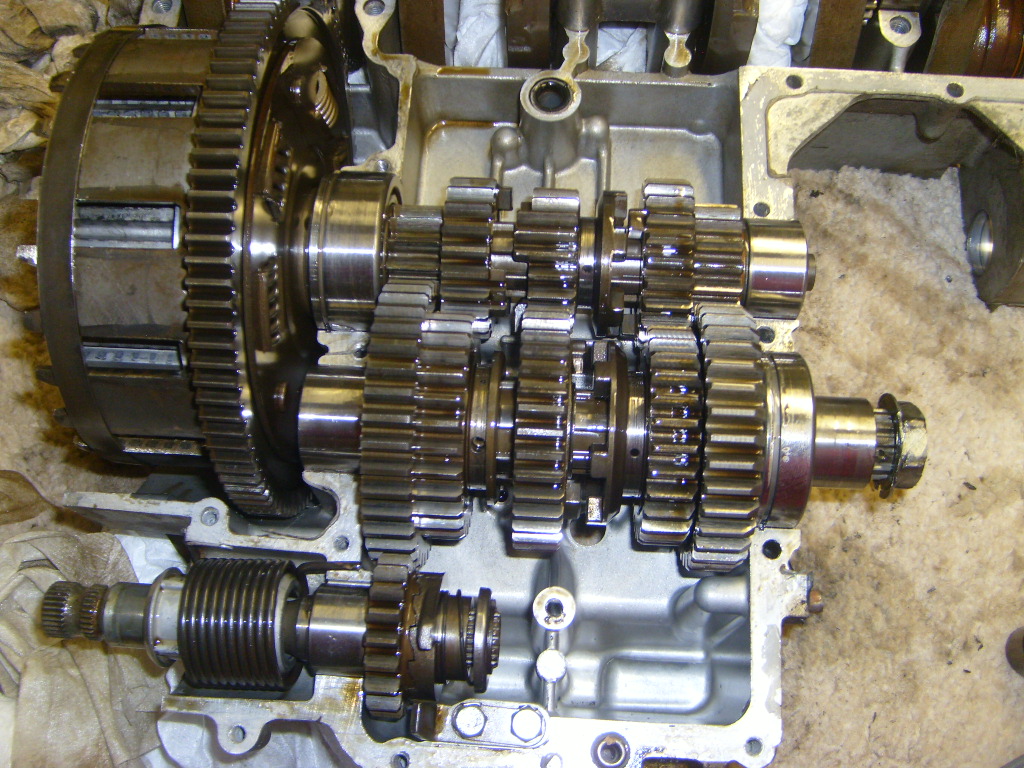
The gear box had lived up to it's bullet proof reputation and everything was fine in that department.
In the full engine strip down only one bolt snapped. One of the long M6 hex heads in the sprocket cover casing, not bad after 38 years!
In the full engine strip down only one bolt snapped. One of the long M6 hex heads in the sprocket cover casing, not bad after 38 years!
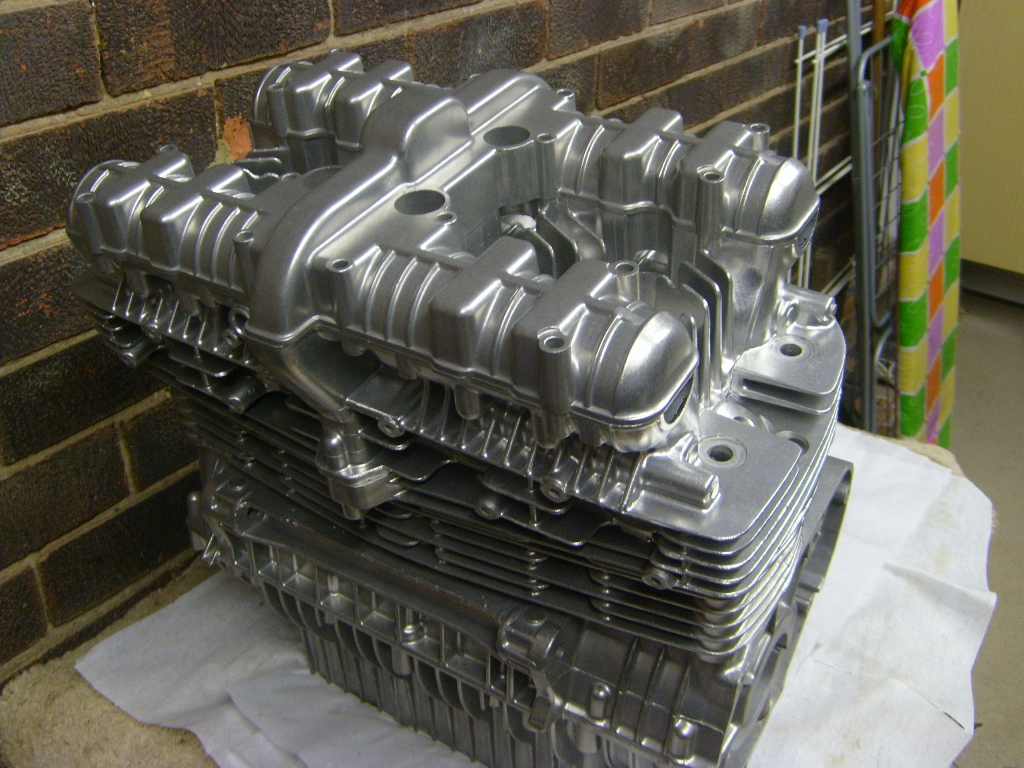
Engine After Blasting
Steve Smethurst restored the engine cases, cylinder head and block.
Here they are, just stacked together loosely to show the final effect.
Steve also sorted the re-zinc plating after I had stripped and cleaned up the items myself.
Hammer rash on wheel and swinging arm spindles, or any marks from sloppy spanner work were all removed before the re-plating could begin.
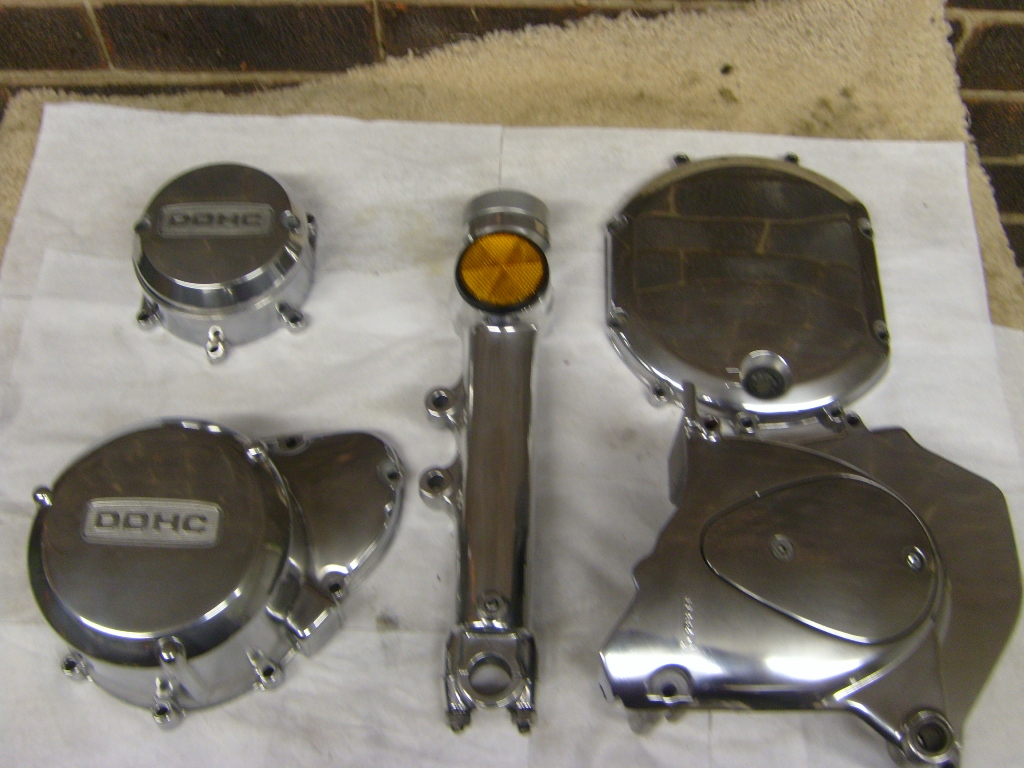
Polished Alloy Parts
In an effort to keep down costs I did a lot of the restoration work myself.
Here are the results of my time spent on a polishing lathe. I was quite pleased with my first attempt at alloy polishing.
You need to be really careful as it is easy to remove too much metal and expose cavities in the material.
Here are the results of my time spent on a polishing lathe. I was quite pleased with my first attempt at alloy polishing.
You need to be really careful as it is easy to remove too much metal and expose cavities in the material.
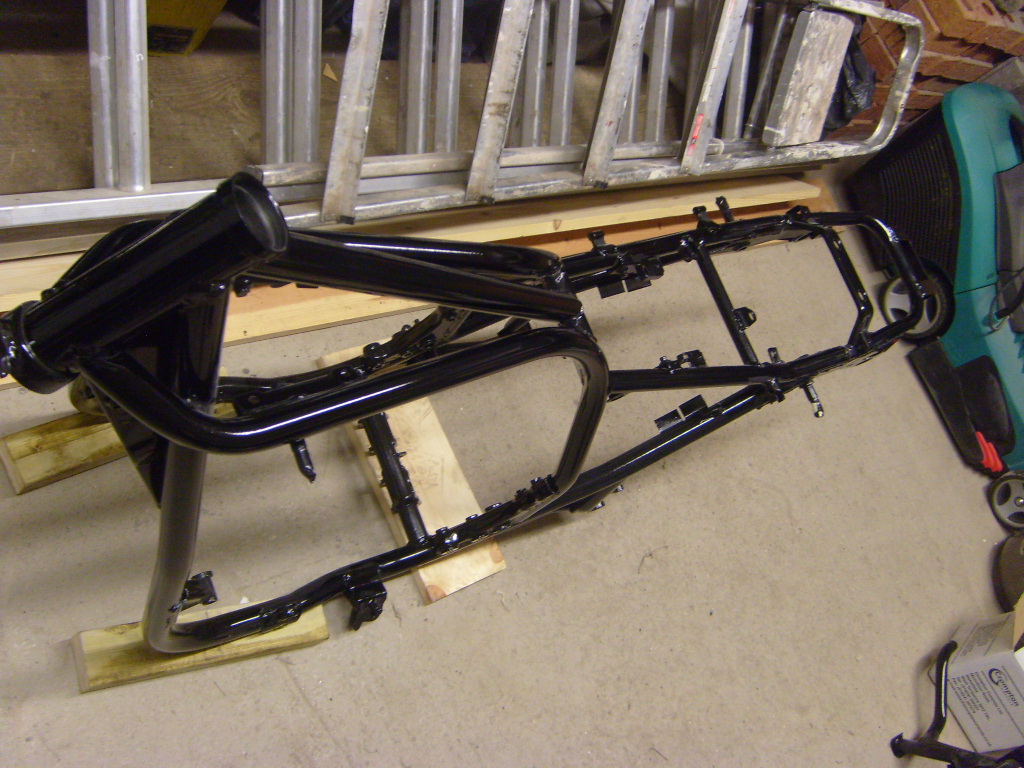
Paint Not Powder
In the paint vs. powder debate I went with the original finish.
The paint from 1974 had lasted well and that was good enough for me.
Sand blasting took place before the local paint shop applied several layers of undercoat and a two-pack gloss black finish.
The paint from 1974 had lasted well and that was good enough for me.
Sand blasting took place before the local paint shop applied several layers of undercoat and a two-pack gloss black finish.
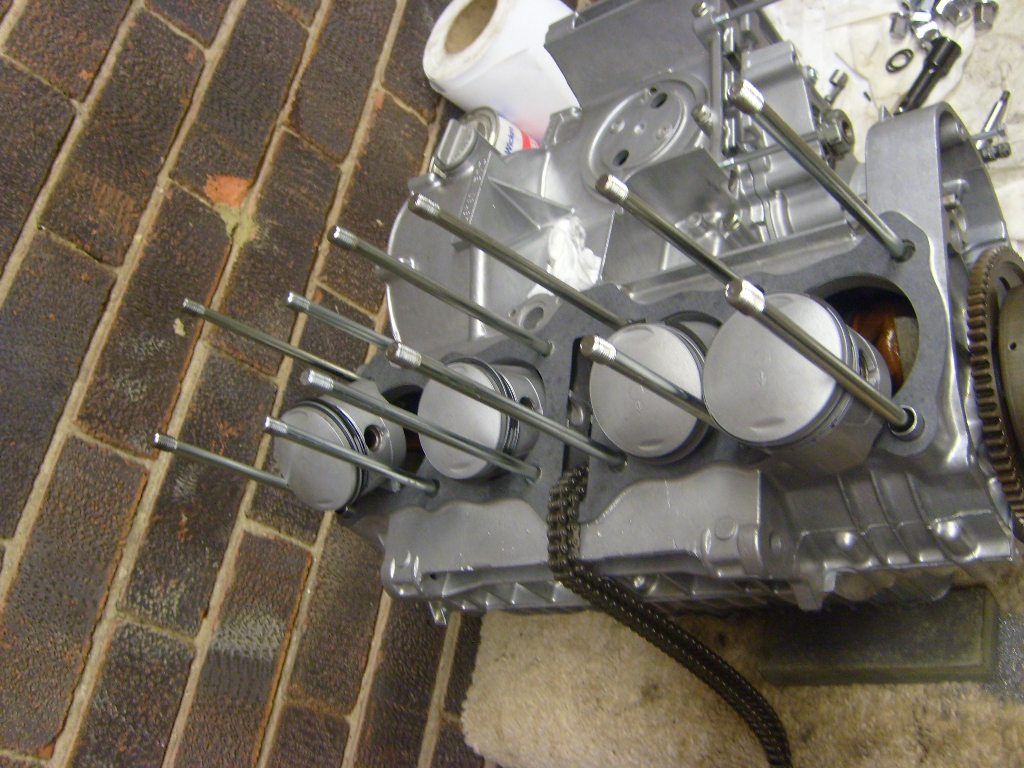
Bottom End Rebuilt
The bottom end went back together without a hitch.
The original pistons and bores are also in great shape so after a cleanup and a new set of rings the pistons slide nicely back into the newly honed bores.
The top end rebuild is harder but I soon have a complete motor with all new cam chain gear, valve stem seals and shims adjusted to get the correct clearances after lapping in the valves.
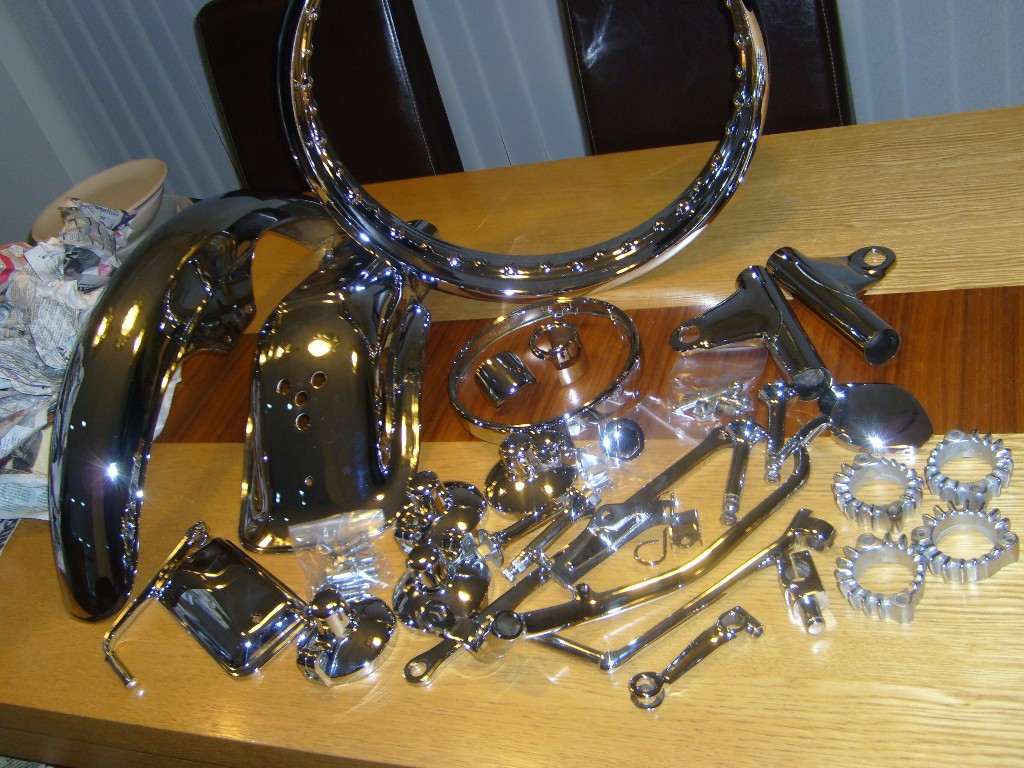
Parts Re-chromed
Prestige Electro Plating in Mexborough sorted out the chrome work.
All of the original chrome parts were re-plated and I was delighted with the result.
I just needed to get the engine back in the frame and then I could fit some of these goodies back on the bike.
All of the original chrome parts were re-plated and I was delighted with the result.
I just needed to get the engine back in the frame and then I could fit some of these goodies back on the bike.

Wheels Re-spoked
Prestige carefully left the Takasago wheel rim markings visible after the re-plating process.I then used original spokes from Z-Power, rather than the stainless steel alternative.
After polishing and re-painting the hubs and fitting new wheel bearings, the wheels were re-spoked and trued up ready for a nice new set of tubes and tyres.
After polishing and re-painting the hubs and fitting new wheel bearings, the wheels were re-spoked and trued up ready for a nice new set of tubes and tyres.

New Paintwork
Mark Hutchinson from Pontefract won the job of re-finishing my paint set.
He was recommended by members of the Z1 Owners Club and you can see what a great result he produced.
The original re-plated petrol cap was re-fitted, along with the tank badges, and then the panels went off into safe storage for later on.
He was recommended by members of the Z1 Owners Club and you can see what a great result he produced.
The original re-plated petrol cap was re-fitted, along with the tank badges, and then the panels went off into safe storage for later on.
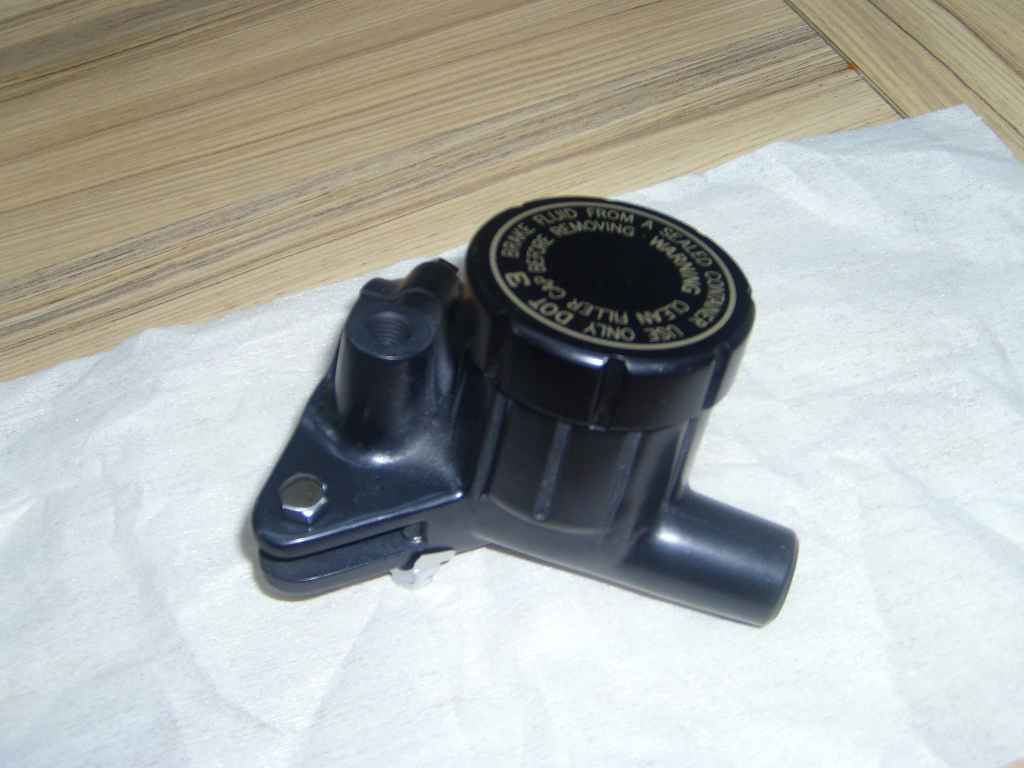
Re-anodised Finish
A black anodised finish was only used on the brake master cylinder and brake pipe splitter mounted on the bottom yolk. It fades over the years to a kind of purplish grey and many have them powder coated or painted black again.
Mikey from the Z1 Owners Club did a great job getting them re-anodised for me. Another piece restored to the correct factory finish.
Mikey from the Z1 Owners Club did a great job getting them re-anodised for me. Another piece restored to the correct factory finish.

Engine Re-fitted
I used the “frame over engine” technique to re-fit the motor.
Now the cost of all the small items such as rubber dampers and fitting kits to replace rusted nuts, bolts and washers becomes apparent!
It seems everything electrical had to be rubber mounted in order to combat vibration.
Now the cost of all the small items such as rubber dampers and fitting kits to replace rusted nuts, bolts and washers becomes apparent!
It seems everything electrical had to be rubber mounted in order to combat vibration.
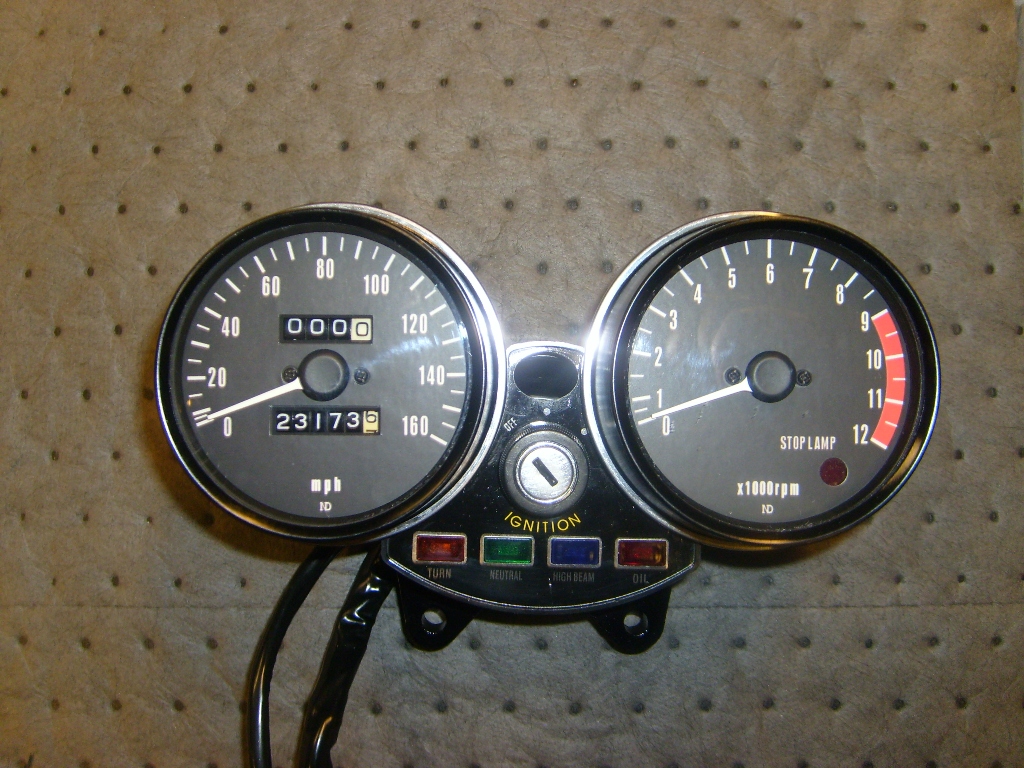
Restored Gauges
I broke a speedometer pin trying to restore my clocks. Al Marshall from Tamworth helped me out. He provides a specialist service for these gauges.
I wanted to see the original mileage when the clocks were rebuilt. Some reset them to zero, but I think a record of the actual mileage is more authentic.
One key fits the ignition, steering lock and seat lock too, pretty rare for a 38 year old machine.
I wanted to see the original mileage when the clocks were rebuilt. Some reset them to zero, but I think a record of the actual mileage is more authentic.
One key fits the ignition, steering lock and seat lock too, pretty rare for a 38 year old machine.
Rolling Chassis
The side panels were loosely fitted to get an idea of how she will look.
The original carb to head rubbers were replaced with a new set from Z-Power. The air box itself was good to re-use after a cleanup and adding new clamps.
All ready for the carbs now.
The original carb to head rubbers were replaced with a new set from Z-Power. The air box itself was good to re-use after a cleanup and adding new clamps.
All ready for the carbs now.
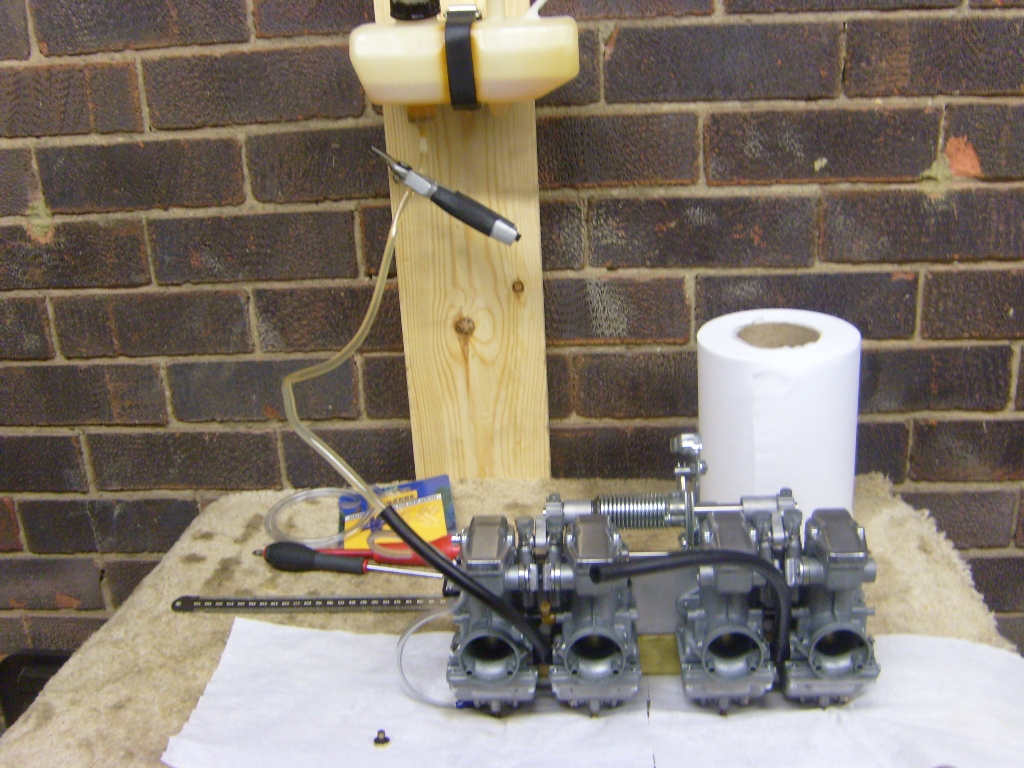
Carb Adjustment
I had to re-manufacture choke and throttle shafts in stainless steel as the originals were corroded.
A new return spring was sourced on e-bay USA and the carb bodies were blasted externally and ultrasonically cleaned out.
Note the use of my chain oiler tank as a remote fuel tank, I used a clear aquarium tube and connector as a float height gauge. It worked a treat!
A new return spring was sourced on e-bay USA and the carb bodies were blasted externally and ultrasonically cleaned out.
Note the use of my chain oiler tank as a remote fuel tank, I used a clear aquarium tube and connector as a float height gauge. It worked a treat!
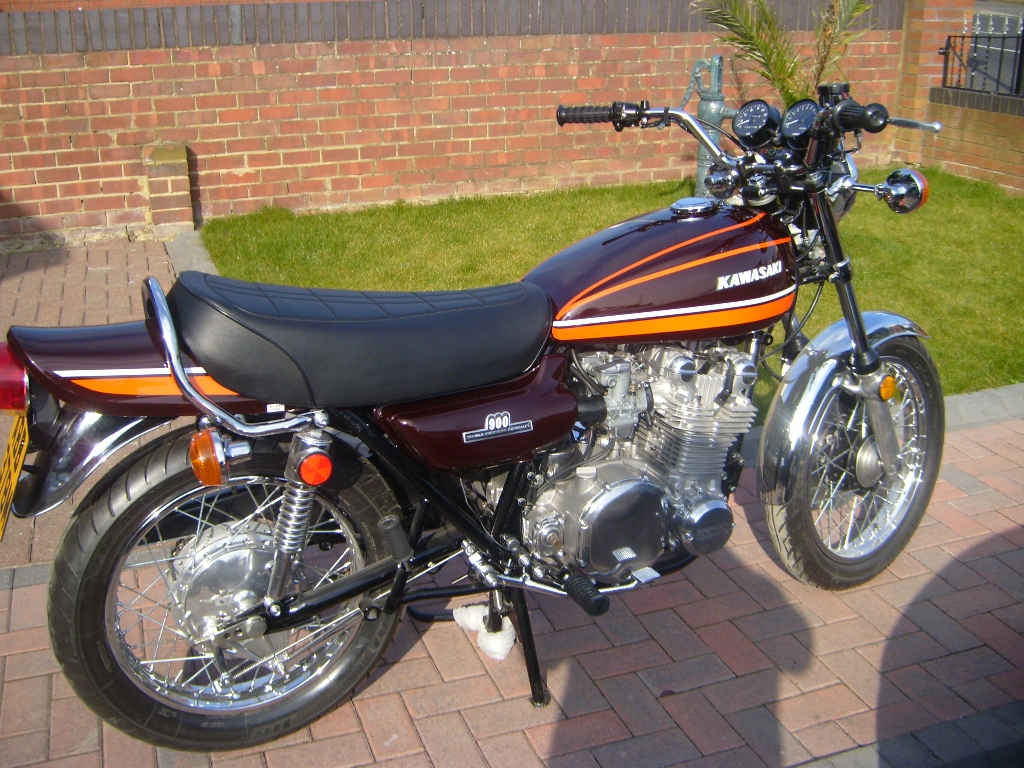
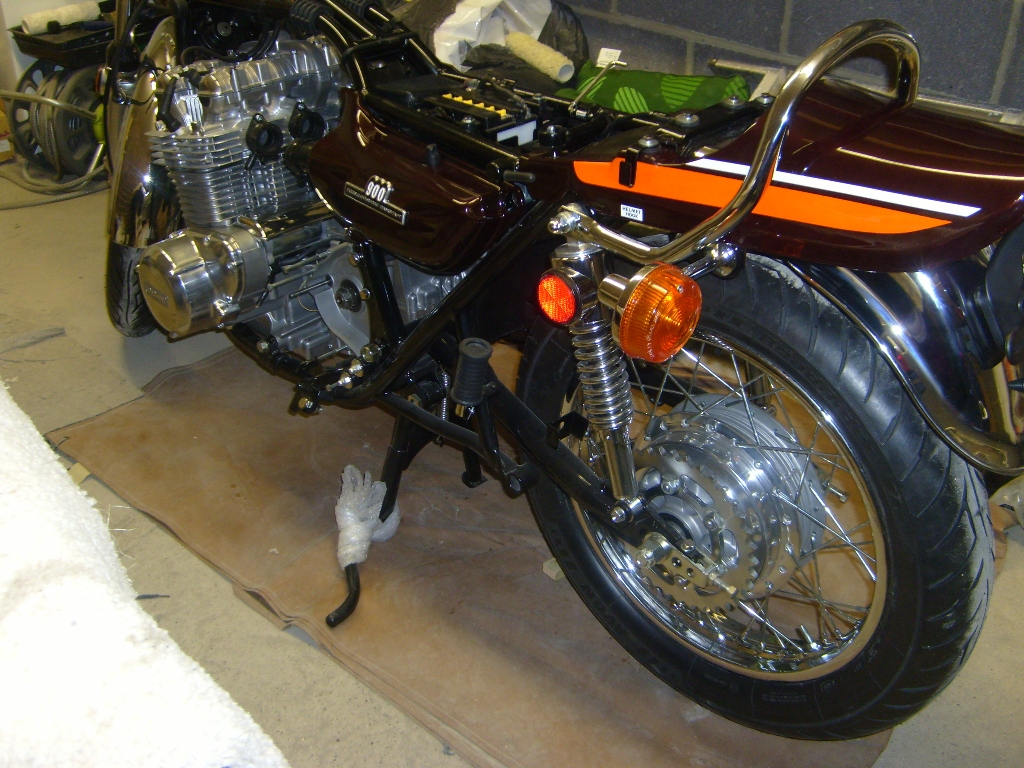
Nearly There
The LTD style unit has now gone and the seat unit is a new Z1 style replacement unit from Z Power.
A set of Doremi Z1 replica exhausts were ordered from Z-Fever in Germany and the bike is looking almost complete now.
A set of Doremi Z1 replica exhausts were ordered from Z-Fever in Germany and the bike is looking almost complete now.
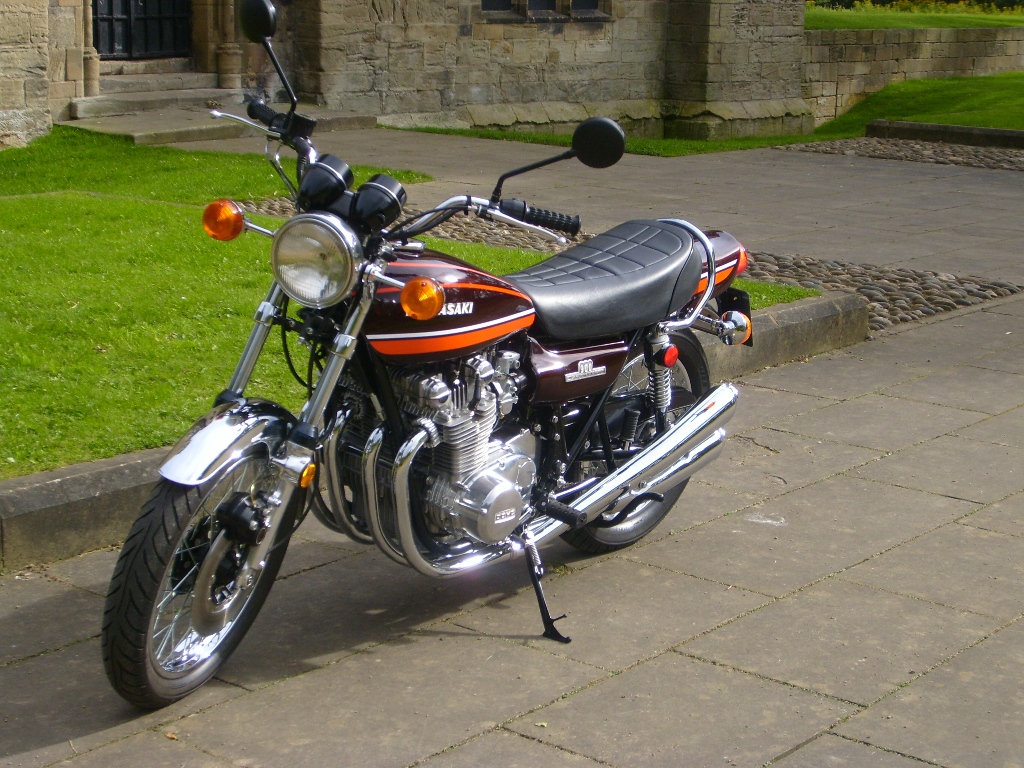
1974 to 2012 - Identical
Here she is at a local heritage site Hylton Castle only half a mile from home.
The original style exhausts make a great finishing touch.
Seeing her back in full 1974 factory trim somehow makes the whole project seem worthwhile.
There's another image of her over on the Gallery page if you want more!
The original style exhausts make a great finishing touch.
Seeing her back in full 1974 factory trim somehow makes the whole project seem worthwhile.
There's another image of her over on the Gallery page if you want more!
