
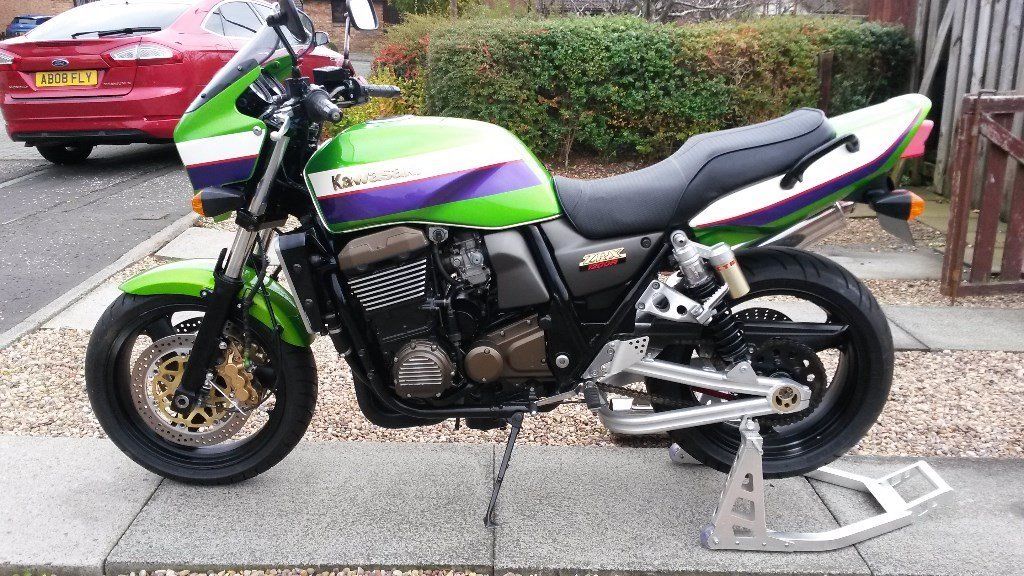
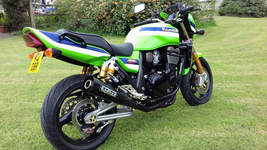
As Collected November 2016
The ZRX range was launched in 1997 with an 1100cc engine derived from GPZ machines. Ours had covered less than 8000 miles since 2001 but was starting to look a bit tired.
It is one of the first 1200cc versions, which had various upgrades - such as a stronger swinging arm.
It is one of the first 1200cc versions, which had various upgrades - such as a stronger swinging arm.
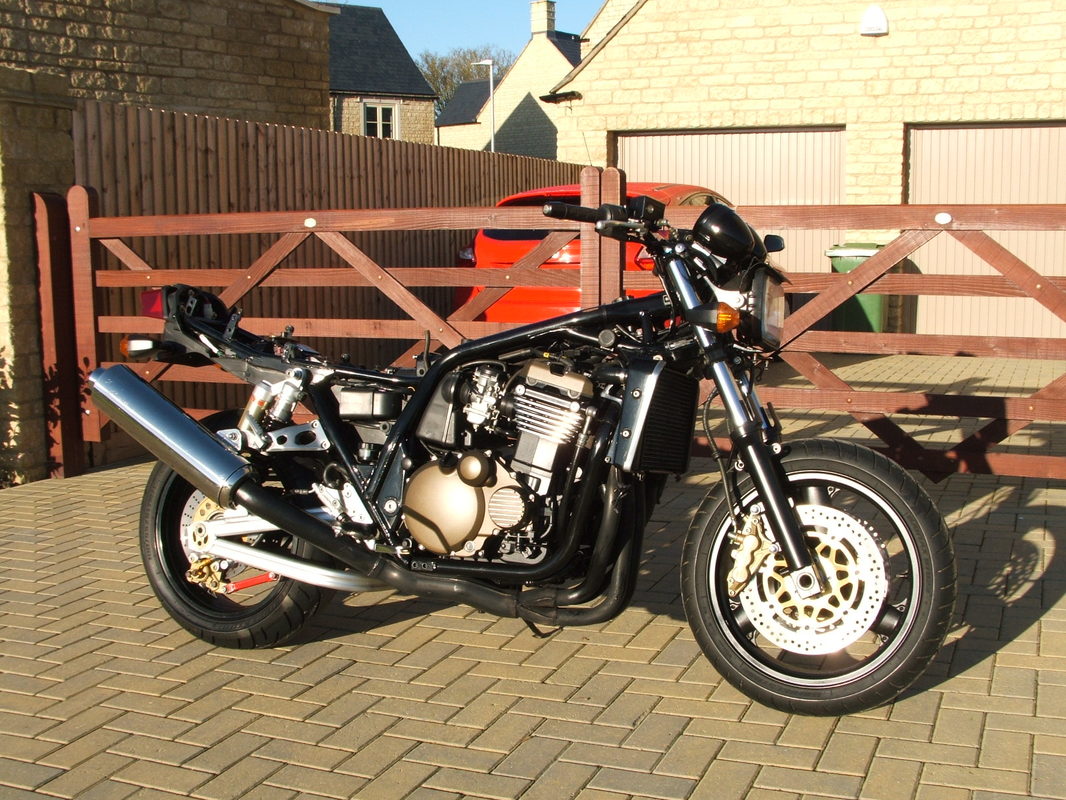
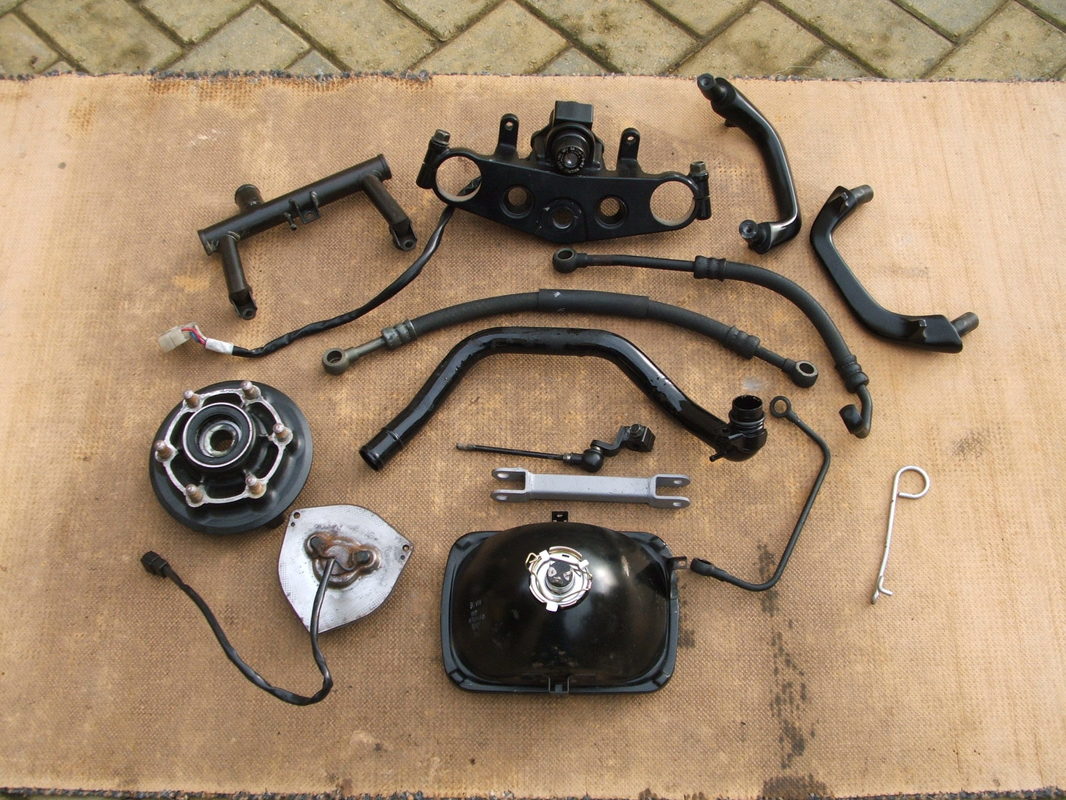
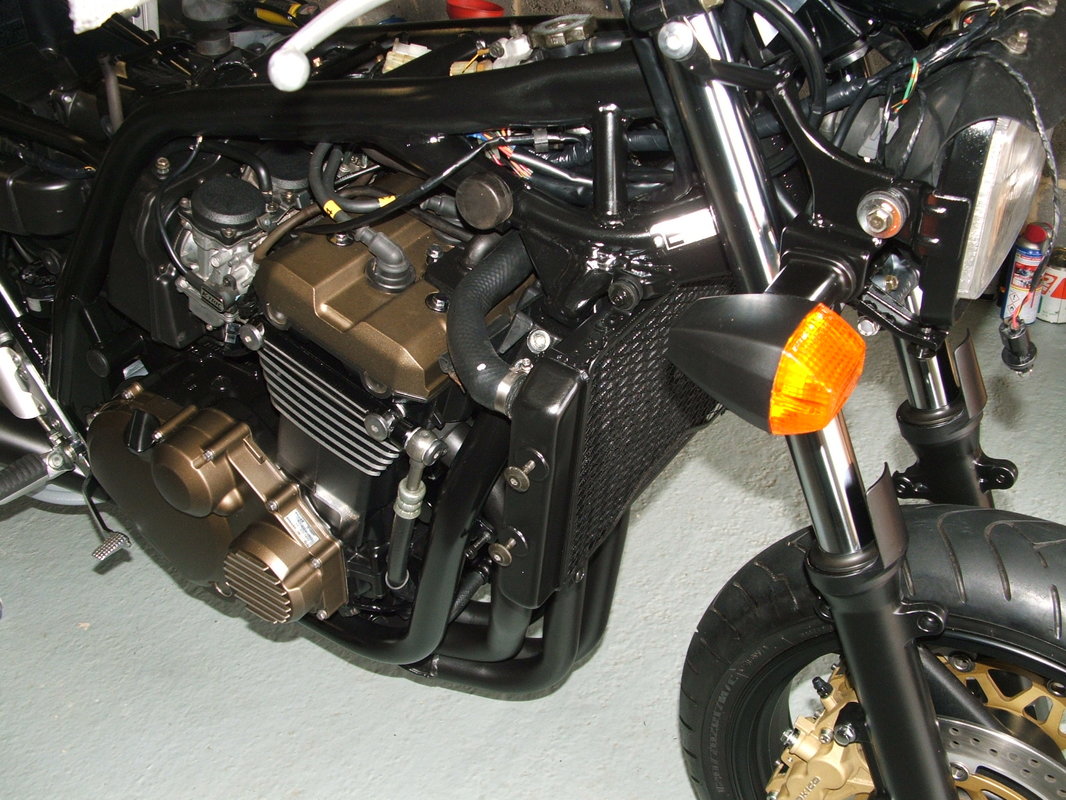
Bodywork Removed
The bodywork was carefully removed and inspected for damage. Detailed photos of how all the inner items were fitted and connected to each other were then taken. This helps when you are rebuilding things months later.
We don't think the red rear brake link arm was a factory option, so it will get blasted to bare metal and re-finished - back to black.
We don't think the red rear brake link arm was a factory option, so it will get blasted to bare metal and re-finished - back to black.
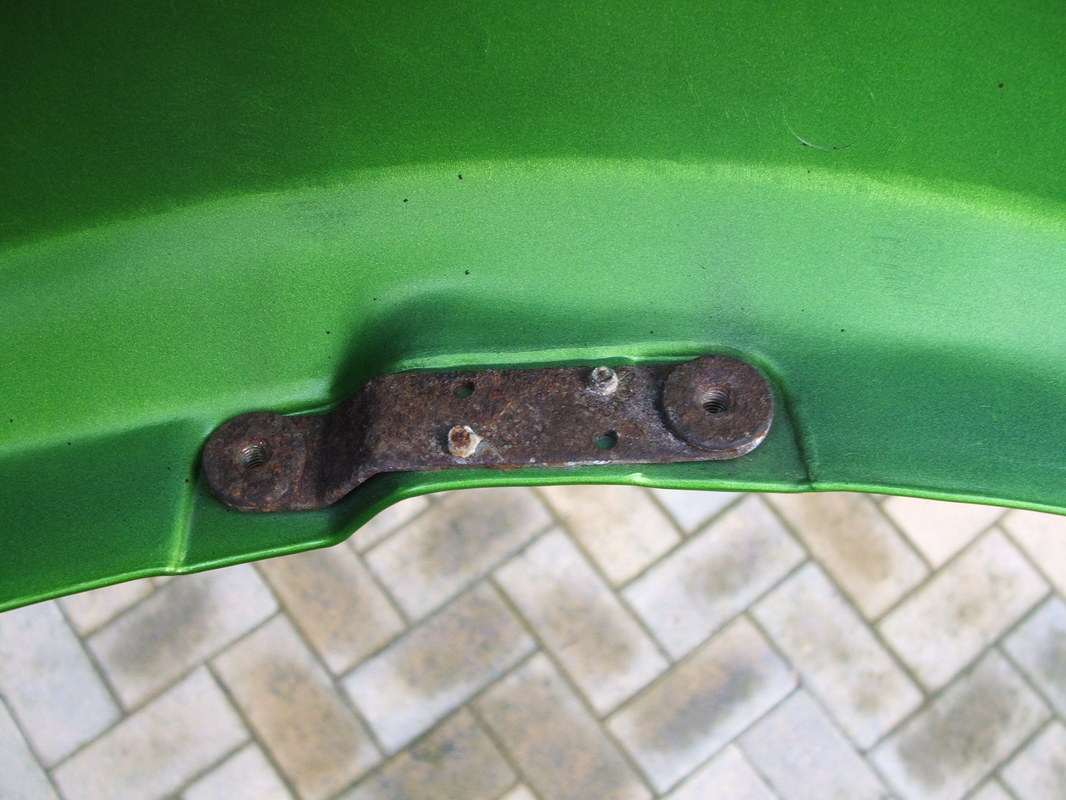
Fender Bracket
The Scottish weather and road salt had been at work on some of the hidden parts. These brackets hold the front fender in place and support the brake hose guides. Once the rivets are removed the fender can get repainted and the brackets will be de-rusted before getting a new top coat.
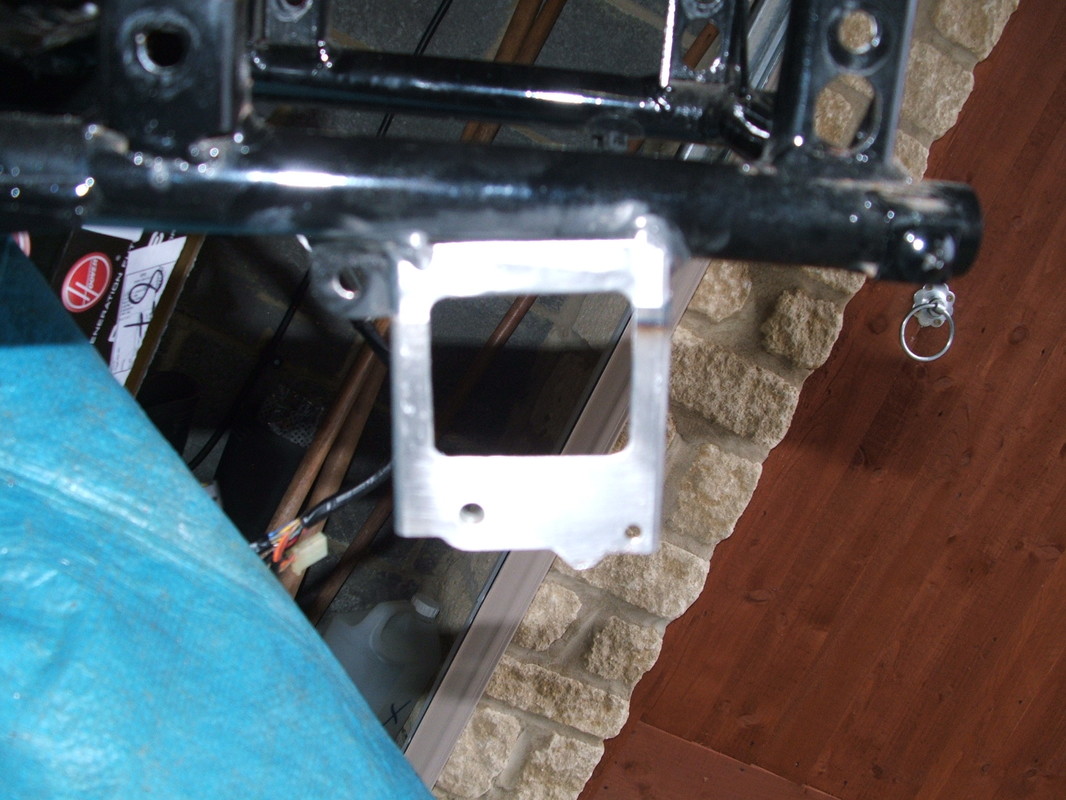
Helmet Lock Bracket
The rear helmet lock and it's bracket had been removed.
The tidy tail look had also seen the rear fender shortened.
A replacement bracket was welded into place.
Getting a new lock and matching it to the existing key came later.
The tidy tail look had also seen the rear fender shortened.
A replacement bracket was welded into place.
Getting a new lock and matching it to the existing key came later.
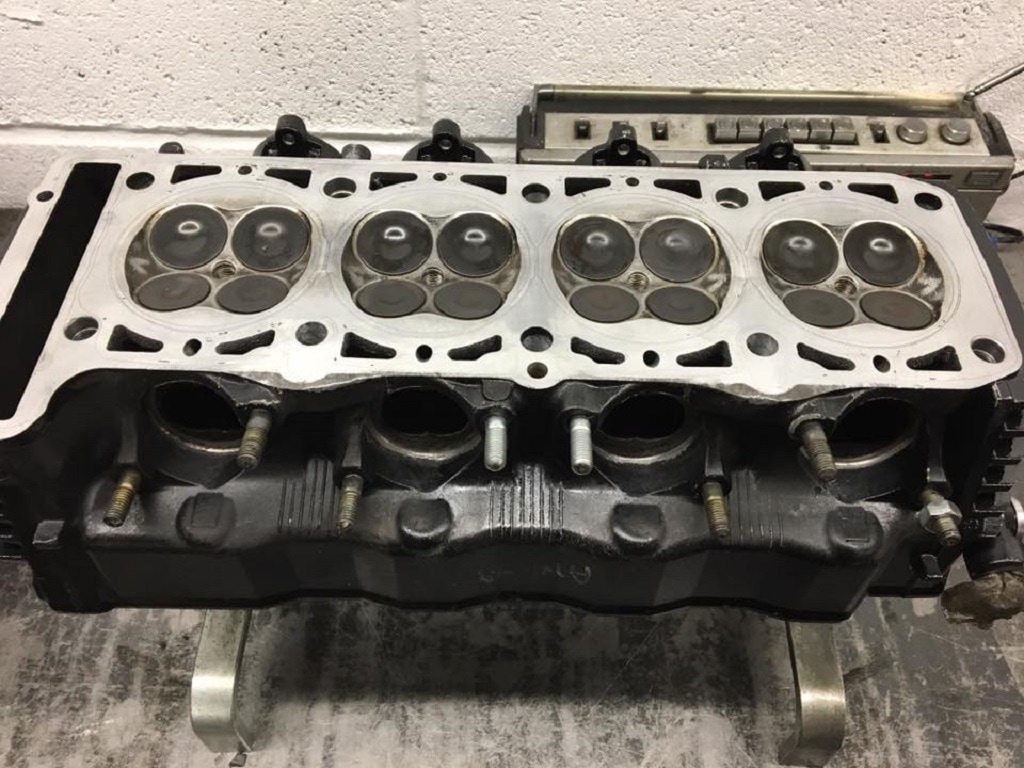
New Exhaust Studs
During the strip down one corroded exhaust stud was broken off.
Another had corroded threads, so the head came off.
Both studs were replaced by Steve at Debbens Performance.
He also fitted new valve stem seals and cleaned the head.
Another had corroded threads, so the head came off.
Both studs were replaced by Steve at Debbens Performance.
He also fitted new valve stem seals and cleaned the head.
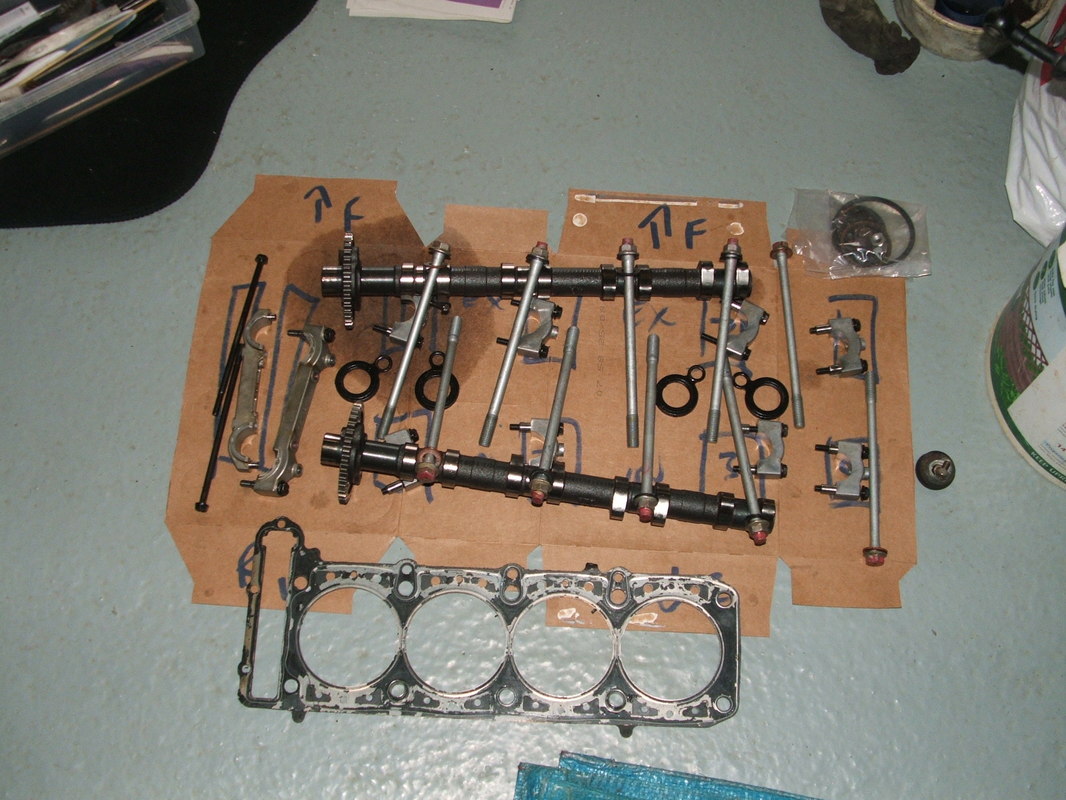
Camshafts
Here are the camshafts and head gasket.
The gasket is triple layered and external tags hold the pieces in place.
Cams are marked IN (rear) and EX (front) on the shaft.
All the holders are numbered and have forward arrows for fitting.
The gasket is triple layered and external tags hold the pieces in place.
Cams are marked IN (rear) and EX (front) on the shaft.
All the holders are numbered and have forward arrows for fitting.
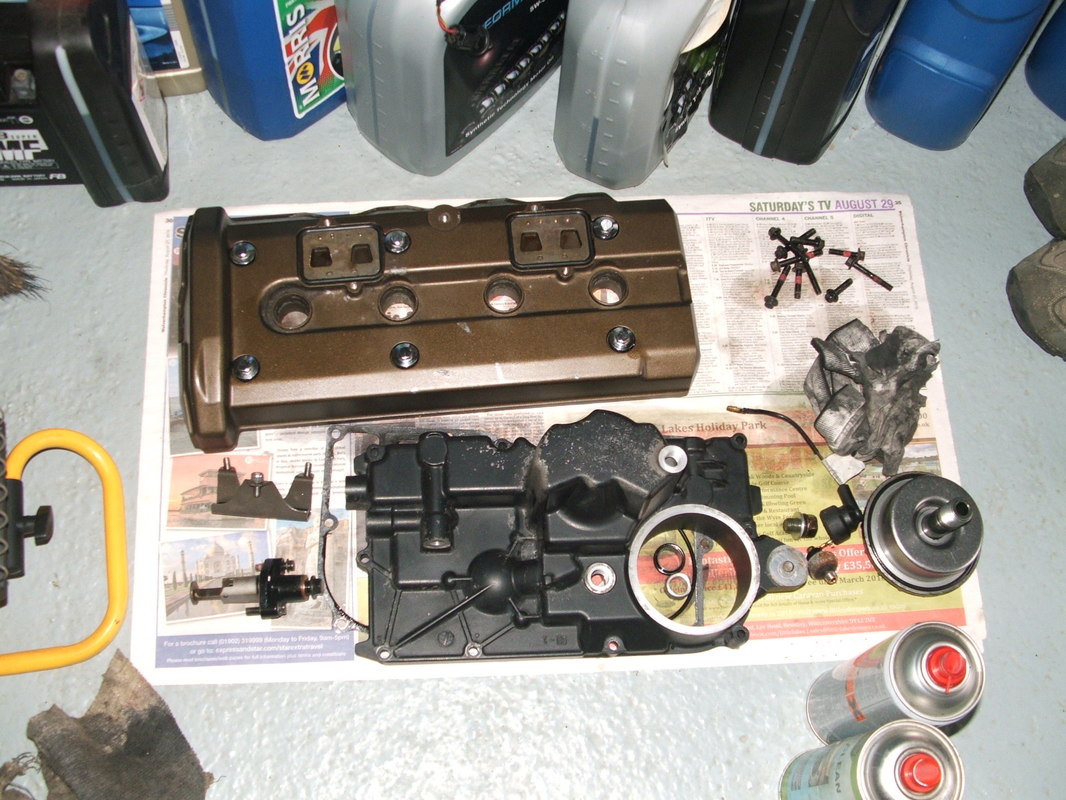
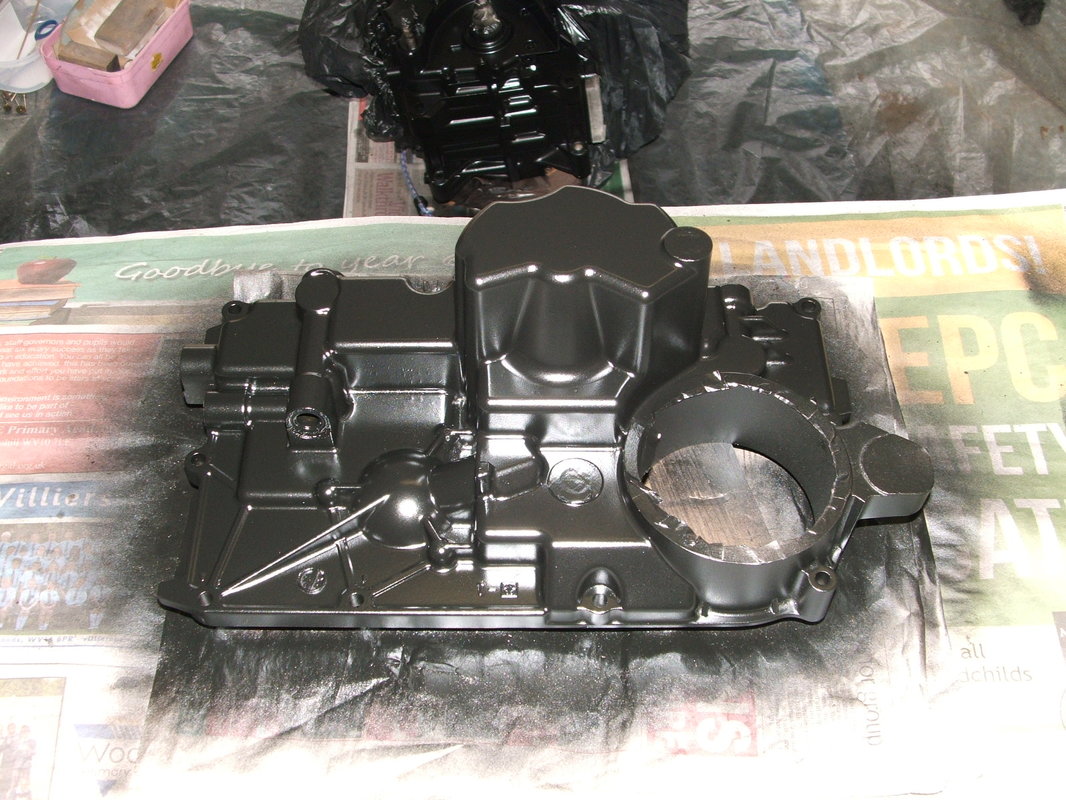
Sump & Cam Cover
The cam cover had a few little marks on it - so it got replaced.
The sump has a protruding section which is exposed to the front tyre.
That will be cleaned & re-painted.
The sump has a protruding section which is exposed to the front tyre.
That will be cleaned & re-painted.
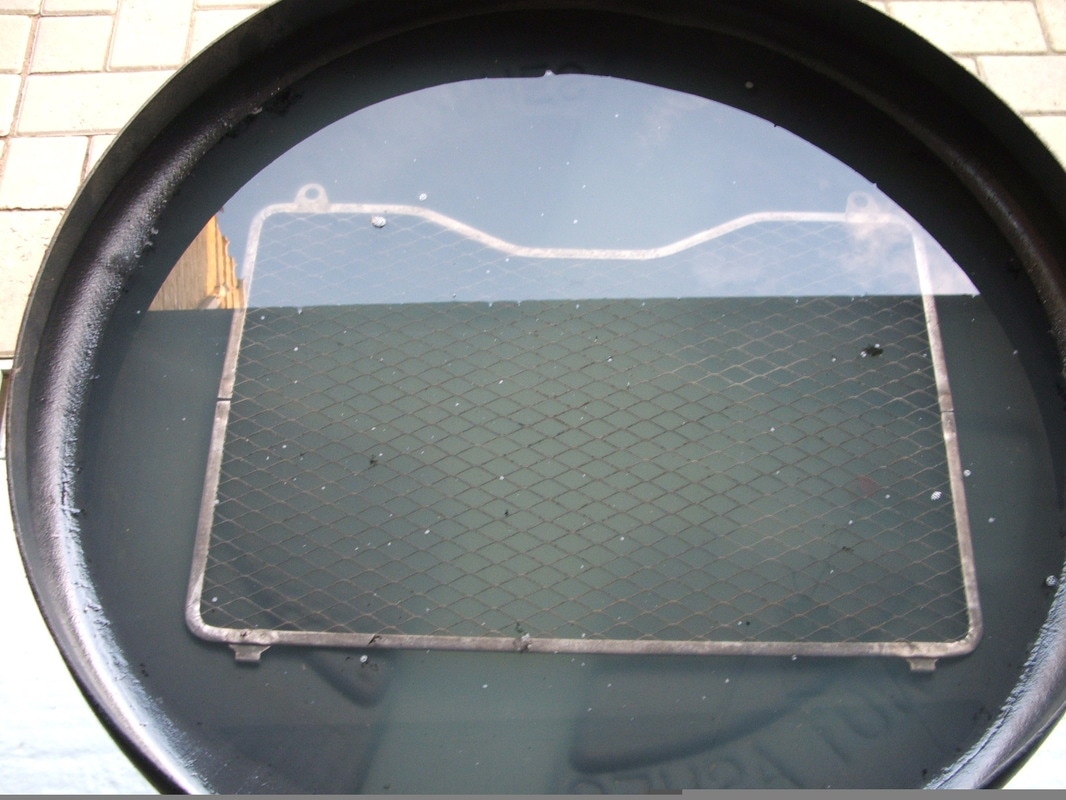
Radiator Grille
The radiator grille was covered with gold mesh & a chrome surround.
Once those were off it got de-rusted before a re-paint.
A small rubber damper goes in the middle of the grille to stop rattling.
Once those were off it got de-rusted before a re-paint.
A small rubber damper goes in the middle of the grille to stop rattling.
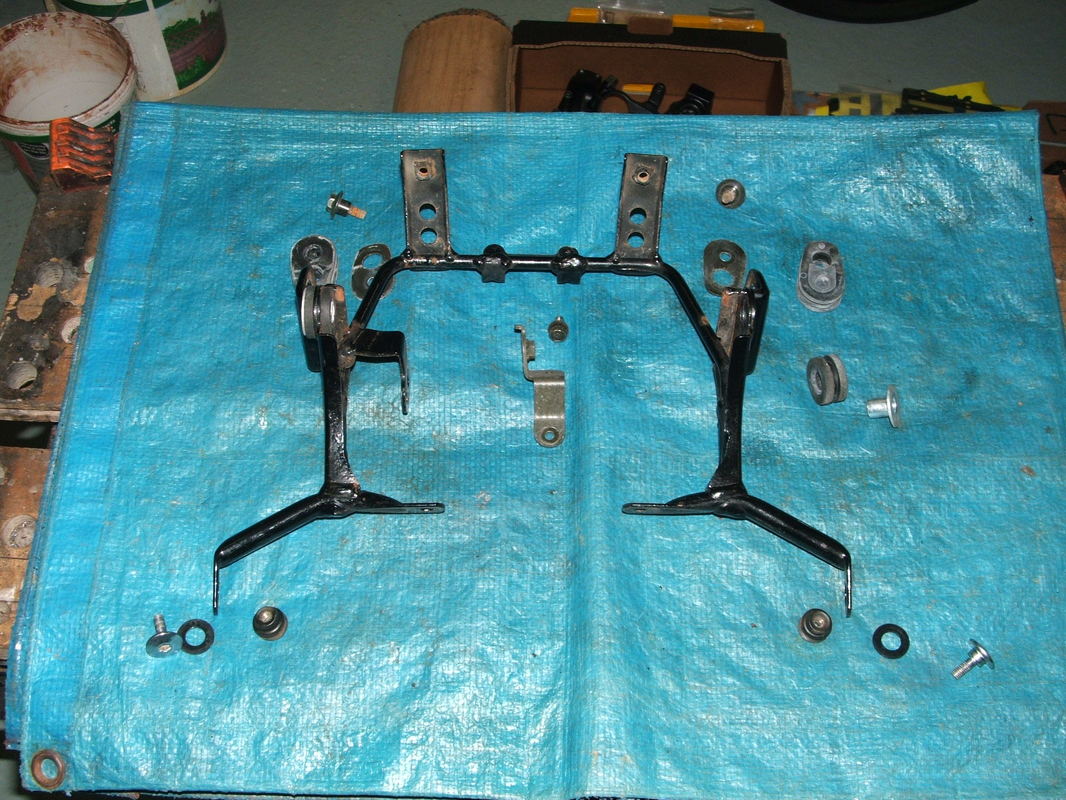
Fairing & Headlamp Bracket
This bracket supports headlamp, indicators, fairing and instruments.
Rubber dampers were all in good condition.
The small bracket in centre is for headlamp vertical adjustment.
The front brake splitter bolts go through the two central tubes.
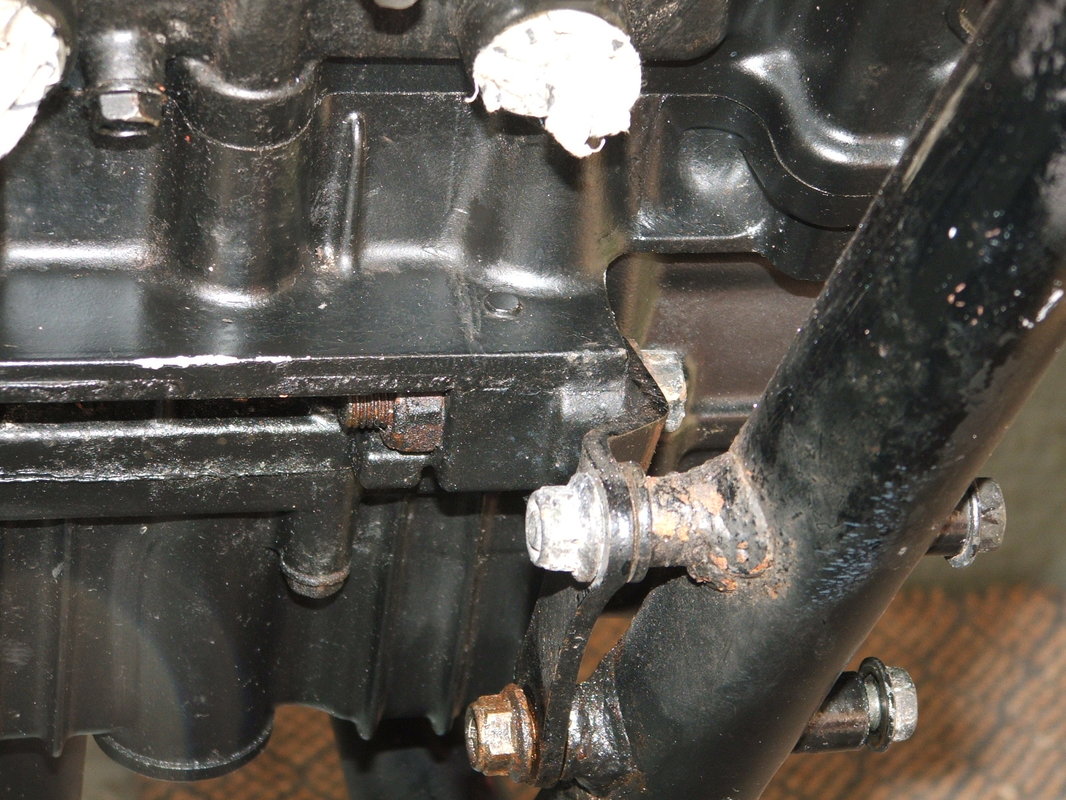
Stuck Engine Bolt
The front crank case engine mounting bolt was stuck.
KMB Engineering machined it out for us.
TIP - use grease on the shaft & threads to prevent later corrosion.
With the engine free the frame could be cleaned & painted.
KMB Engineering machined it out for us.
TIP - use grease on the shaft & threads to prevent later corrosion.
With the engine free the frame could be cleaned & painted.
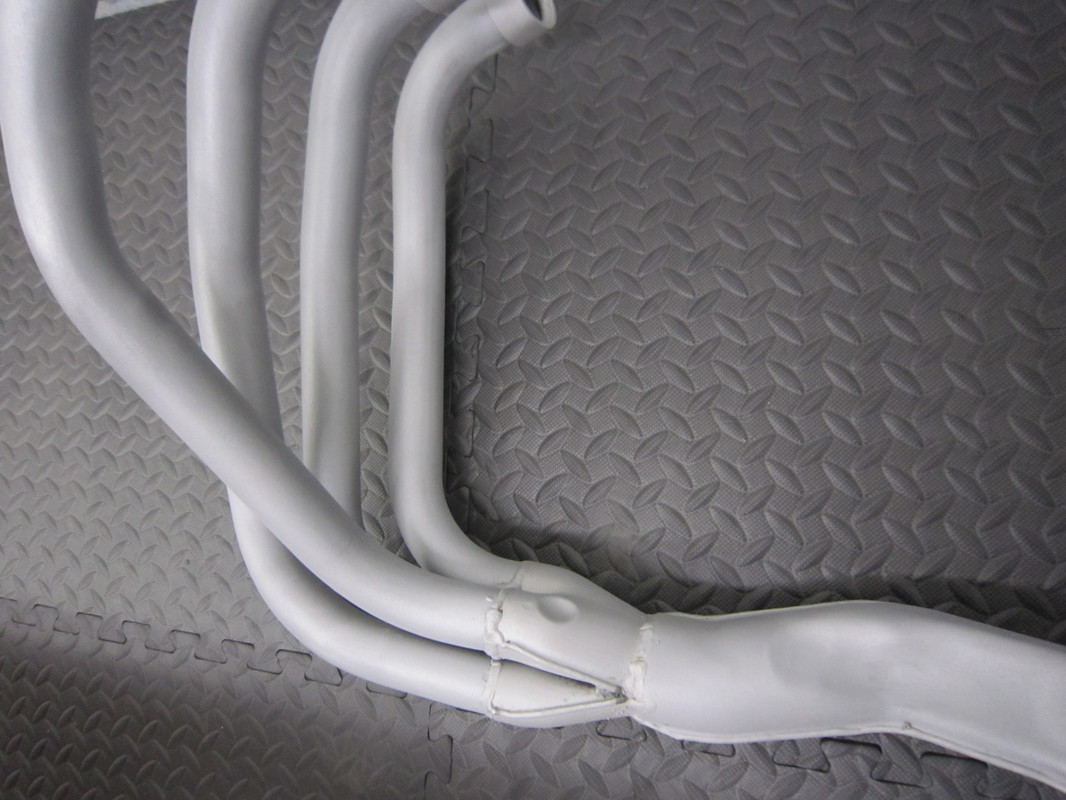
Headers After Blasting
The stainless header pipes were blasted to remove layers of old paint.
Only blasting can get into the tight joint spaces properly.
Then they could be painted with high temperature spray.
We used PJ1 header paint.
Only blasting can get into the tight joint spaces properly.
Then they could be painted with high temperature spray.
We used PJ1 header paint.
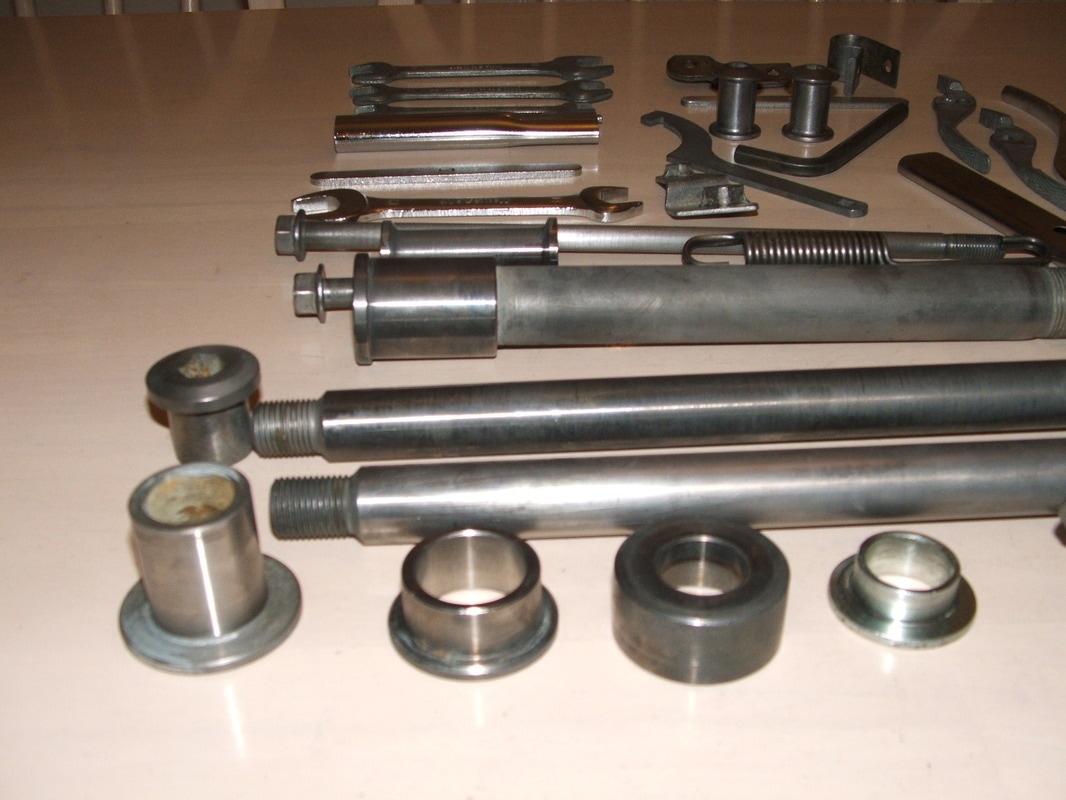
Ready For Zinc Plating
All the zinc plated parts were cleaned & de-rusted ready for re-plating.
Any threads were checked & cleaned with wire brush or tap & die.
Even the tools got a freshen up.
Which Shade of Black ?
The frame and lower forks were sprayed in our booth.
Gloss for the frame and oil pipes.
Satin for the sprocket holder, torque arm and engine.
The chrome rim got pressed off the lamp before painting.
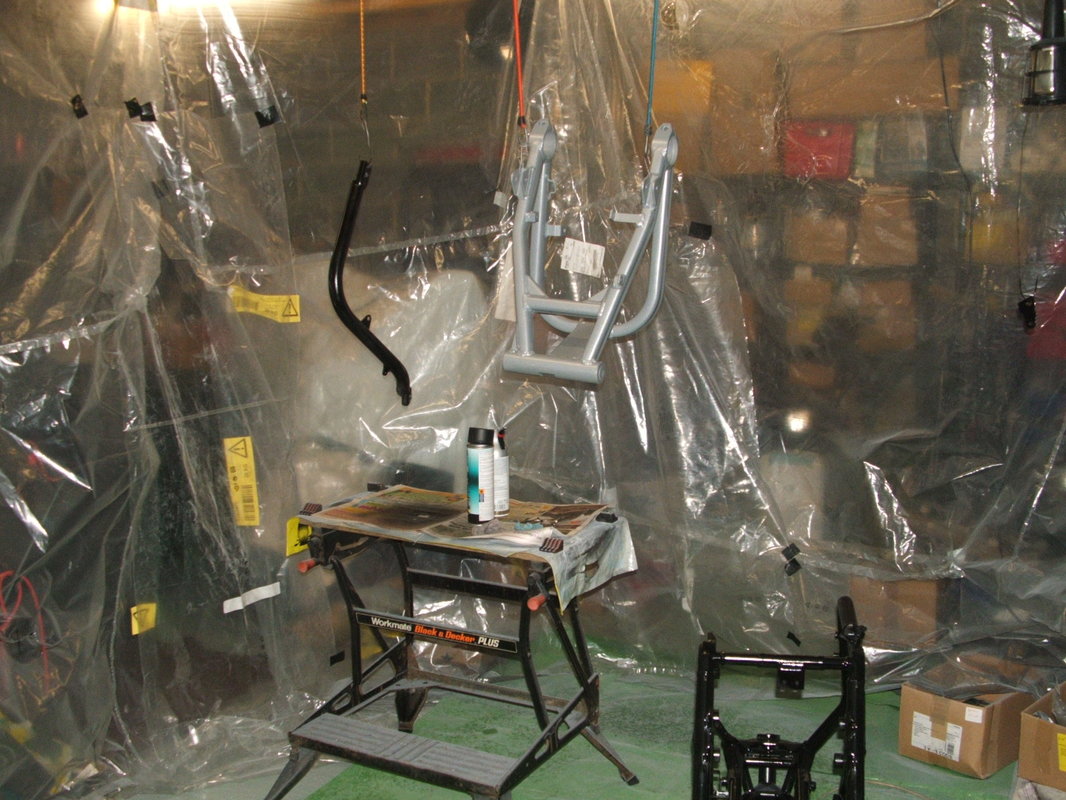
Spray Booth
The swing arm shaft was masked at each end to keep grease away from the new paint.
We used Rust-oleum Titanium Silver metallic spray and two coats of clear lacquer to re-finish ours.
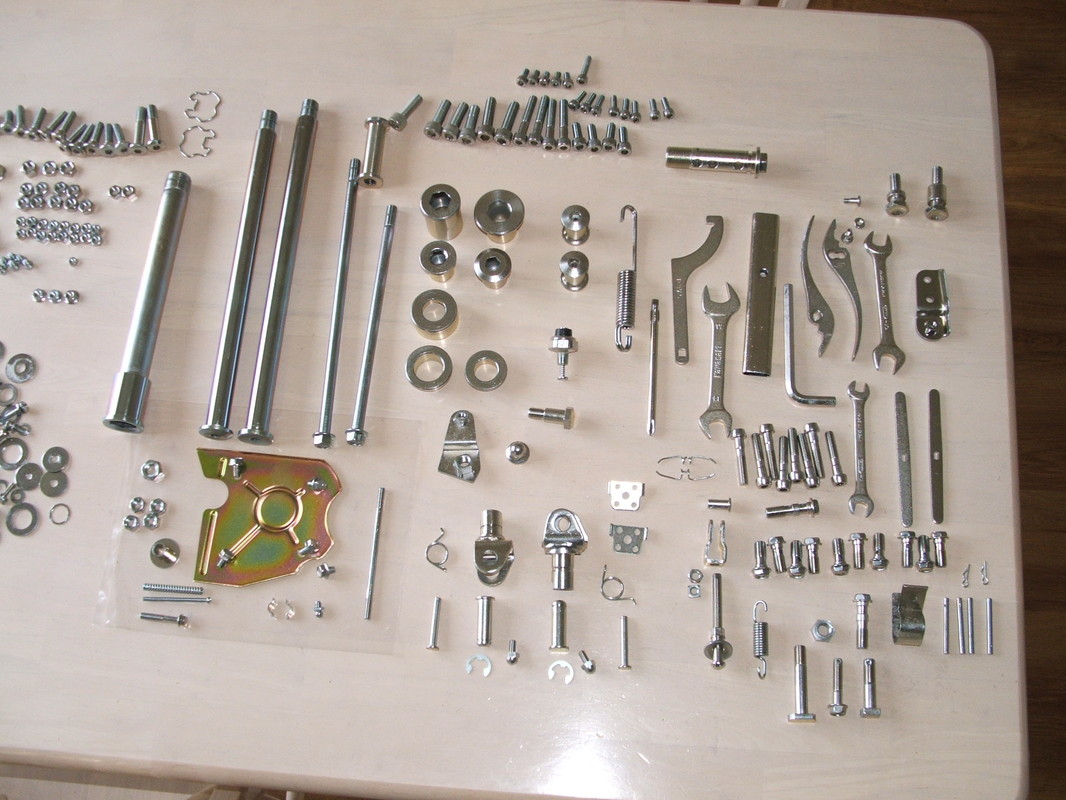
Re-zinced Parts, Tools & Fasteners
The re-plated fasteners soon came back from Malvern Electroplaters.
They also do work for Morgan Cars you know !!
The yellow zinced panel fits inside the front sprocket cover.
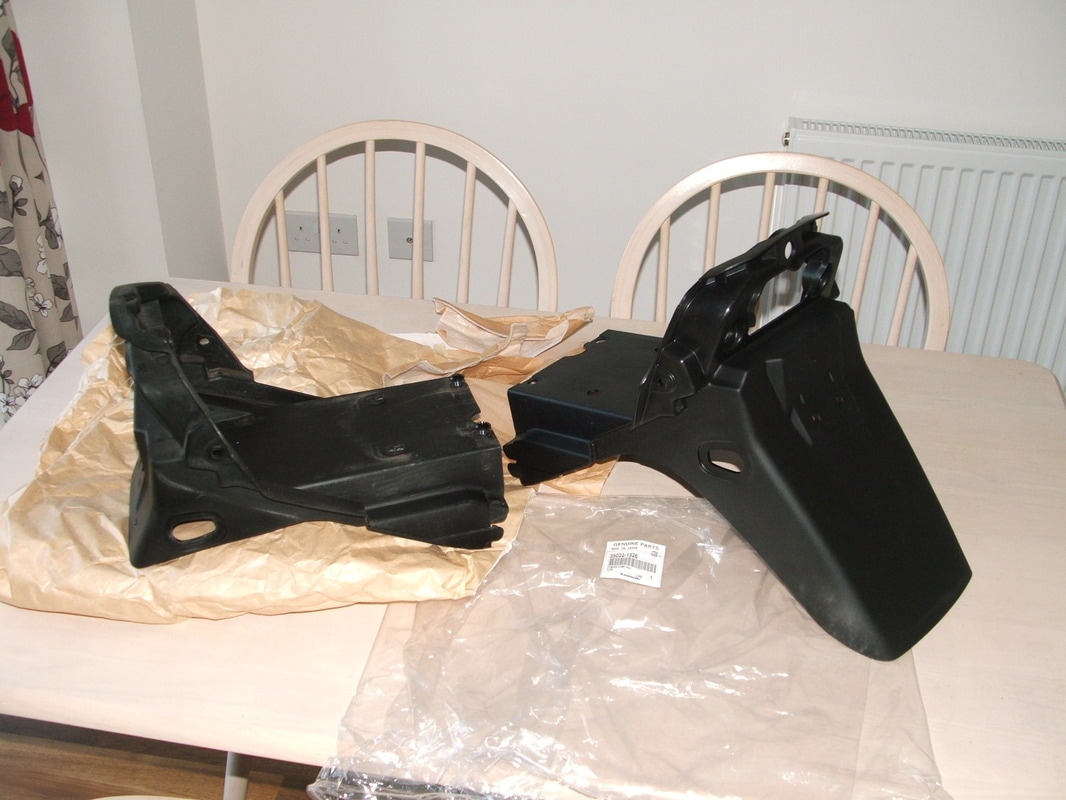
Short & Standard Fenders
The short rear fender does not take a full size licence plate or give much weather protection.
We got a new one from Japan.
Later DAEG models have a thinner version.
Don't forget a thin rubber trim goes on at top centre.
Front Axle & Fittings
These are the front wheel fittings.
Axle nut to left by speedo drive.
Speedo drive lug locates in a slot on the left fork leg.
Don' forget this spacer on the other side !
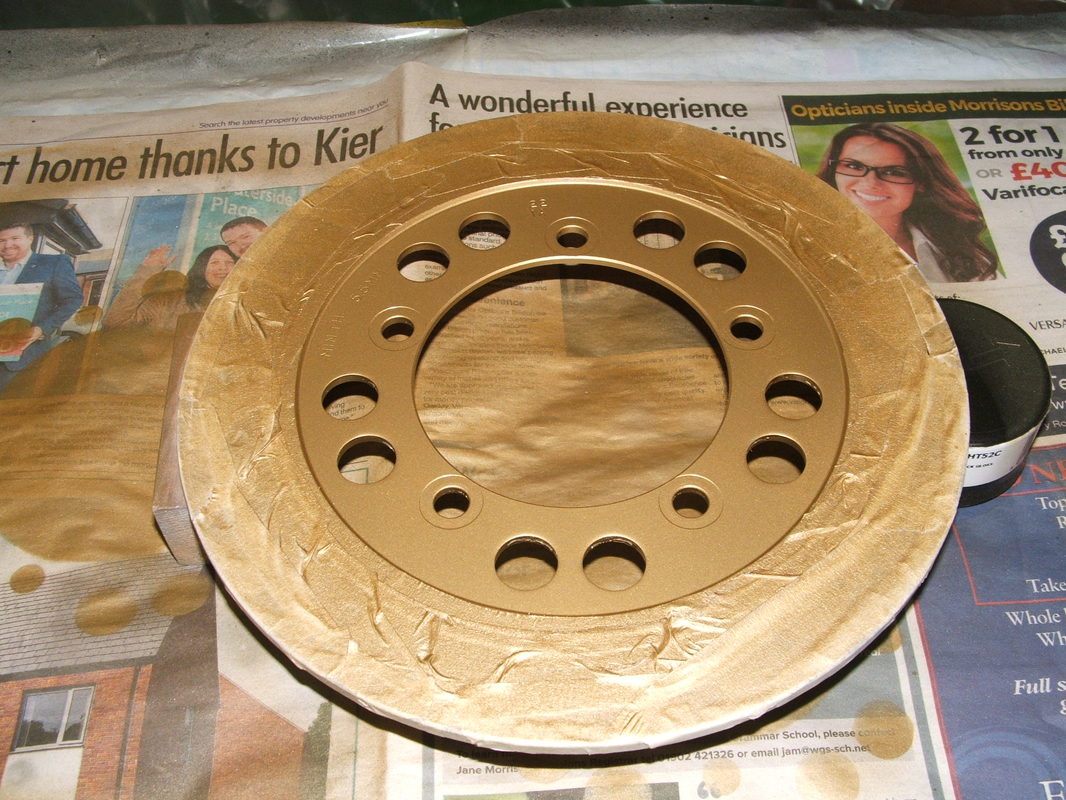
New gold paint
The rear disc needed new gold paint at the centre.
Later bikes had a different hole pattern & darker paint.
The rear comes unpainted but we gave ours a coat anyhow.
Gold & bronze brakes, side covers, engine covers & chain give this model a distinct look.
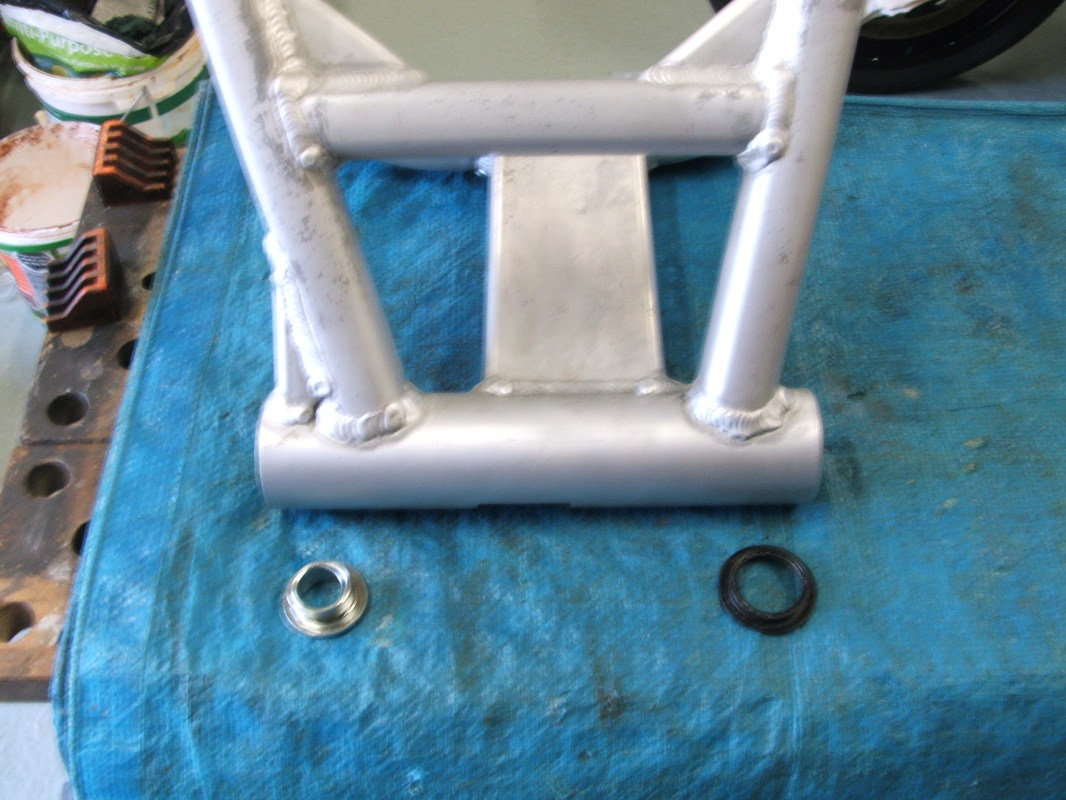
Swing Arm Fittings
The swing arm has a metal spacer at one side and a seal at the other.
The seal fits behind the chain protector.
Don't forget the small grease nipple on the underside.
It's a good time to test it - off the bike.
Grease should come out from both sides if things are right.
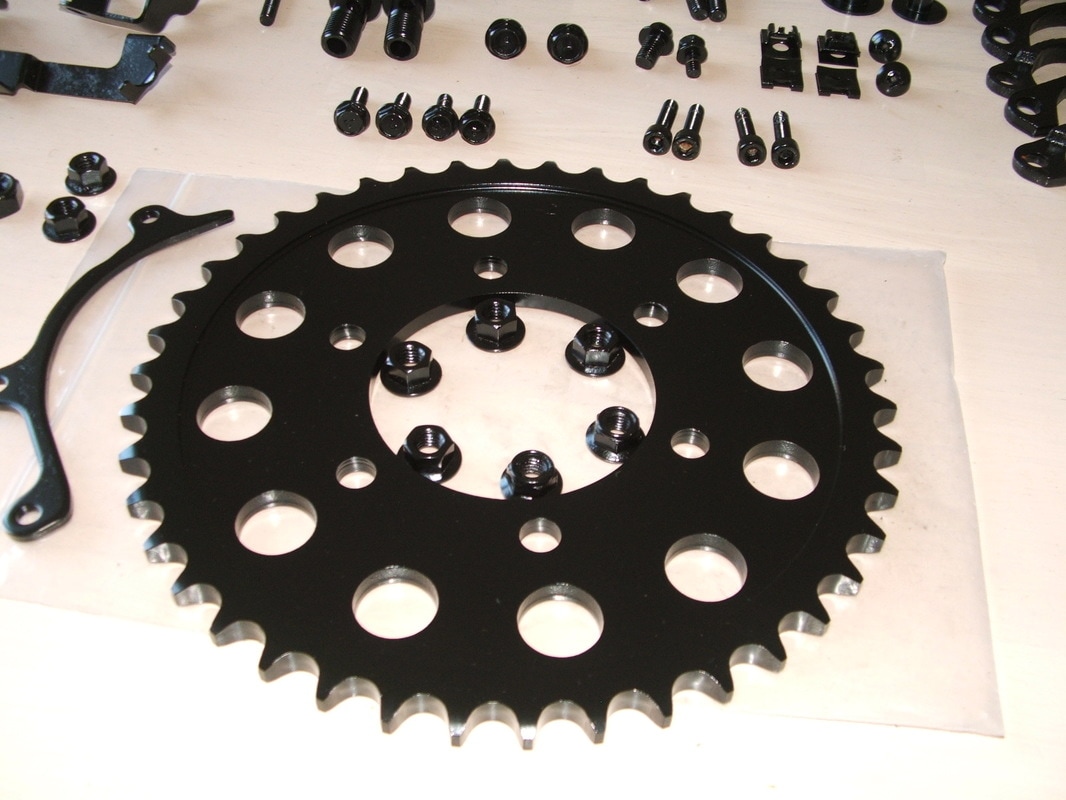
Electrophoretic Paint
The rear sprocket & some other parts were painted by TWB Finishing in Cheltenham.
The process deposits paint by electrolysis - giving a very even layer.
It is then baked for a hard finish.
Repainted Oil Pan
The sump has been cleaned inside & painted outside.
Mask off the pipe access points or you will get leaks.
Copper or aluminium washers give the seal.
It's best to change these for new ones.
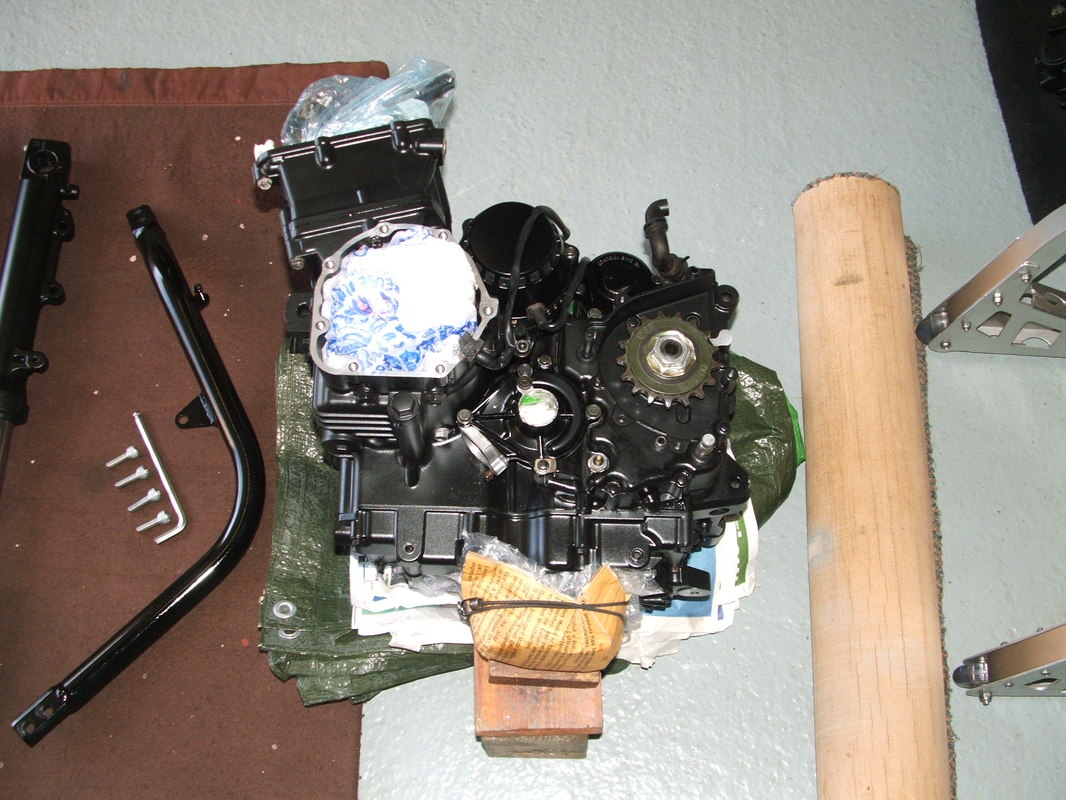
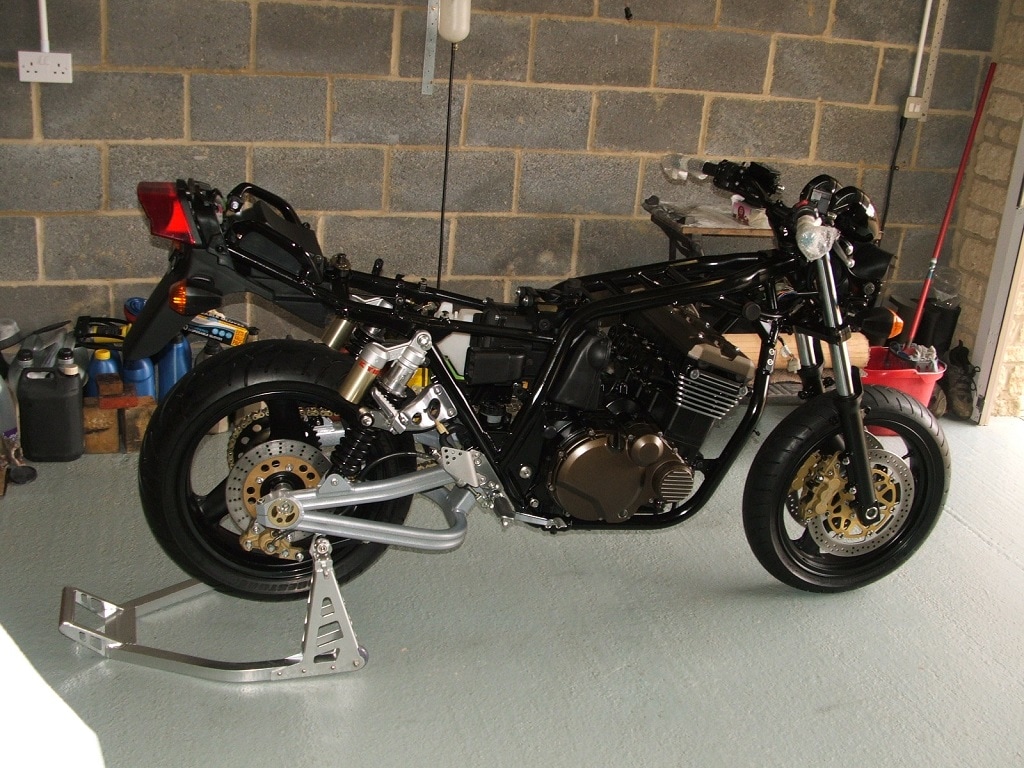
Repainted Engine
The engine has been cleaned & repainted where needed.
The cylinder head will go back on after the engine is in the frame.
It is on it's side and the frame will be dropped over it.
You can see the extra frame piece that has been removed to help..
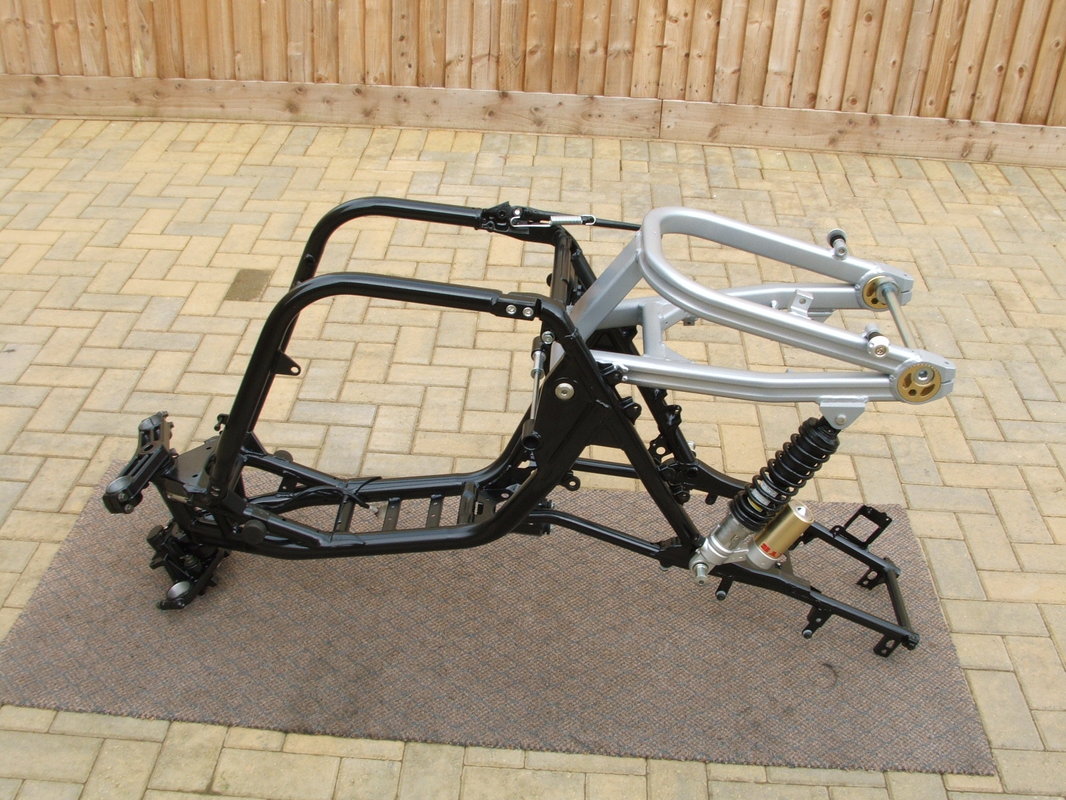
Repainted Frame & Fittings
The frame got swing arm & fork yokes fitted first.
We will need these on to get it upright once the engine is in.
Two helpers are also needed !
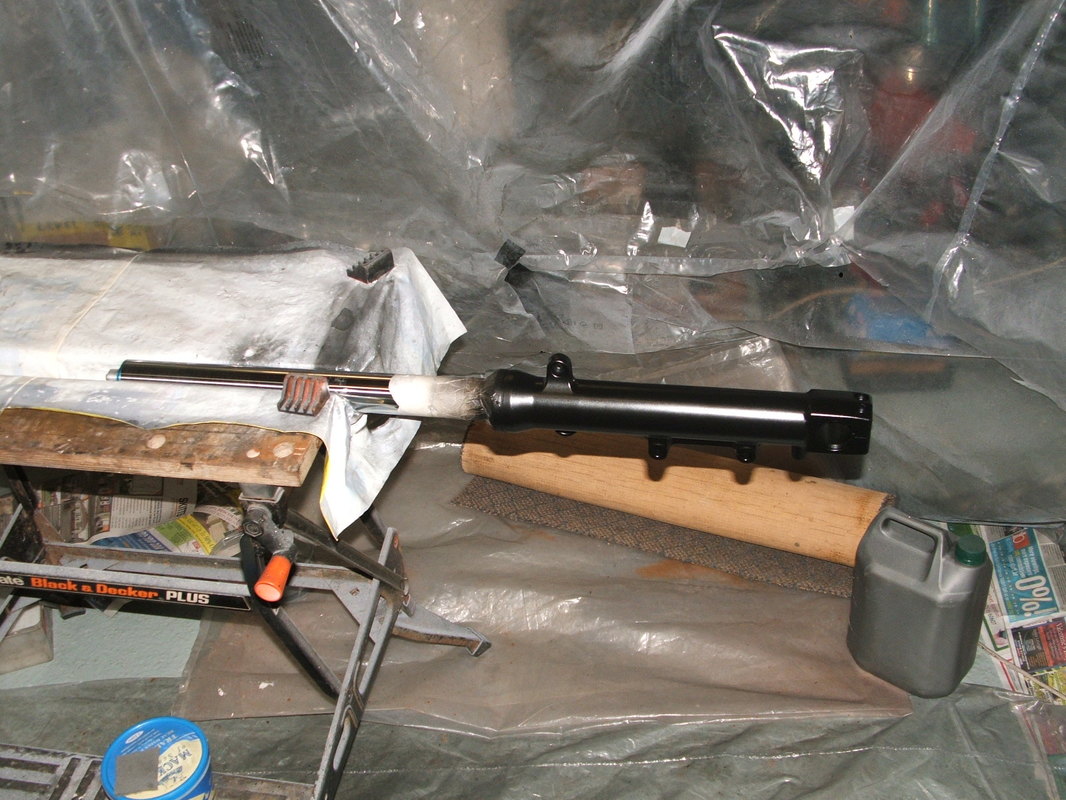
Forks Serviced & Painted
The forks have been serviced with new fork oil.
Use SAE 10w grade for factory settings.
Then they got repainted lowers in satin black.
If you clamp like this they can be turned during spraying.
That stops runs and separate coats.
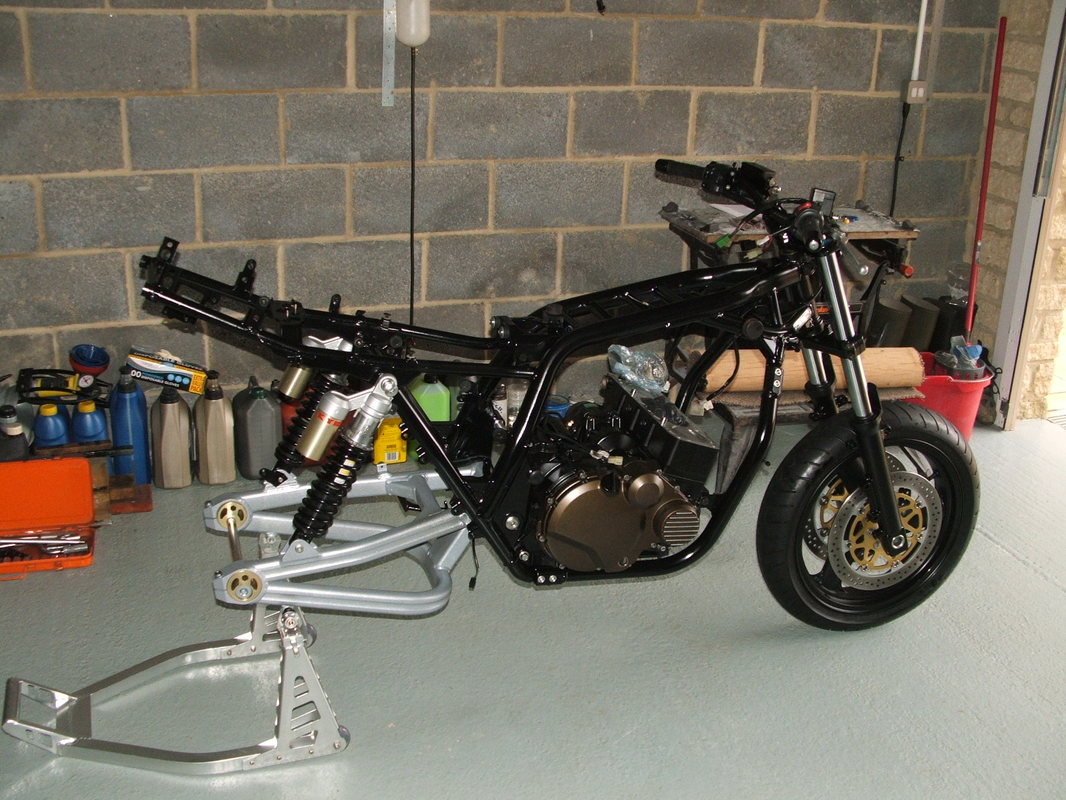
Engine & Frame Assembled
The frame was masked to protect it from the engine.
Once they were together the forks were clamped up.
Once the front wheel was in the whole lot was lifted upright.
The paddock stand can then take the strain.
The frame tube and handlebars were fitted next.
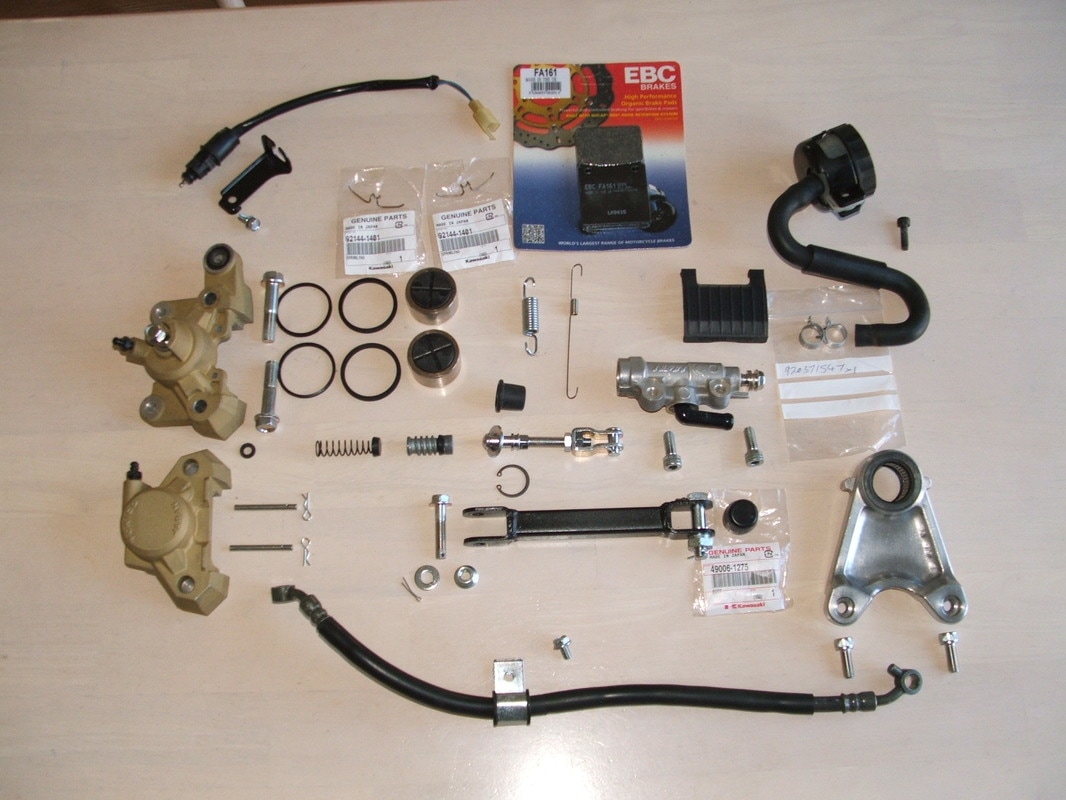
Rear Brake Components
The rear brake was stripped & cleaned.
New parts from Kawasaki were fitted.
There is a rubber shroud over the front torque arm bolt.
Get a rebuild kit for the rear master cylinder on our Cool Parts page.
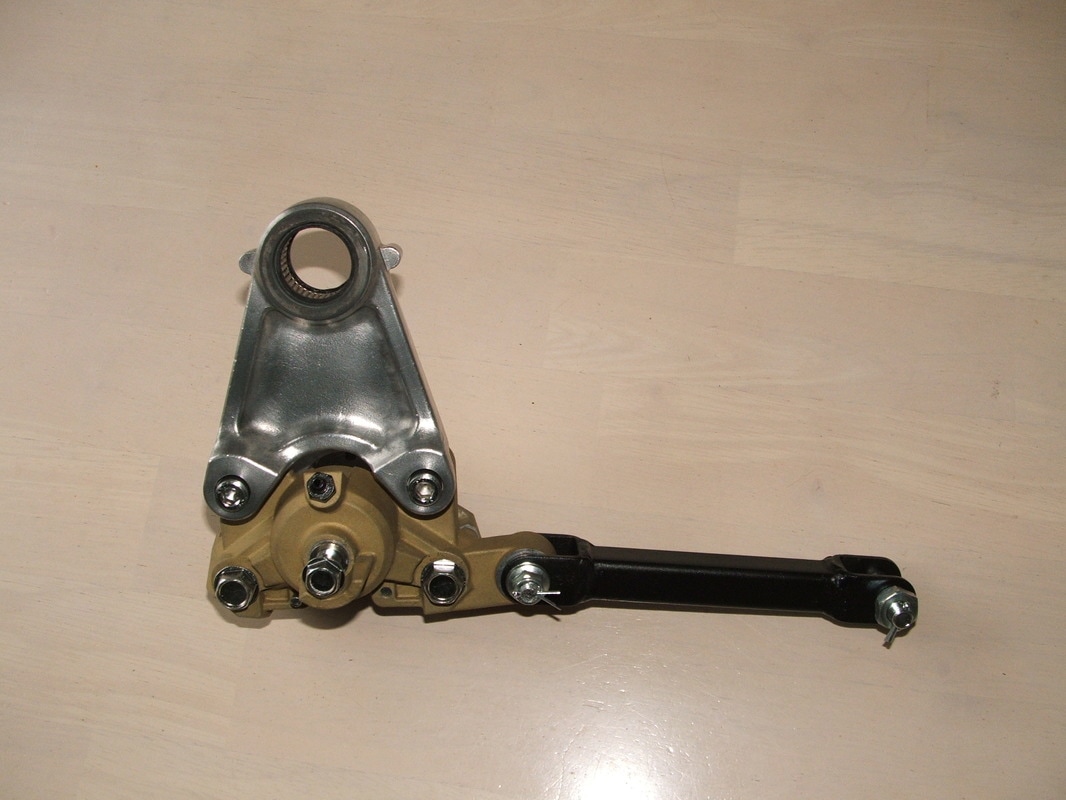
Rear Brake Assembled
The calliper hangs from the rear axle.
The torque arm is anchored to the swing arm.
There are two bleed nipples and a plastic cover clips over the pads.
The gold colour is copied at the front end.
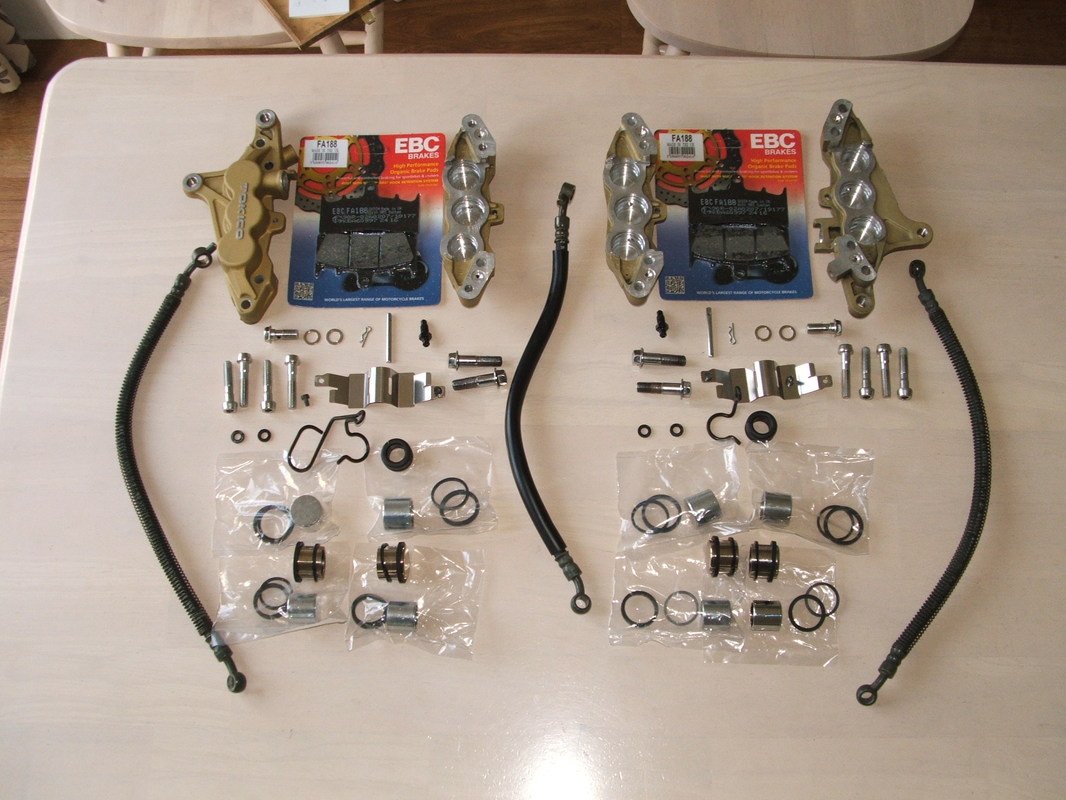
Front Brake Components
The front brakes got the same treatment.
New EBC pads were fitted all round.
The right brake hose has a lug on the lower union.
The left does not have this.
Most of the pistons, and all the seals, were replaced.
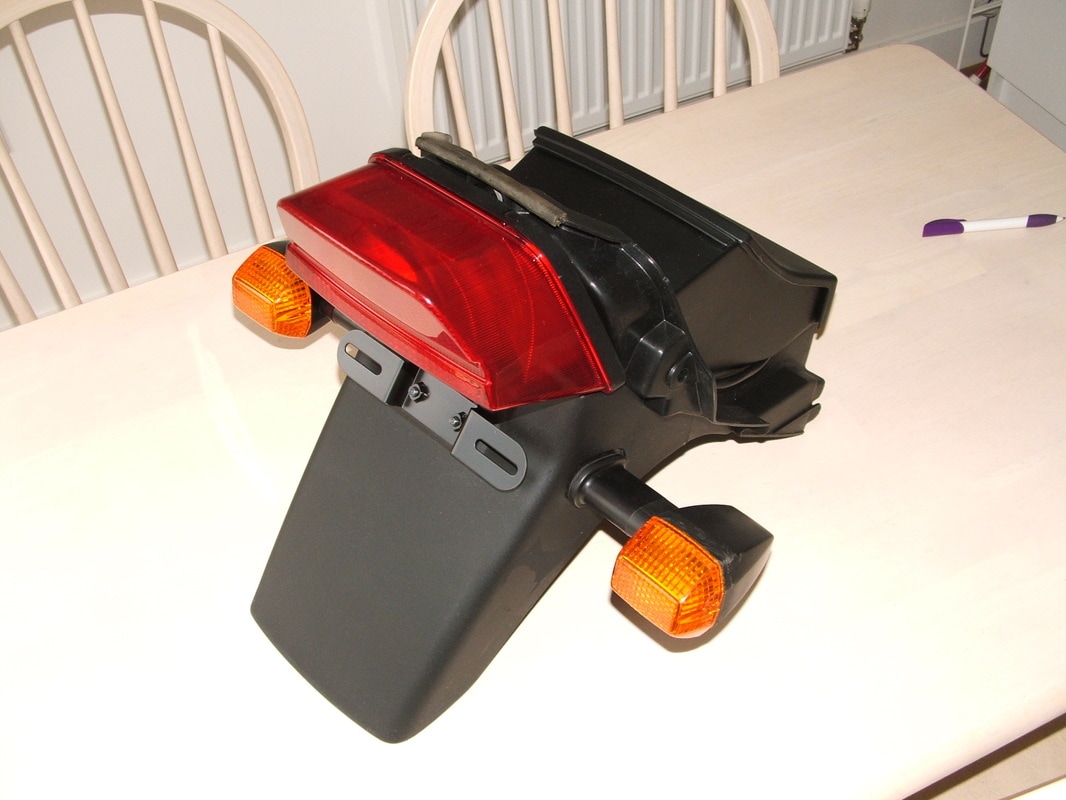
Rear Light & Fender Assembly
The rear fender, licence plate bracket, igniter box, reflector, tail lamp & rear indicators can be assembled as a unit off the bike.
The tool box needs to be fitted afterwards - when wires have been connected.
Note the rubber damper strip in place above tail lamp.
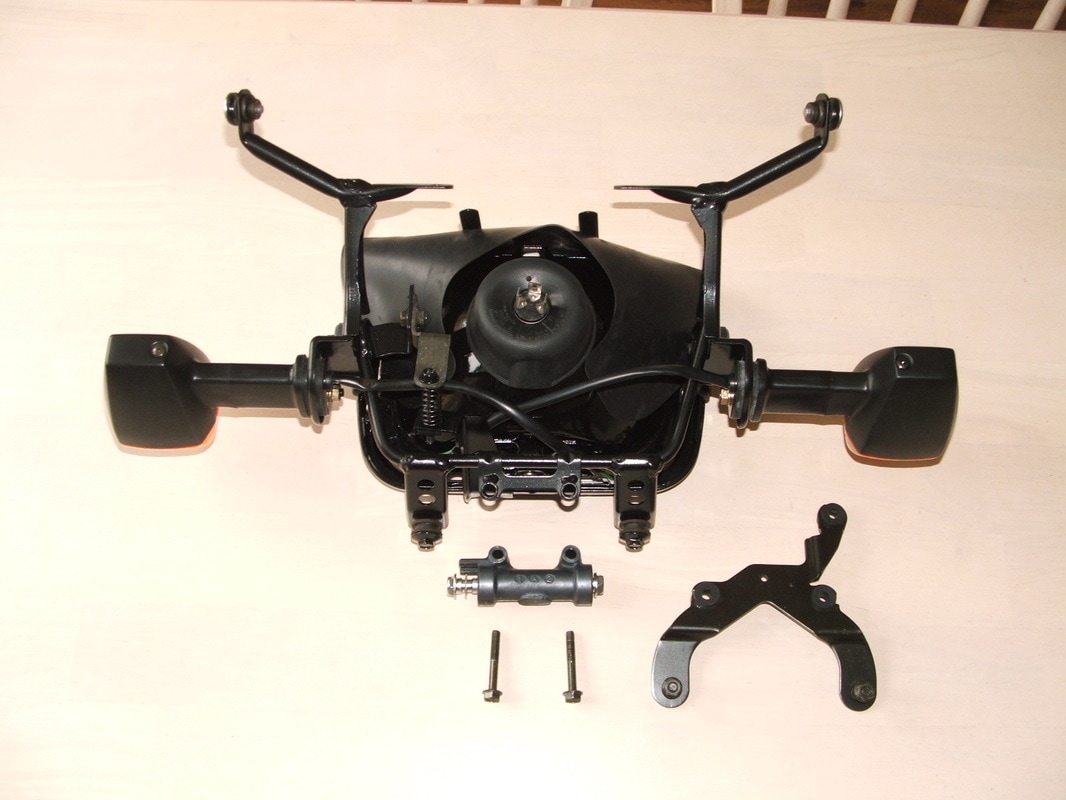
Front Light & Indicator Assembly
The fairing bracket can also be pre-assembled.
Indicators & Headlight have been fitted here.
The brake splitter bolts go through the two central tubes.
The bracket shown lower right is hidden behind the instruments.
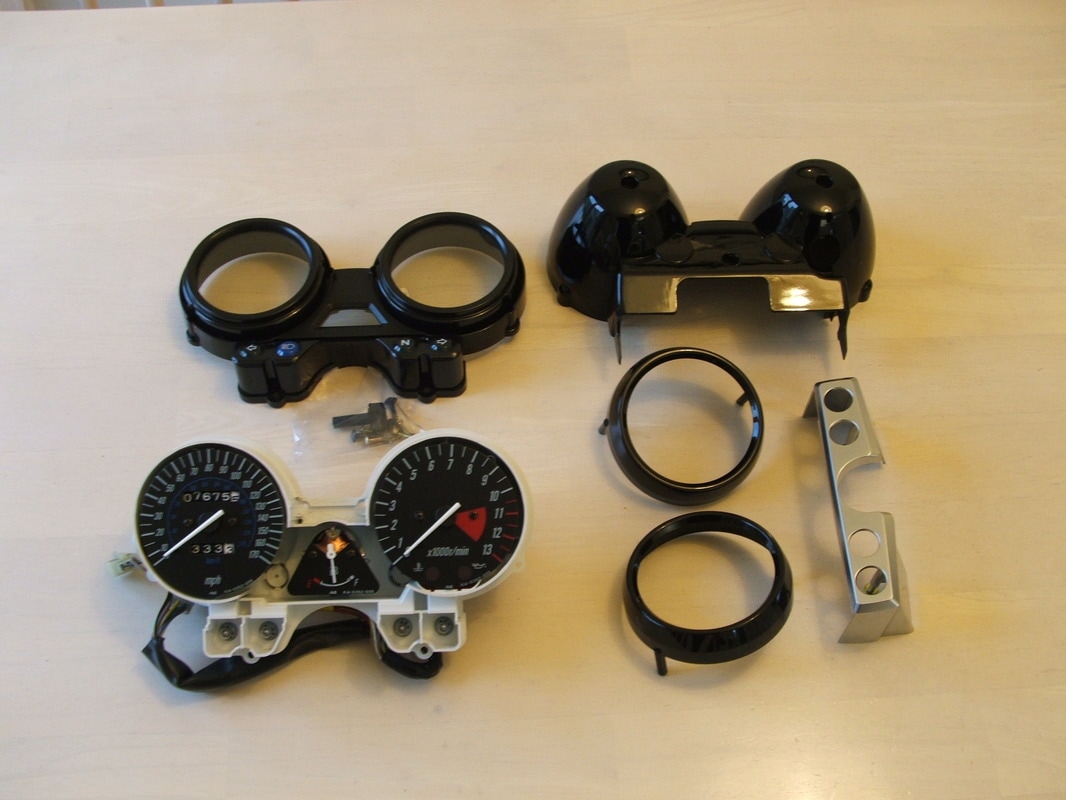
Instruments Dismantled
The instruments were dismantled and given a good clean.
The glass can get misty or dirty - even on the inside.
Under 8000 miles showing from new with MOTs to prove it.
Now is the time to check all the bulbs.
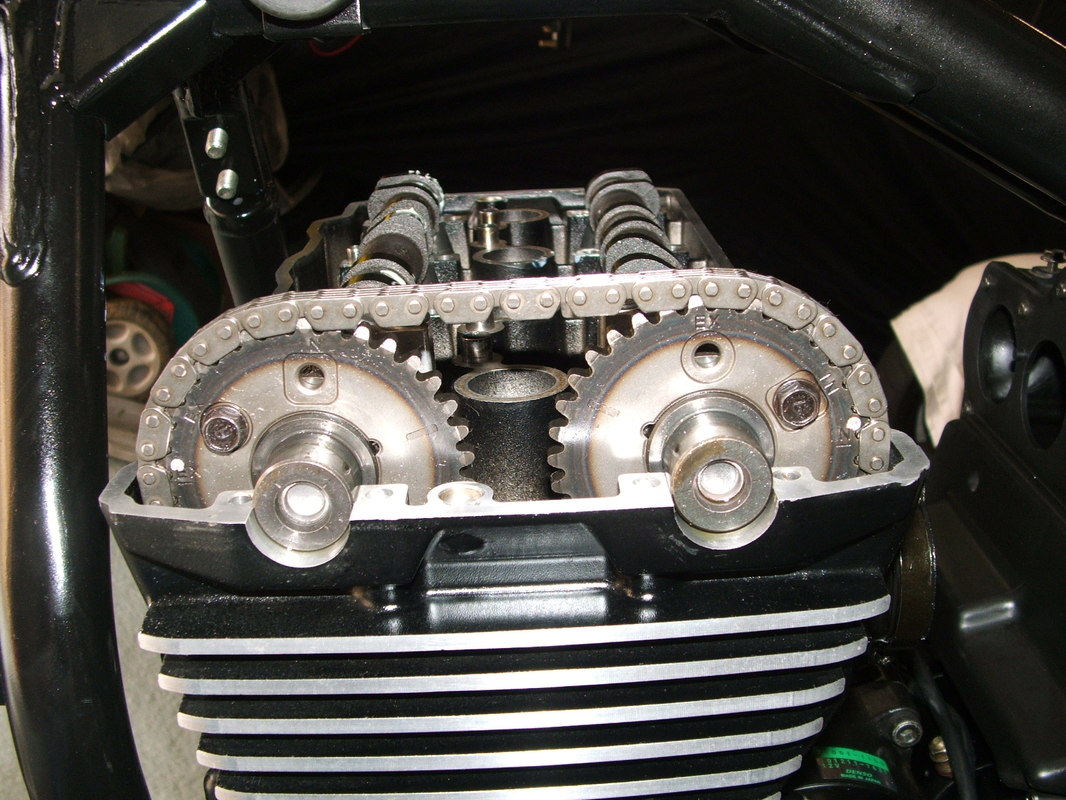
Valve & Cam Timing Marks
The repainted cylinder head was fitted. Then the valve timing was set.
You can see the white timing marks on the sprockets.
The Cam Chain Tensioner ratchet is re-set then fitted back on with a new gasket.
Then the valve shims can be checked for clearance.
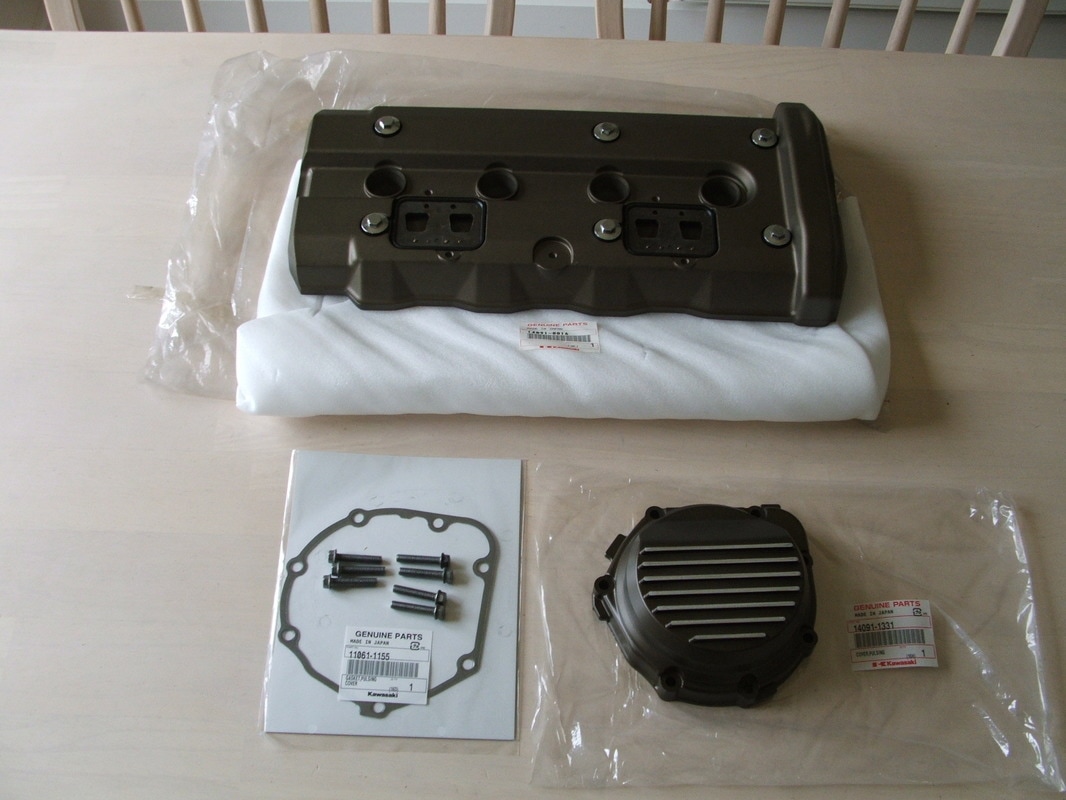
New Cam Cover & Pulse Cover
The engine can be closed up with new covers.
Here is the cam cover and pulse (timing) cover.
The extra holes on top are for reed valves and an air circulation system.
It is called KLEEN - Kawasaki Low Emissions Exhaust.
Many owners blank off the holes and do not refit the parts.
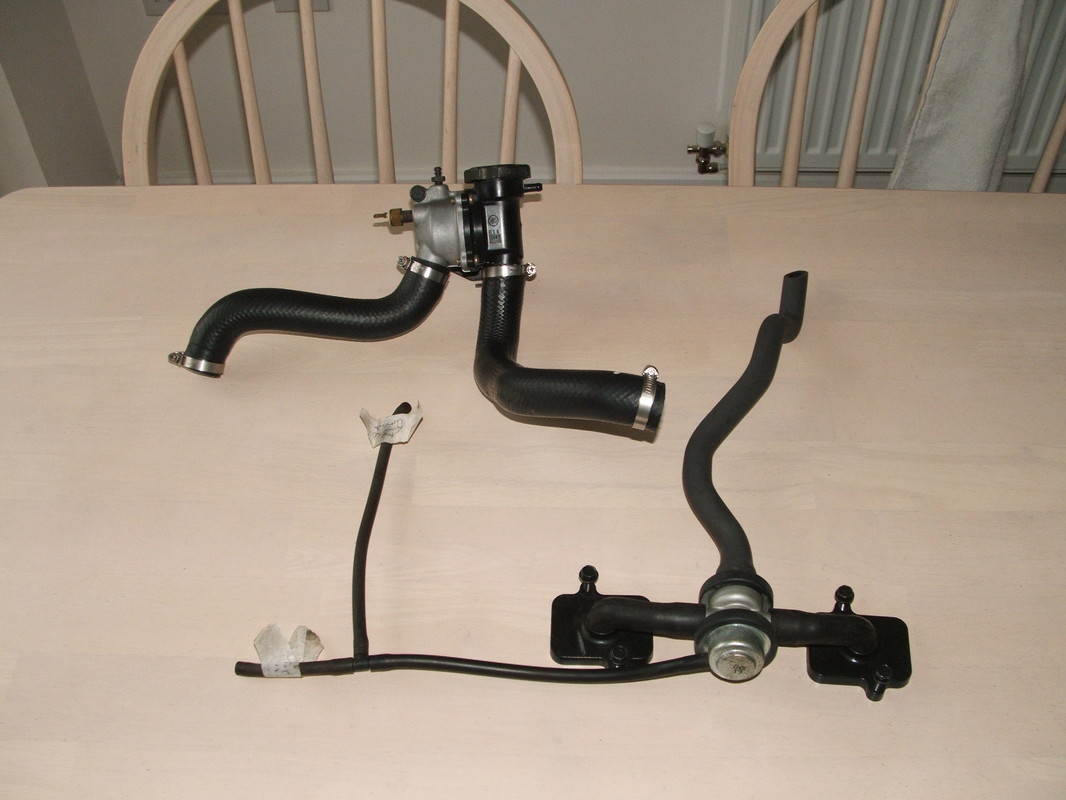
KLEEN Pipe Work
The KLEEN pipe work is front right here.
It links to the carbs via small tubes.
The large tube goes into the airbox.
At rear is the thermostat & radiator cap - with hose to rear coolant pipe & front right of radiator.
Rear Wheel & Engine Completed
The rear wheel and new chain are needed for turning the engine over.
Shift up to 5th gear if you can - better leverage.
Keep the plugs out or loose to lower compression resistance.
Don't use the nut inside the timing cover - it can shear.
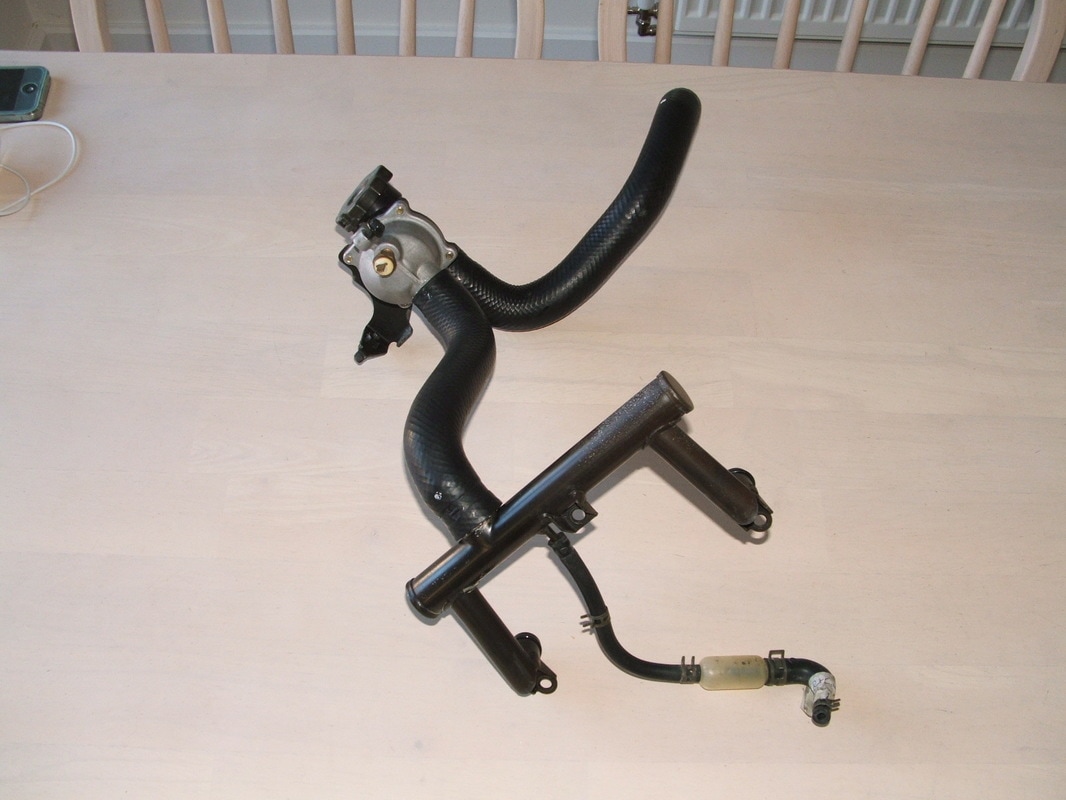
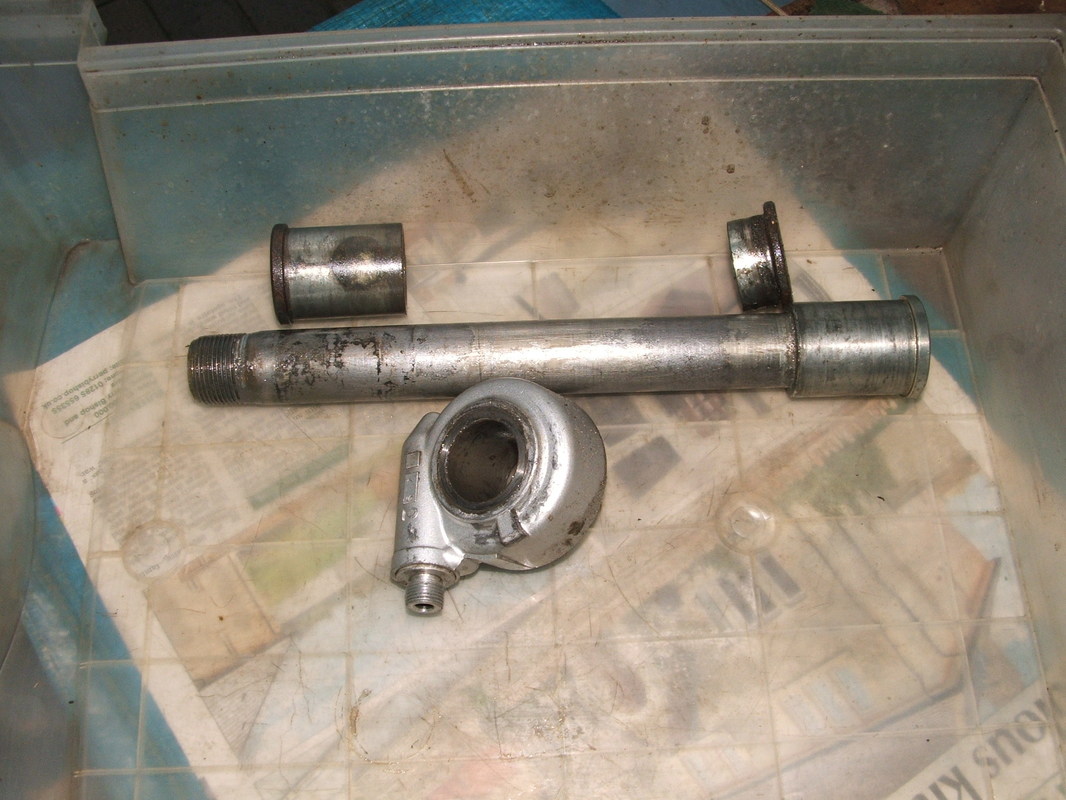
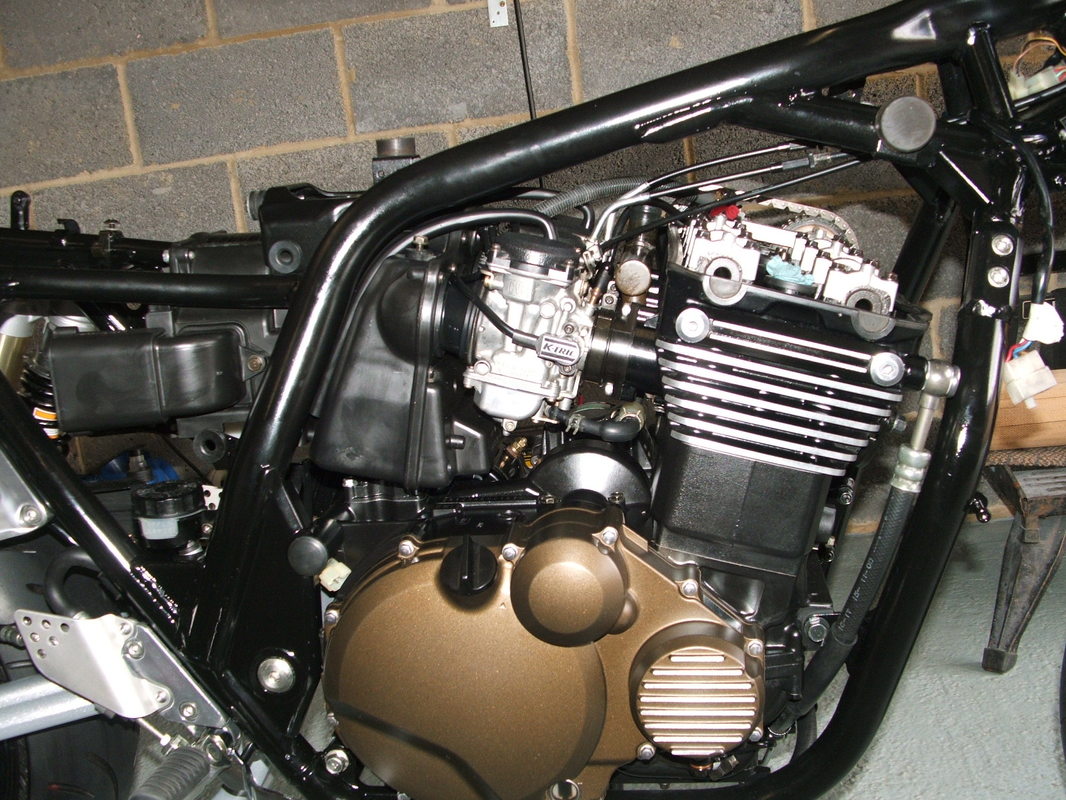
Rear Coolant Pipe
The rear coolant pipes need fitting before the carbs go on.
Two O rings provide the seal to the cylinder head.
Three small bolts hold the pipe in place.
The small pipe at centre has an important job . . .
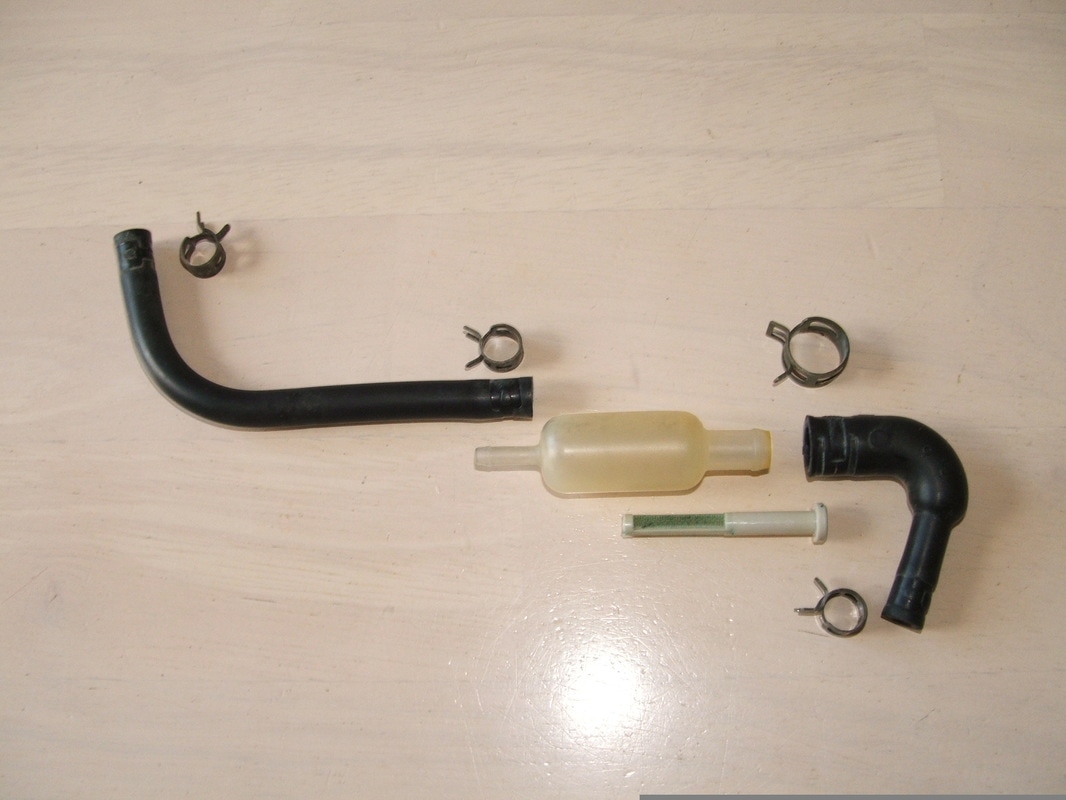
Coolant filter Parts
It contains a coolant filter which must be cleaned out.
Note the different pipe widths and clip sizes.
Kawasaki recommend Green coolant with ethylene glycol.
Use 1 part coolant to 1 part distilled water.
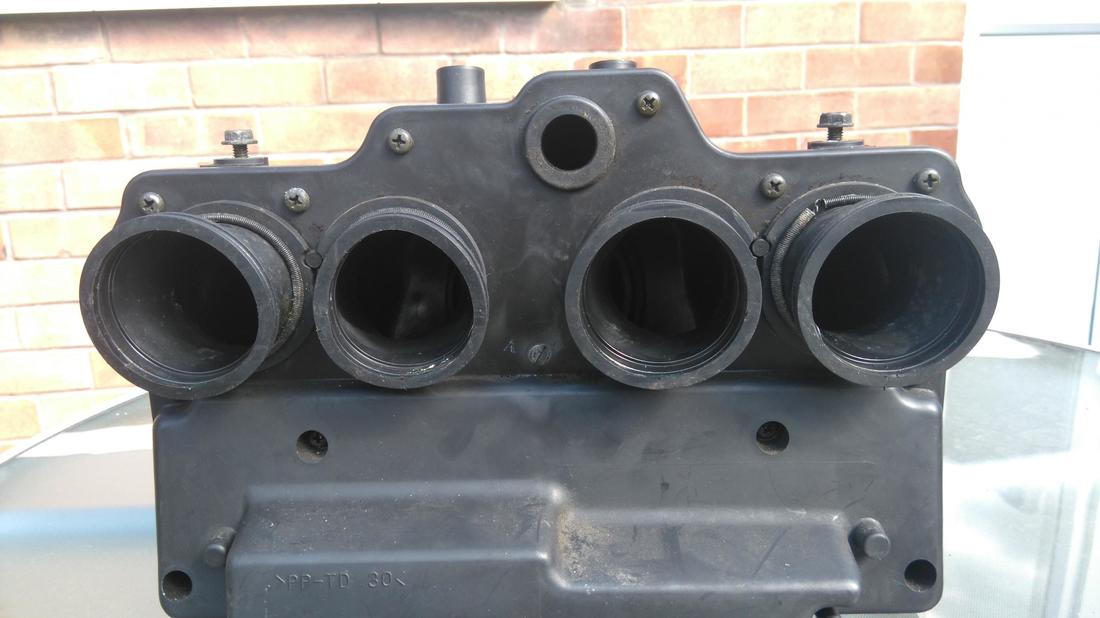
Airbox Rubbers Fitted
The small grommet at top centre will take the rear pipe from the KLEEN apparatus - often called the "Octopus" due to it's shape.
Airbox rubbers are marked 1 & 3 or 2 & 4.
They should line up with cut outs against the stub on the box like this.
Ready for the Carbs
Fit the airbox, carb rubbers & rear coolant pipe before the carbs go back on. Note the clamps have screws at top and holes at base locate in the rubber.
Don't tighten the airbox up yet - wriggle room is needed when the airbox rubbers are being inserted (after the carbs are in place).
TIP - feed the rear rubber through from the rear of the airbox (filter housing removed) - outers first.
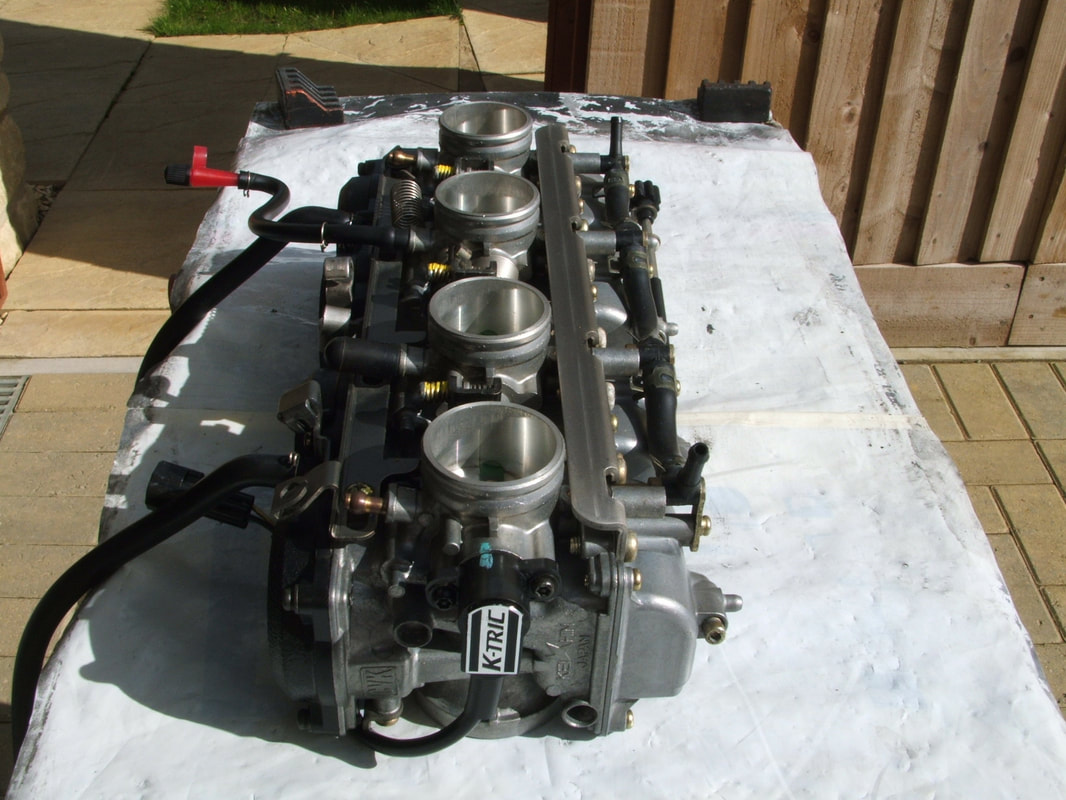
Clean Carbs & KTRIC calibration mark
The carbs have been cleaned and checked and a missing screw on the choke arm replaced.
Note the calibration mark for the K-TRIC sender unit. Once loose it will rotate and go out of adjustment so make sure you have a mark.
TIP - the red plug is blocking the vacuum pipe for the fuel tap. You need to do this when running the bike without the fuel tank.
Rear Airbox Assembly & Carb Vent Pipes
When the carb rubbers & clamps have all seated correctly the rear airbox section can be fitted - it holds the filter and has a thin damper rubber to seal it to the front box. Now the side snorkel has also been added.
You can also see how the black carb breather pipes are located - between frame tube & airbox. There will be side covers added to the box later.
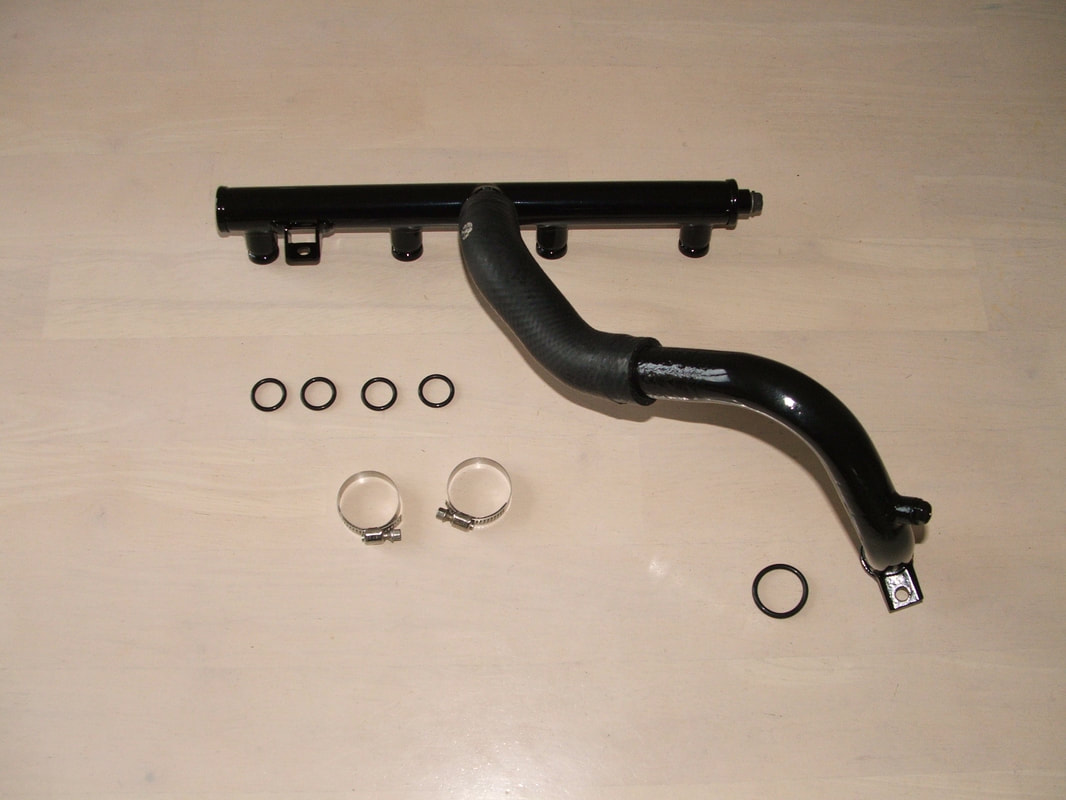
Front Lower coolant pipework
This coolant pipe bolts on before the exhaust down pipes are added.
The lower metal pipe gets road rash from the front tyre and was repainted.
The upper pipe is new, as are the O rings.
Don't forget to change the lower O ring at the water pump and clean where it seats.

Front Coolant Pipe
Here is the fitted pipe. It has four O rings to seal it.
You need to fit this before the exhaust system goes on.
Here we have masked the frame & lower coolant pipe - to stop scratches from the exhaust as it goes on.
Grease spots hold the copper header pipe gaskets in place.
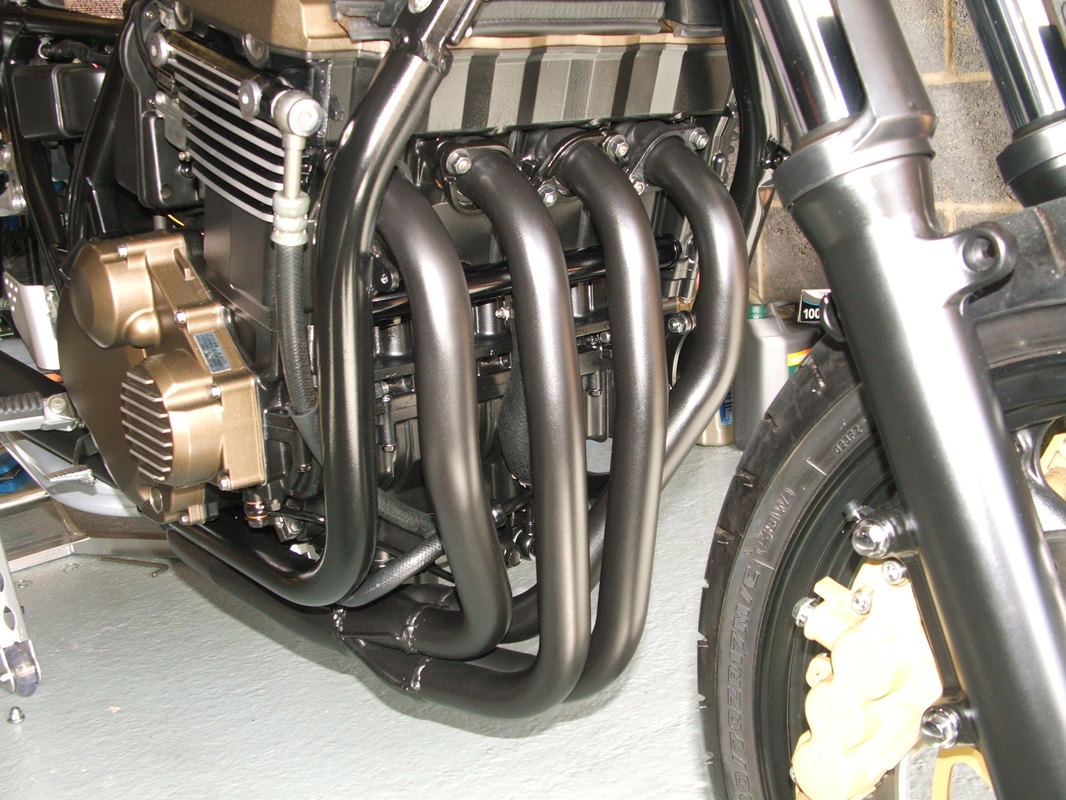
Exhaust Fitted
The Header Pipes are now in place.
There is a bolt at the rear of the oil pan to hold the mid pipe.
The oil pan pipes need fitting first.
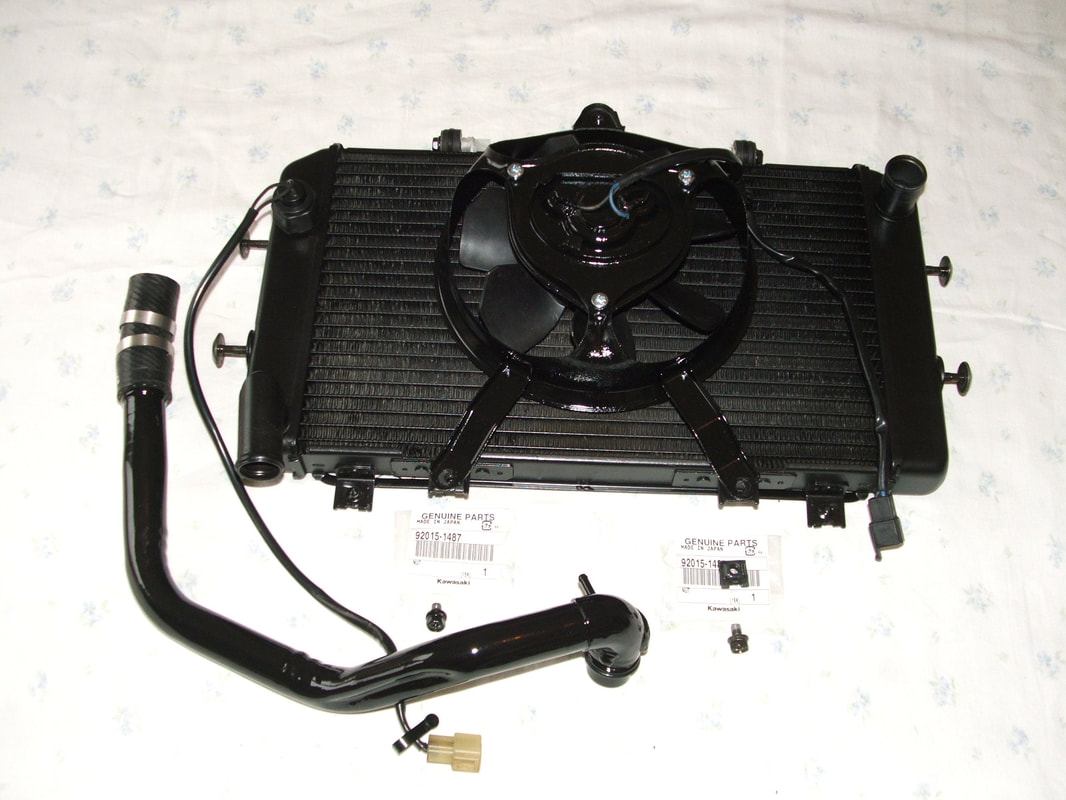
Radiator, Fan & Front Upper Coolant Pipes
This assembly can be added after the exhaust downpipes and mid section have been fitted.
TIP - there is an outer right radiator cover which must be added BEFORE these pipes are fastened up. The left outer cover can be done later.
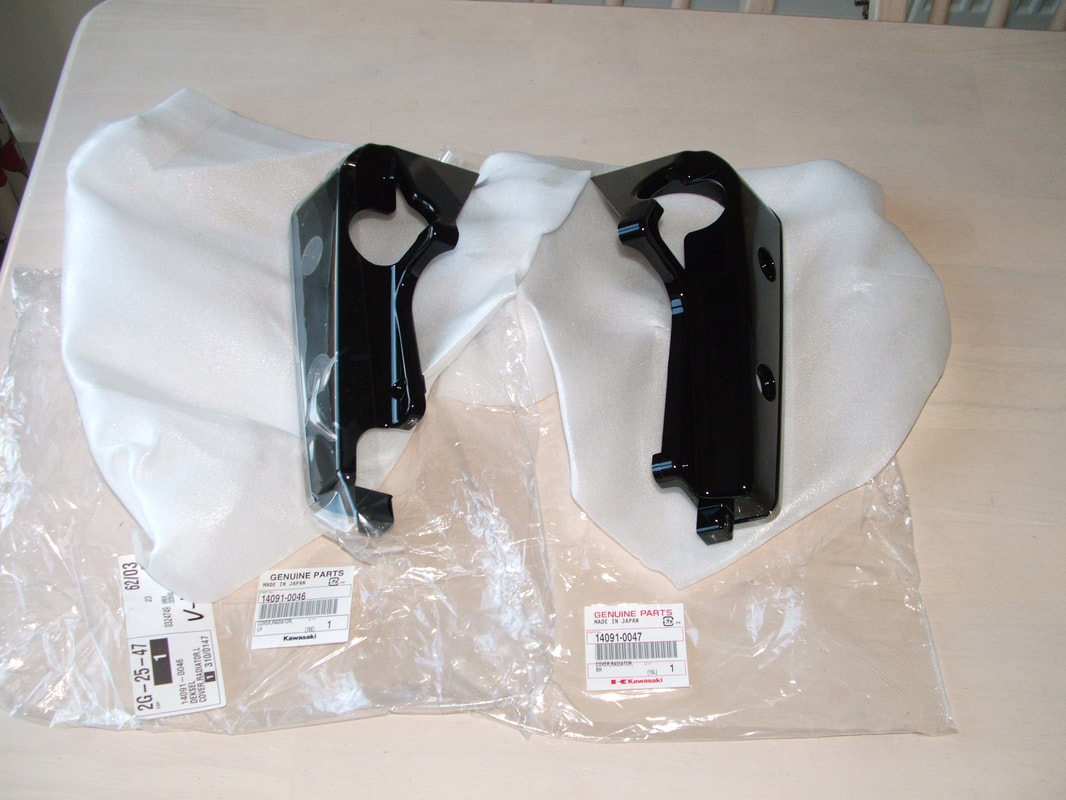
New radiator covers
Our rebuild has new outer radiator covers.
The hole in the top right is for a coolant hose to pass through.
The top left hole is for the radiator temperature sender.
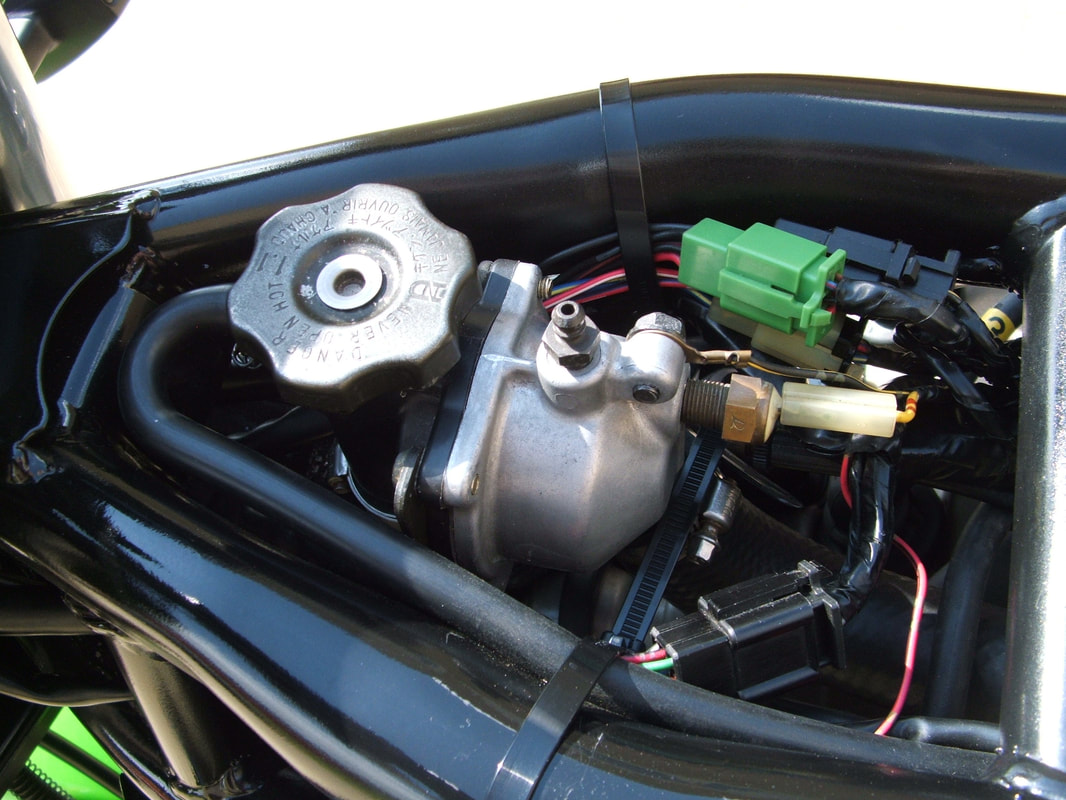
Thermostat assembled
Here is the thermostat & harness reassembled.
You need to run the engine with fuel tank off to bleed the coolant system.
There is a bleed nipple here and also a bolt to loosen at the water pump.
The looped pipe leads to the coolant reservoir.
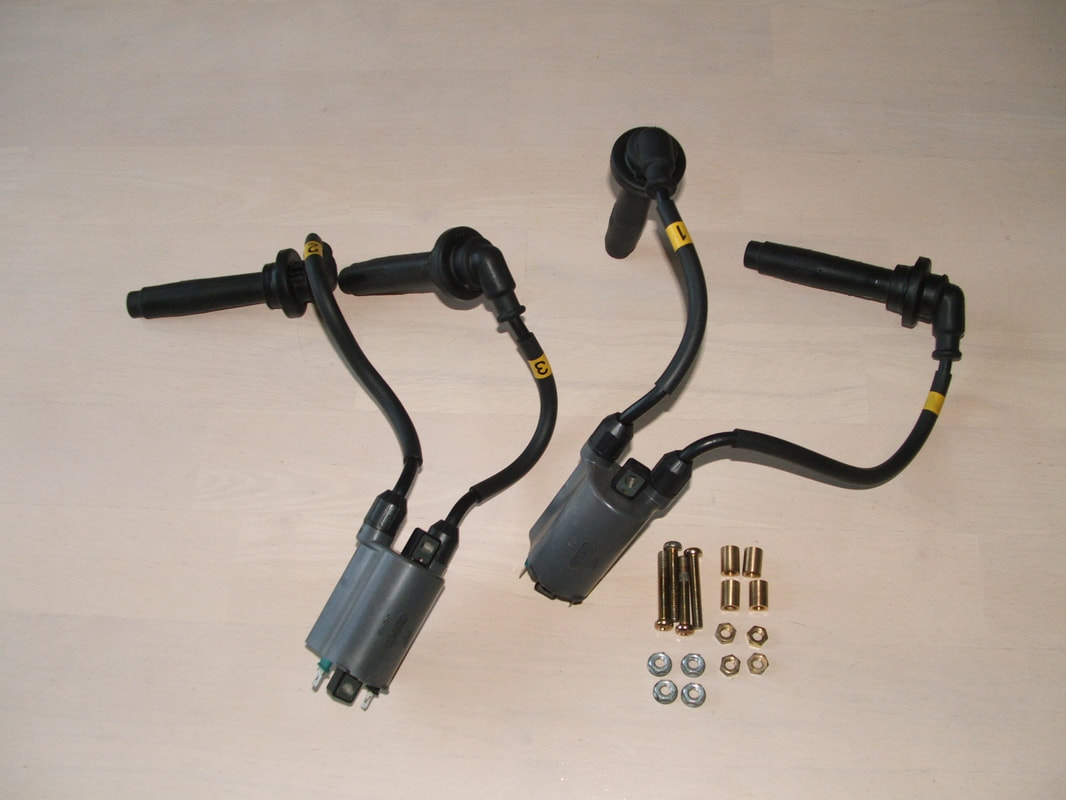
Original Coils & Fittings
The original coils have cleaned up fine and all the fasteners are factory fresh again.
Make sure the HT leads are still flexible and ensure they are routed clear of the top of the engine to avoid heat transfer. Yellow cylinder number decals make sure there are no mistakes.
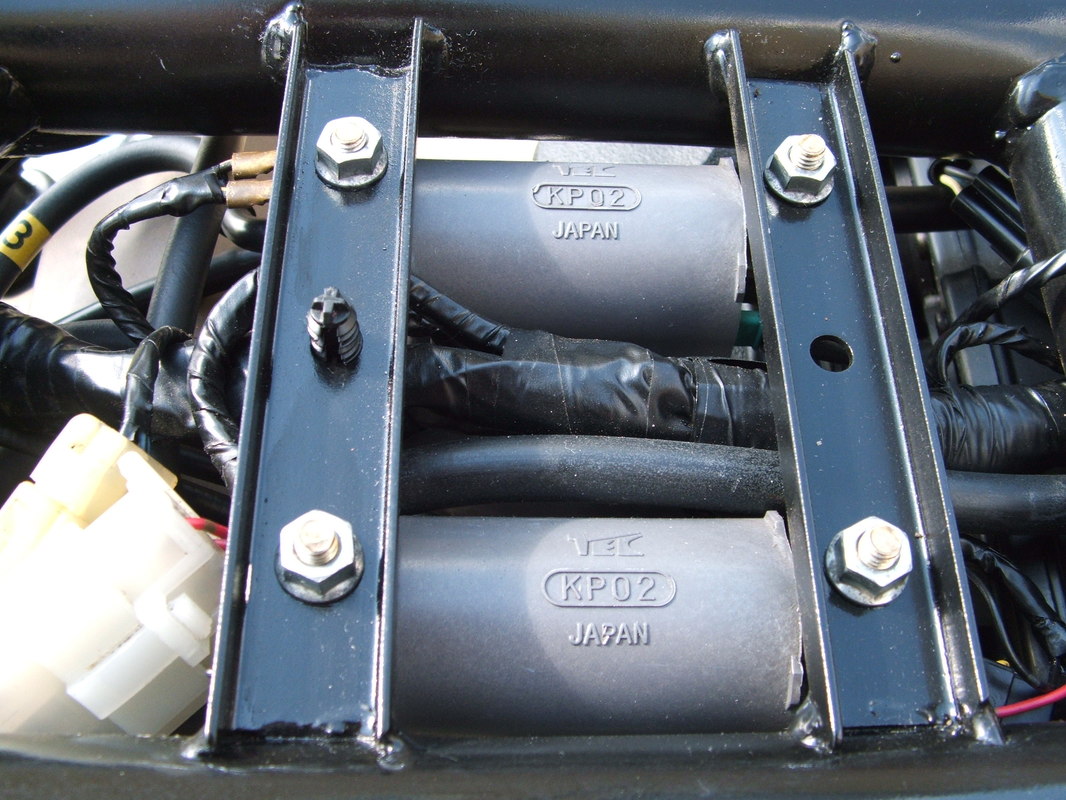
Coil earthing point
The front right coil bolt is also used by an earth lead.
Things start to get tight when the wiring harness is added.
There is a plastic harness clip mounted in between the front coil bolts.
The radiator, thermostat, choke cable, coils and plugs are now in place.
You can see the oil capacity decal on top of the clutch cover.
This original clutch cover has a chipped fin and it will be replaced with a new item later.
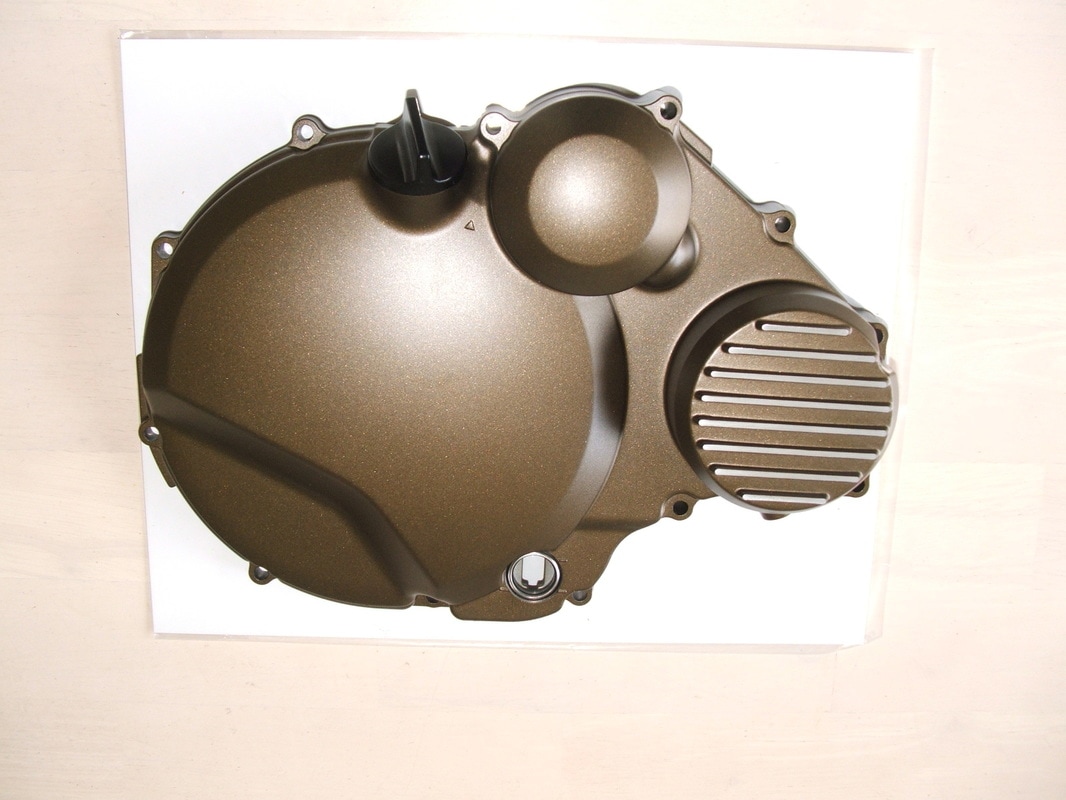
New Clutch Cover
. . . and here is the new Clutch cover.
You have to fit a new sight glass - use washing up liquid to get it in place.
On the inside you must swap a damper plate and one oil pipe from the old cover.
The four front bolts need locking agent.
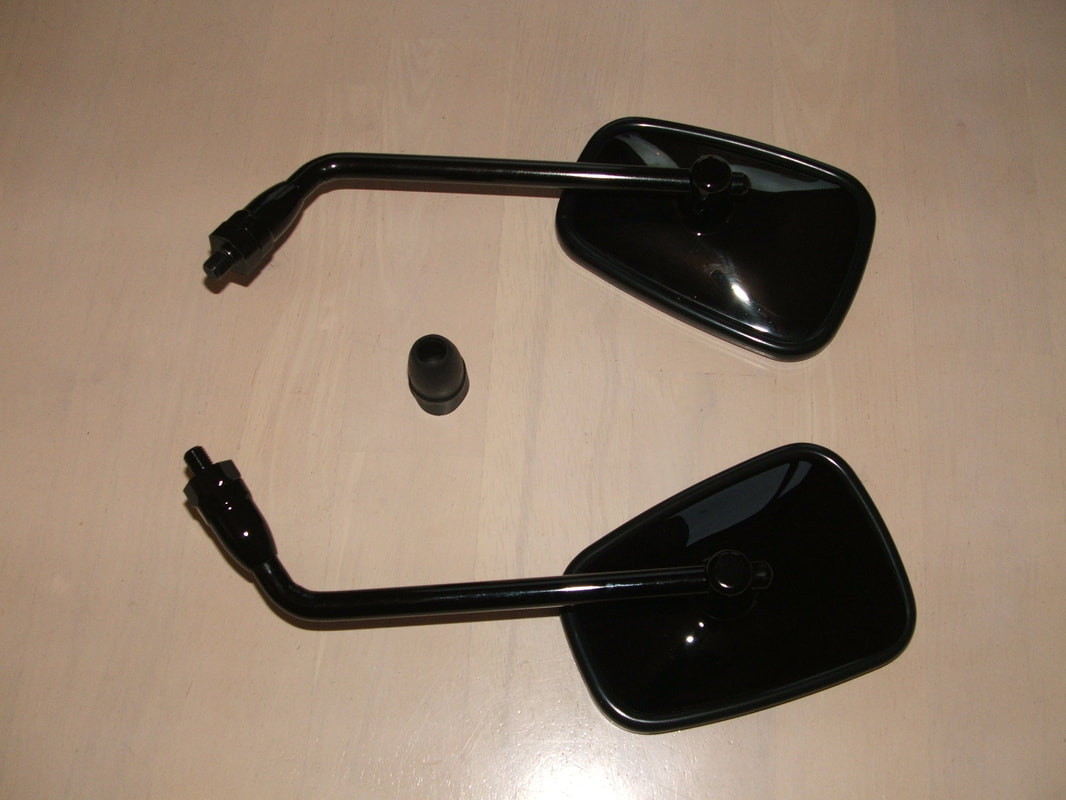
New mirror - rubber cover removed
One mirror had security numbers etched into the glass.
This was distracting so a new one was fitted. New ones have a rubber cover at the base which does not match the 2001 look.
We removed the rubber and painted the new one to match our original.
You can see the spare rubber here.
Can you spot the new mirror ?
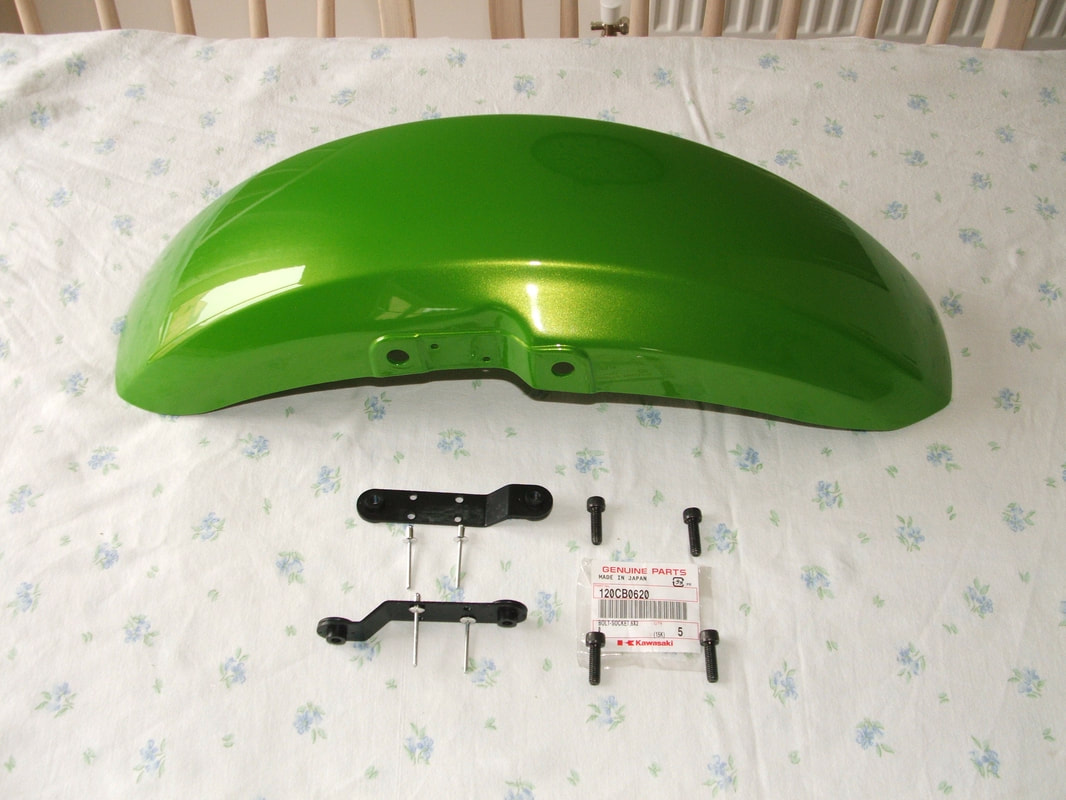
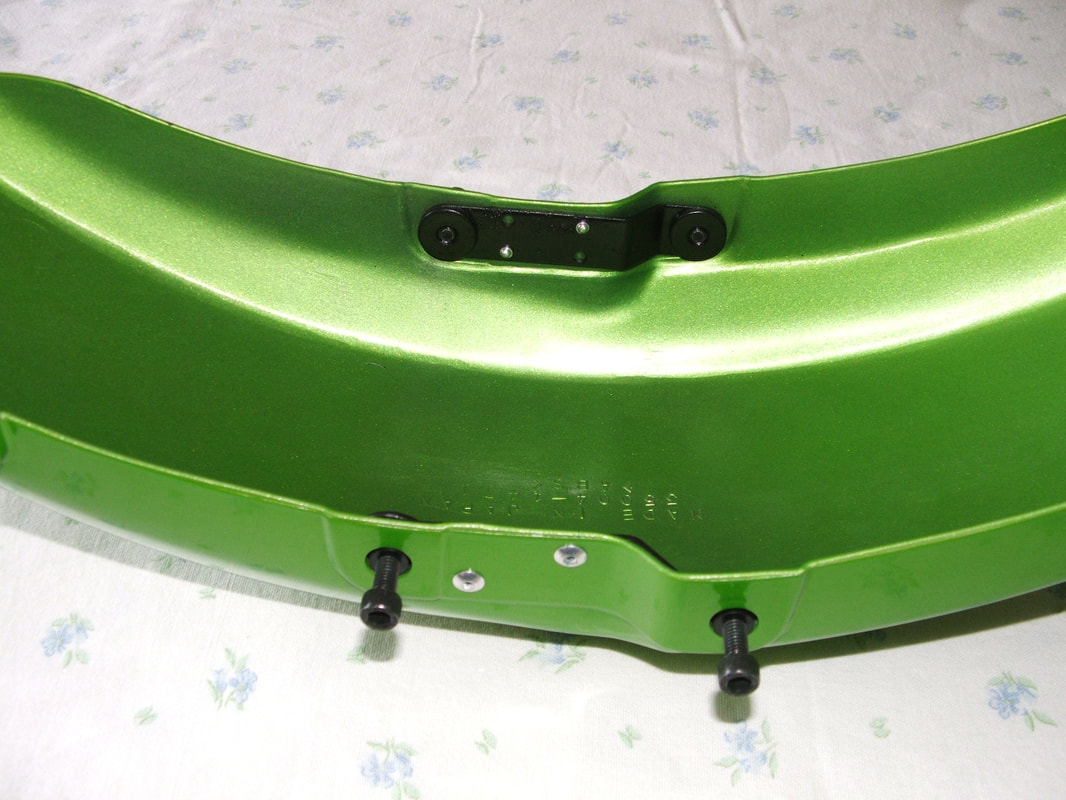
Repainted fender & fittings
The front fender has been repainted now.
The rusty inner brackets are back to new condition.
The brackets are held to the fender with pop rivets (mind that new paint !!)
Four new allen bolts hold the fender to the front forks. There is also a black plastic speedo cable guide fitted to the other side.
Front Fender assembled
Here is the front fender reassembled ready for the bike.
No need for underseal as it is made from ABS plastic.
The black brackets have been de-rusted, electro phoretically painted and then spray painted with a final coat. So they won't corrode again.
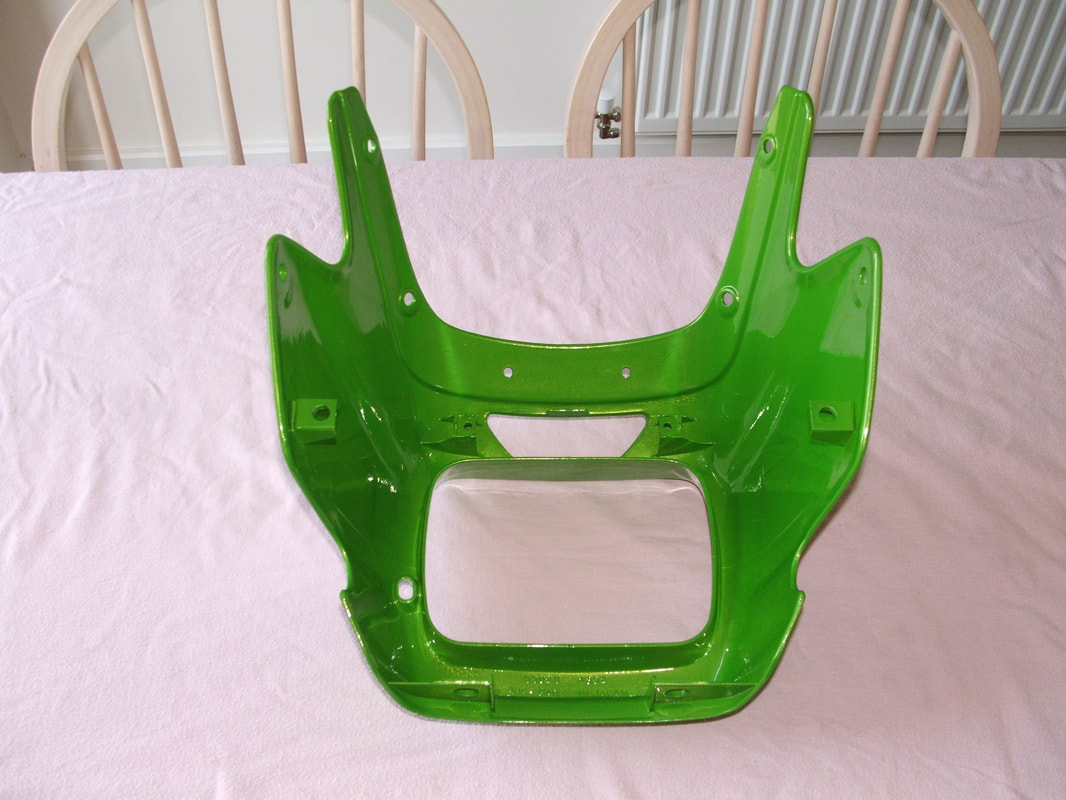
Fairing inner paintwork
The fairing has been repainted inside & out.
The space above headlamp is for a UK & Euro running lamp.
In the USA this is a body coloured vent.
The fairing has a black tray in the middle to cover the wiring harness & headlamp assembly. The speedo & tacho sit above this, behind a smoked screen.

Eddie Lawson colours & style
This colour scheme reminds us of the great racer Eddie Lawson - it was also used on Z1000R and Z1100R bikes.
Two black bolts at front lower and two silver flanged allen bolts at left & right outer edge can be seen fixing it to the bike.
Two black bolts at front lower and two silver flanged allen bolts at left & right outer edge can be seen fixing it to the bike.
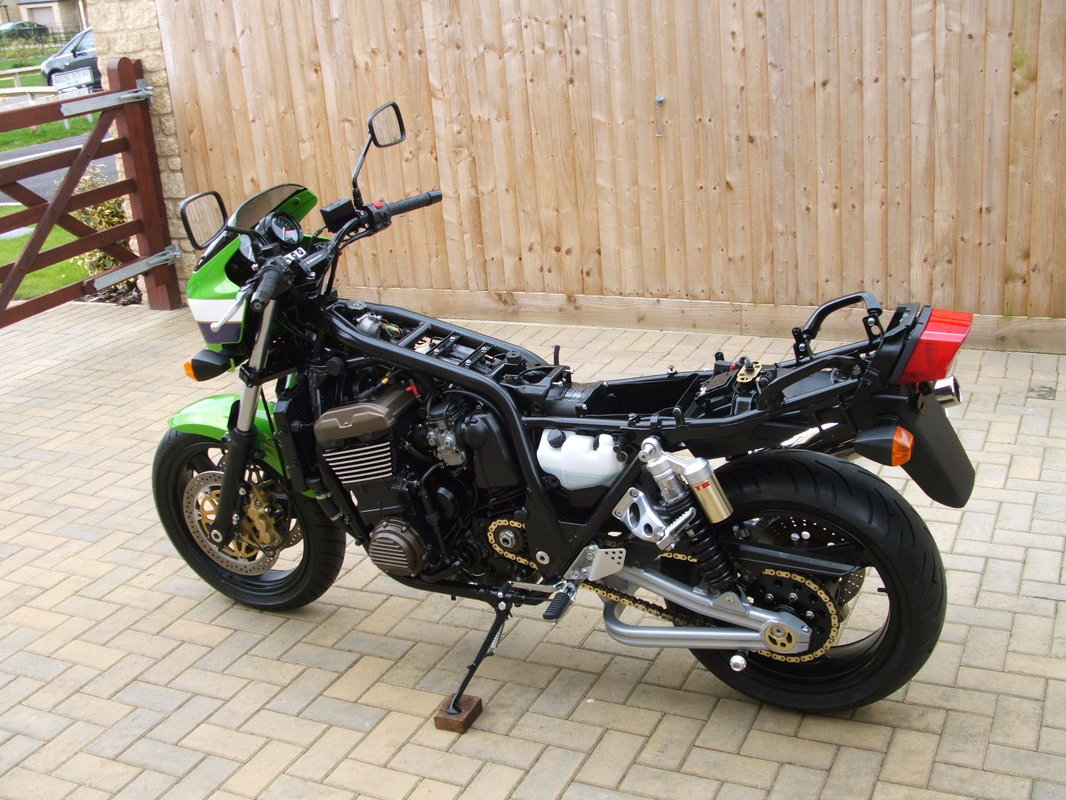
Coolant Reservoir Location
The coolant overflow reservoir is behind the left side panel.
An overflow pipe goes along the frame to the rear stop lamp area.
The rear suspension, brakes and wheel are now in place.
A new mirror and some of the front bodywork has also been added.
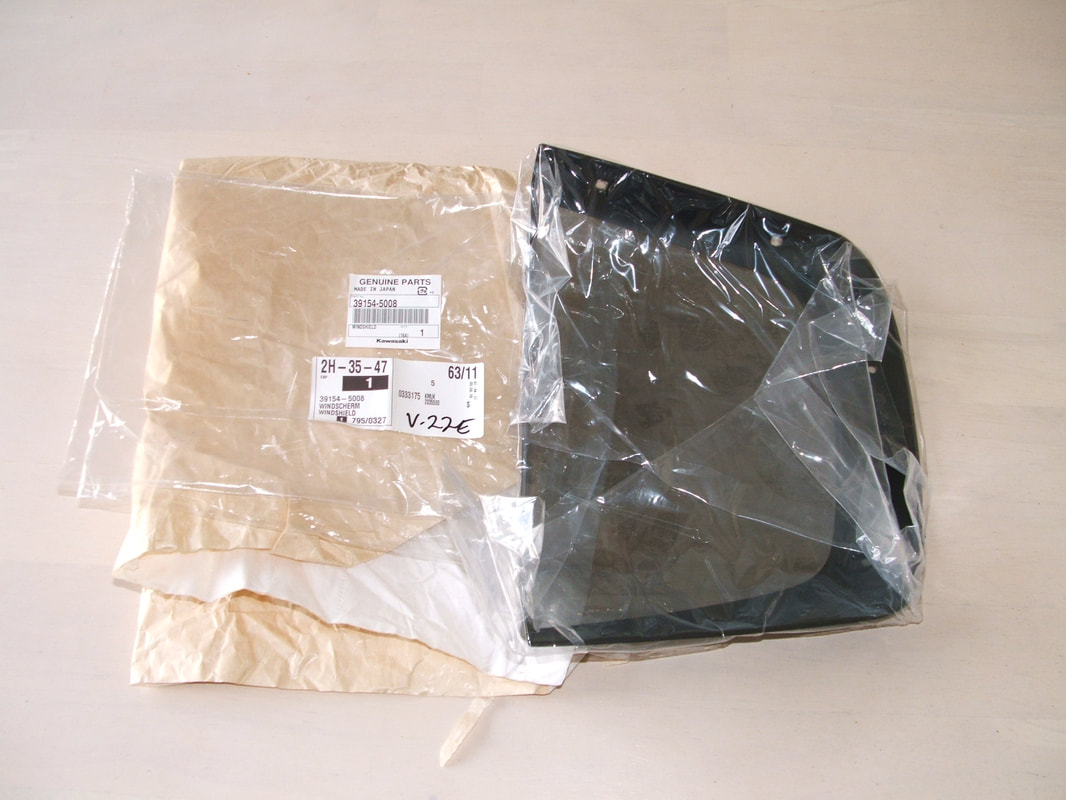
New smoked screen from Japan
A new factory screen from Japan makes a good finishing touch for the front end of the bike.
TIP - do not overtighten screen fittings or it will crack around the mounting holes.
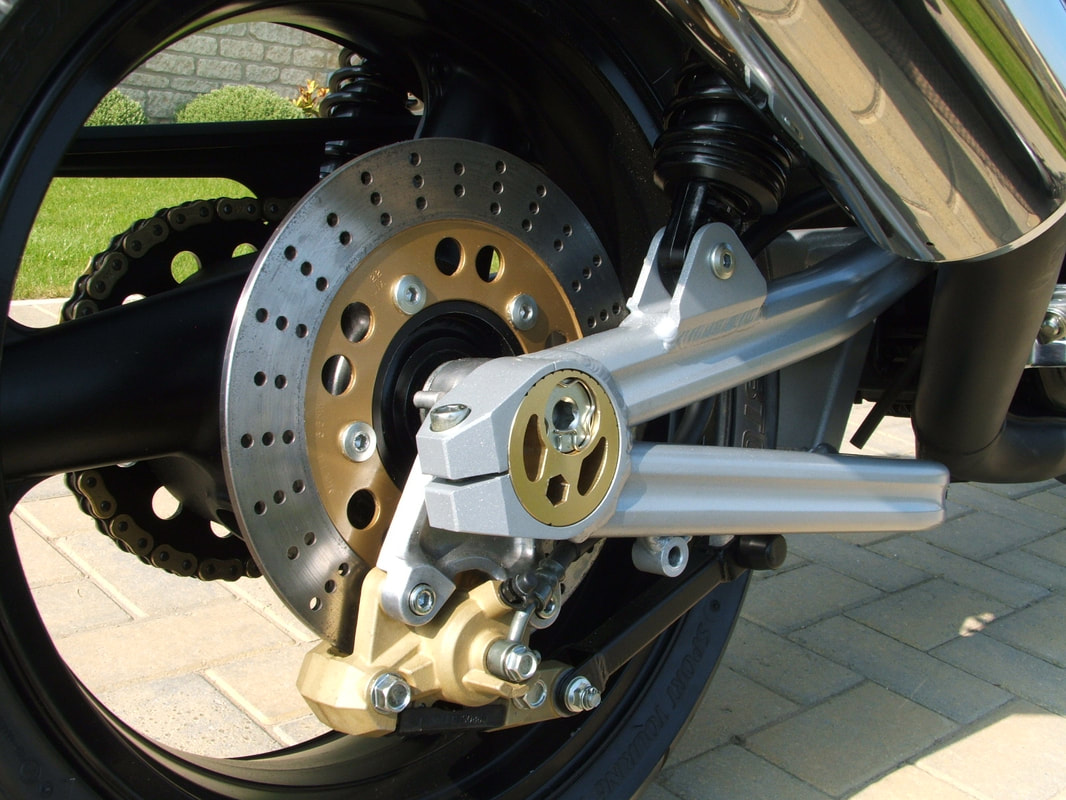
Rear brake arm & chain adjuster
The rear brake arm has a rubber cap over the front mounting bolt. This is often missing.
You can see the chain adjuster workings and the retaining clip here.
More gold touches add to the quality feel of a ZRX.
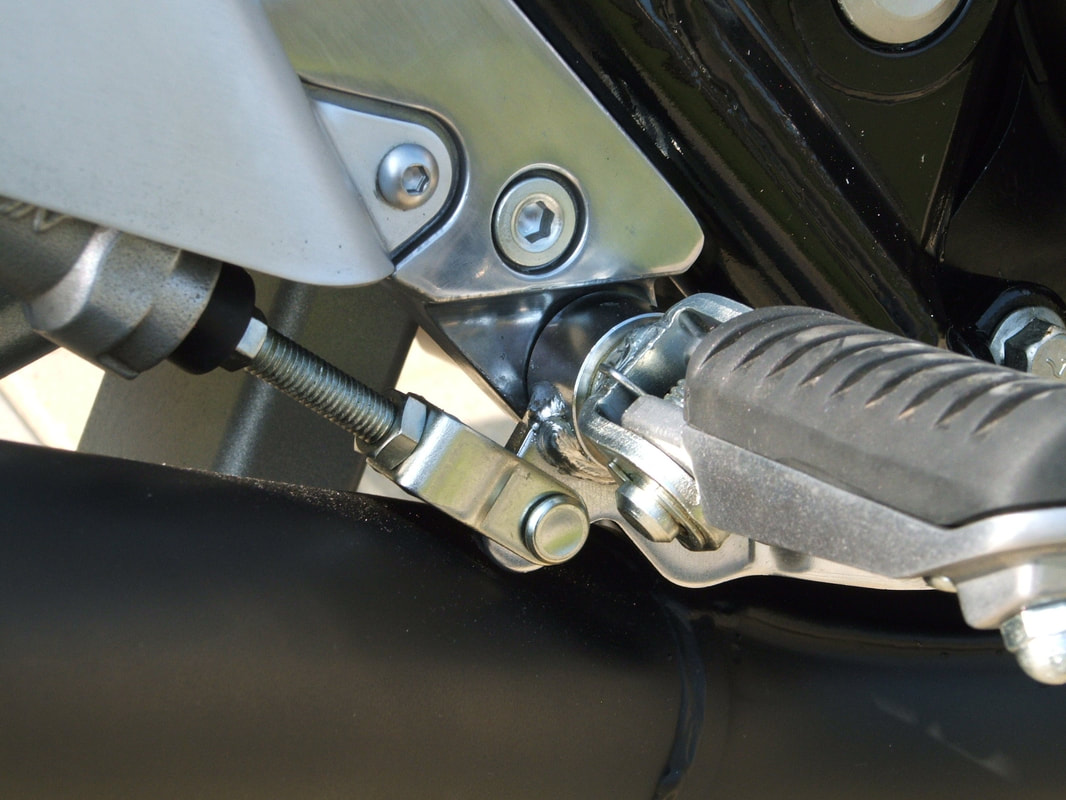
Brake pedal linkage
The brake pedal linkage has been cleaned & re-plated.
Clearance to the exhaust is VERY tight here so be careful.
The heel guards are held on with two tiny allen bolts which can easily corrode and lock up. We had to drill two out and the new ones were greased for assembly.
Footrest mounts were stripped, polished and lacquered.
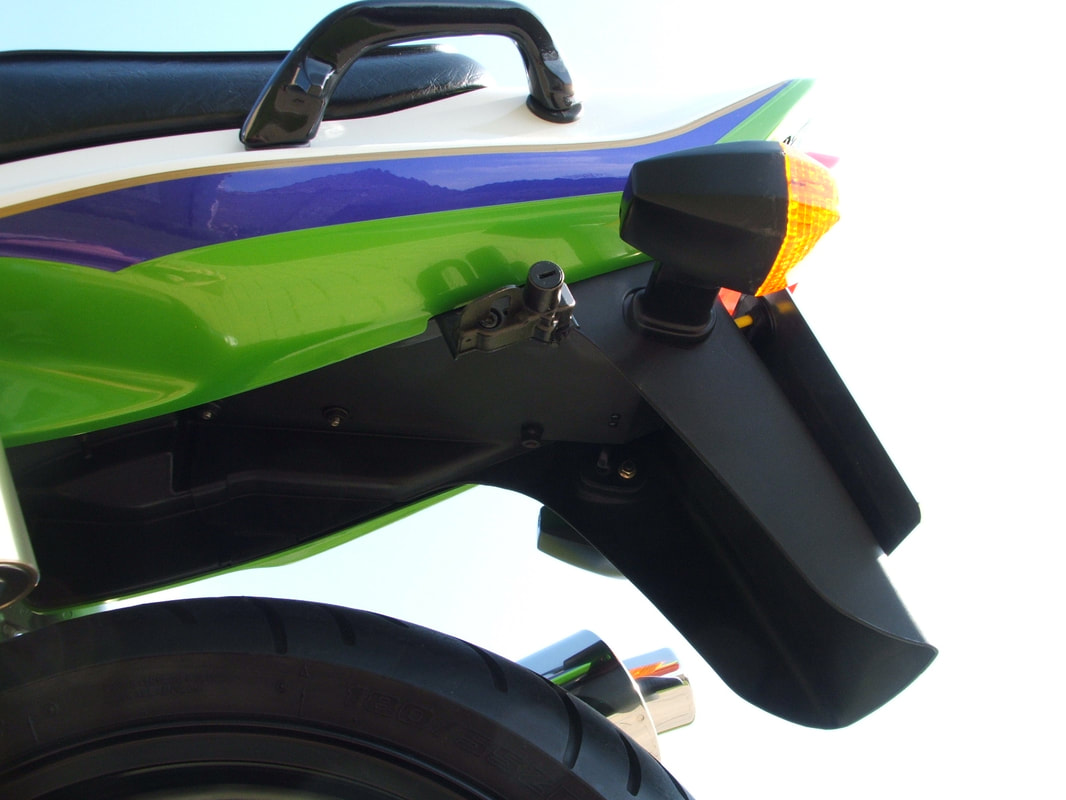
New helmet lock
The missing helmet lock has now been replaced.
There was no key with the new lock.
Rear indicators & licence plate holder all attach to the rear fender.
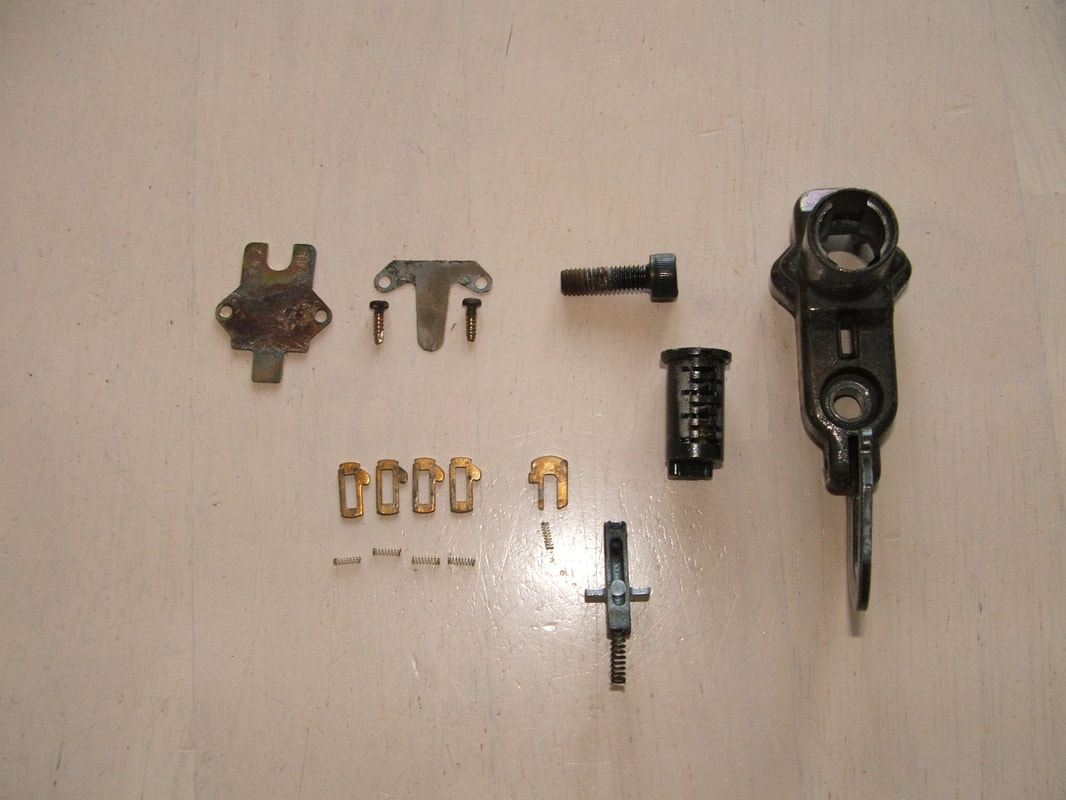
Helmet Lock assembly
The helmet lock was dismantled & cleaned up.
The four brass wafers in the lock must be re-arranged to fit our key.
The large brass wafer pops out to hold the barrel in place and is not moved by the key.
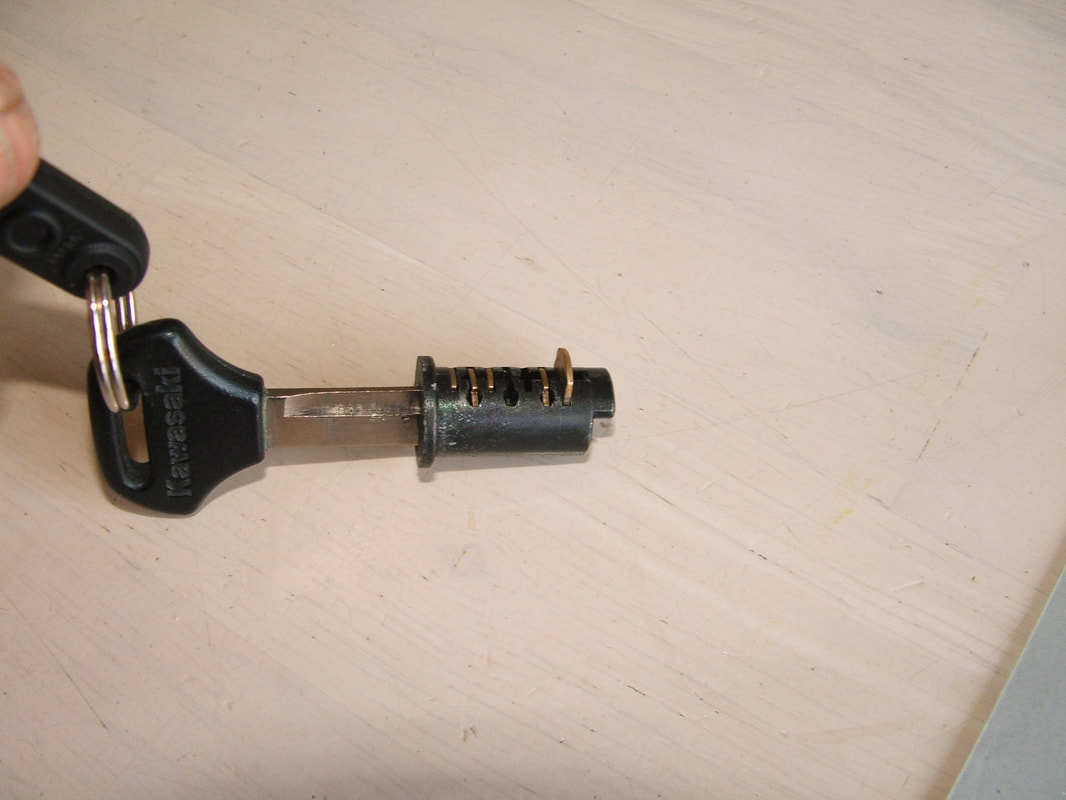
Old key fits new lock
Here is the adjusted lock barrel.
Our original key fits it now.
That's another piece of the jigsaw solved.
The large brass tag is spring loaded and will secure the barrel.
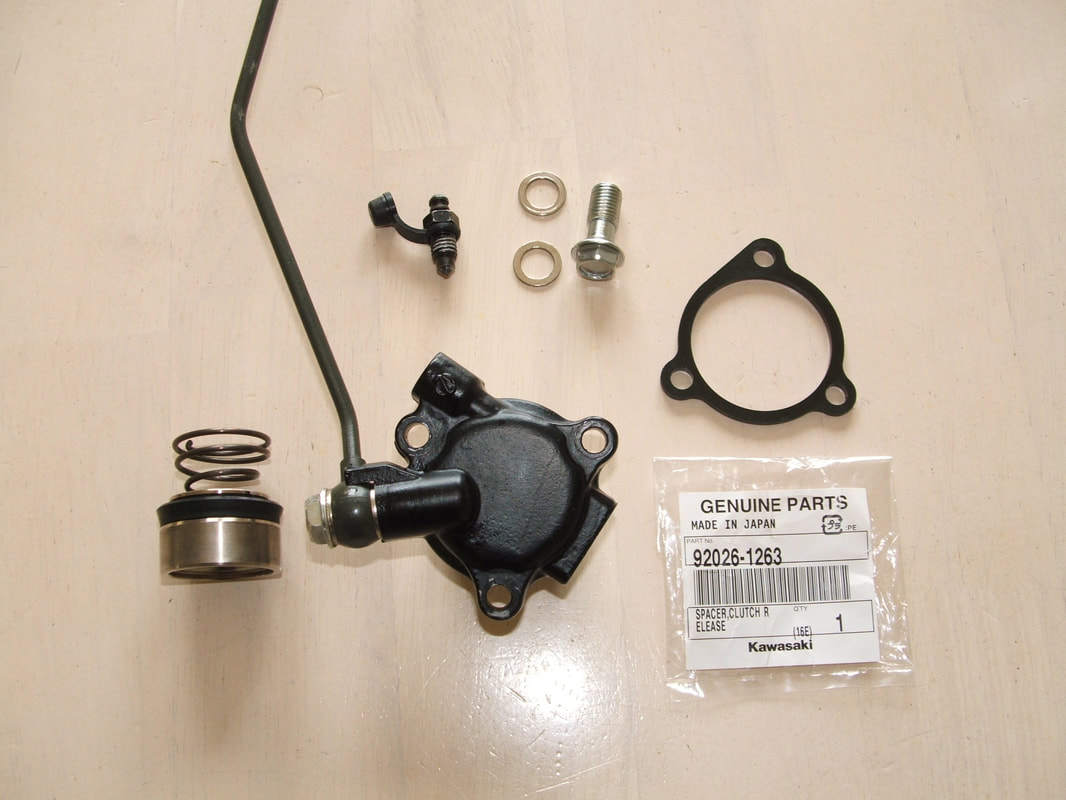
Clutch Slave Cylinder
The clutch slave cylinder needs to be cleaned & serviced for smooth shifting.
The plastic spacer is fragile and easy to fit the wrong way so check the manual and do not over tighten it.
TIP - look at the three holes in the spacer - one is different. It also has a lip on one side only.
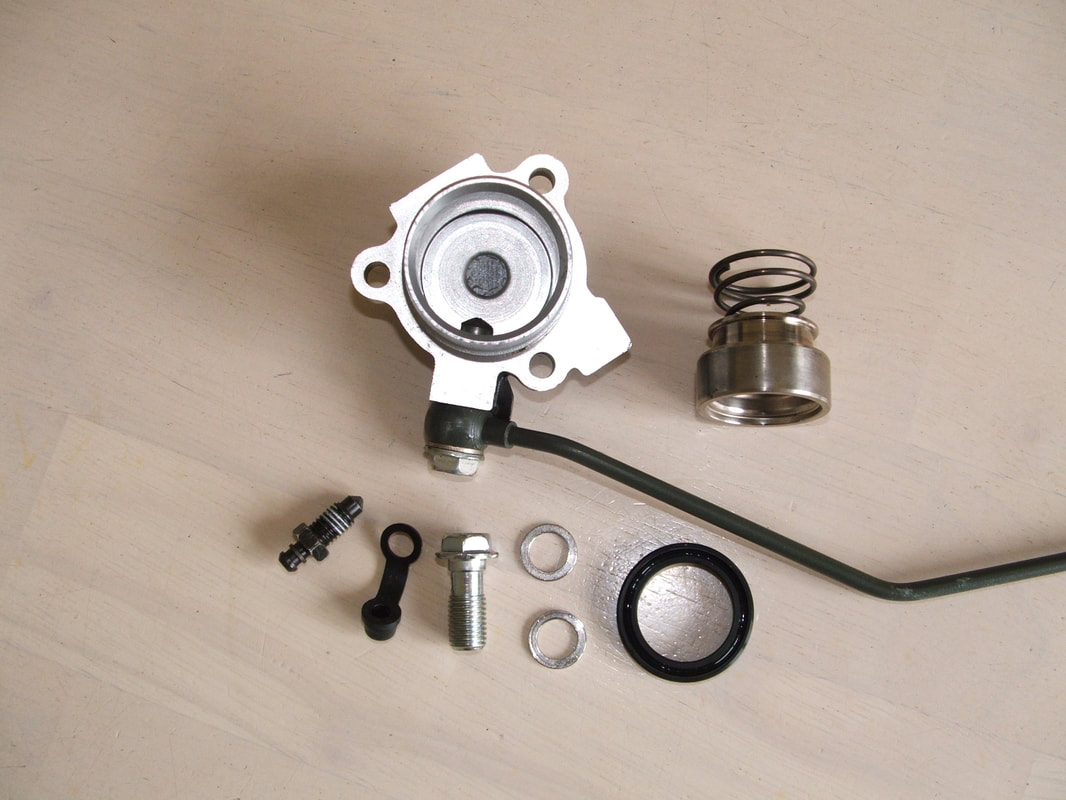
internal bore & seals
Clean the internals and lube the new seal with clean brake fluid before assembly.
** DO NOT BLEED CLUTCH UNTIL SLAVE IS ATTACHED **
If you release the clutch slave cylinder during service the large spring will try and pop the piston out - spilling brake fluid. So don't pull the lever !!
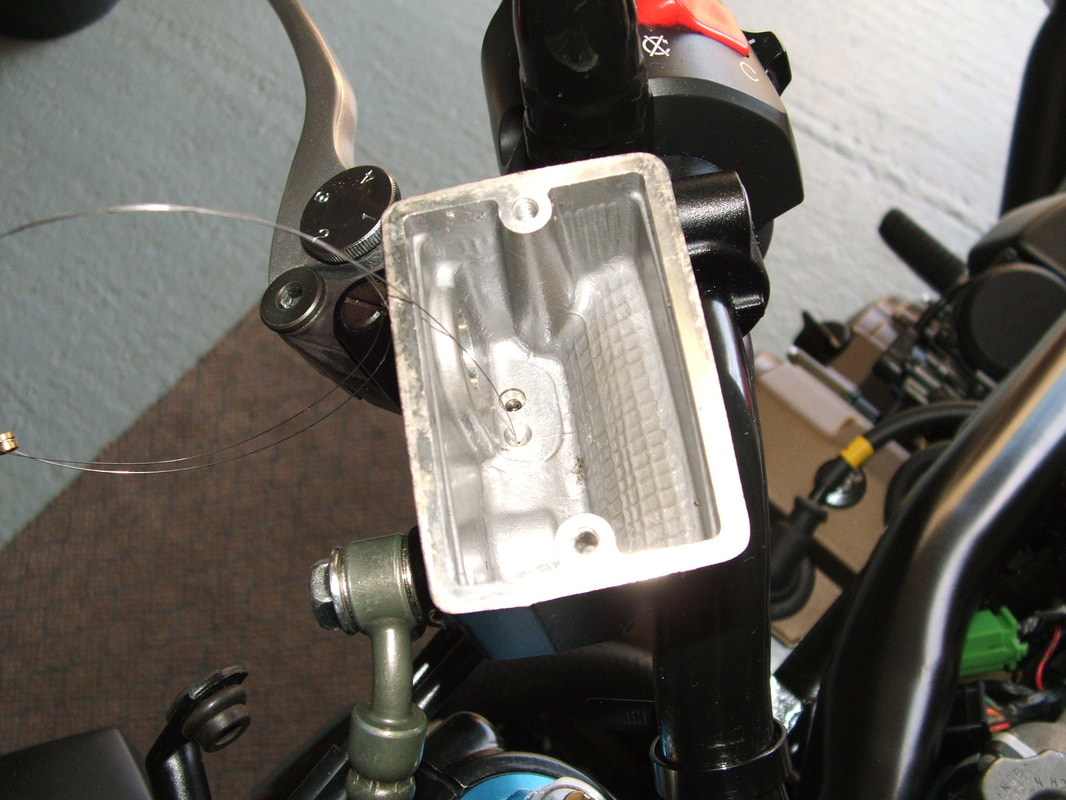
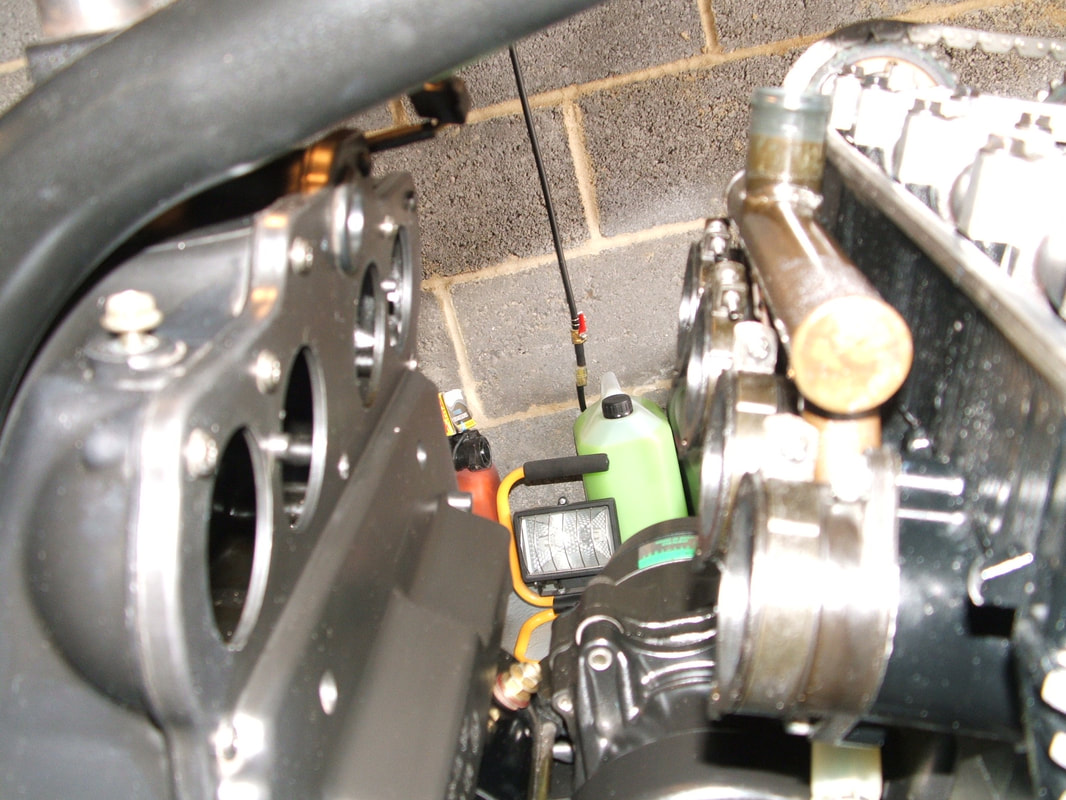
checking relief hole is clear
Check that the tiny relief hole in the clutch and brake master cylinder is not blocked before adding new brake fluid.
If it blocks you will not bleed properly and get a firm lever.
We use a thin guitar string for this.
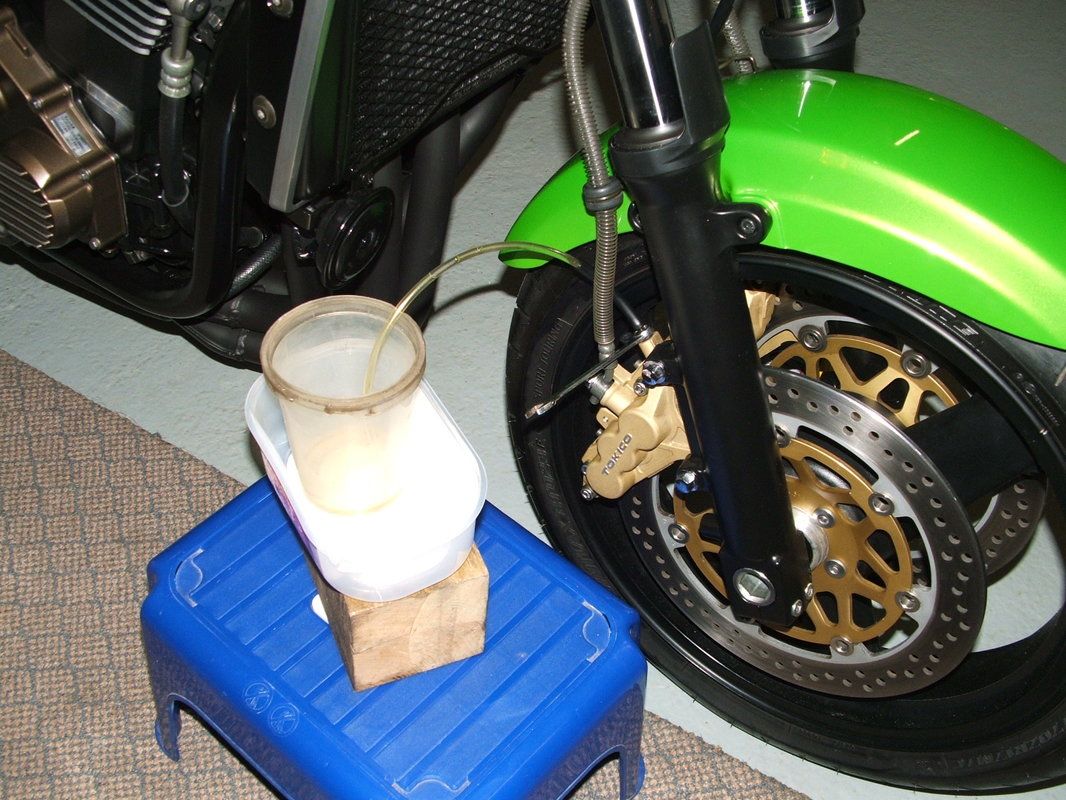
bleeding brakes
Both front callipers get this treatment at the same time.
Send plenty of clean brake fluid down to wash out any debris in the hoses or unions.
When it is running clear with no air bubbles you should be good.
We leave it overnight and repeat to make sure.
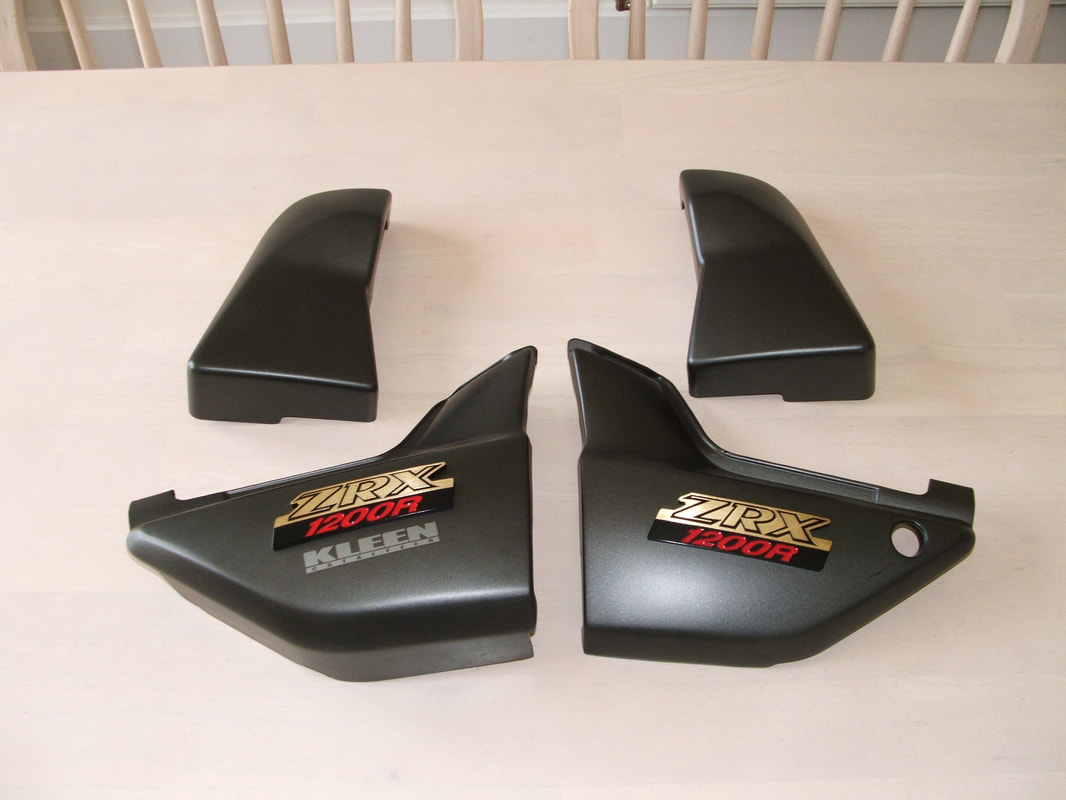
Side Covers
This model has extra side covers which fit over the airbox.
You must lift the fuel tank to reach the top securing bolt.
Only one side cover should have the KLEEN decal applied.
The left side cover has a hole for the seat lock barrel - make sure the rubber outer damper is fitted or it will vibrate against the side cover
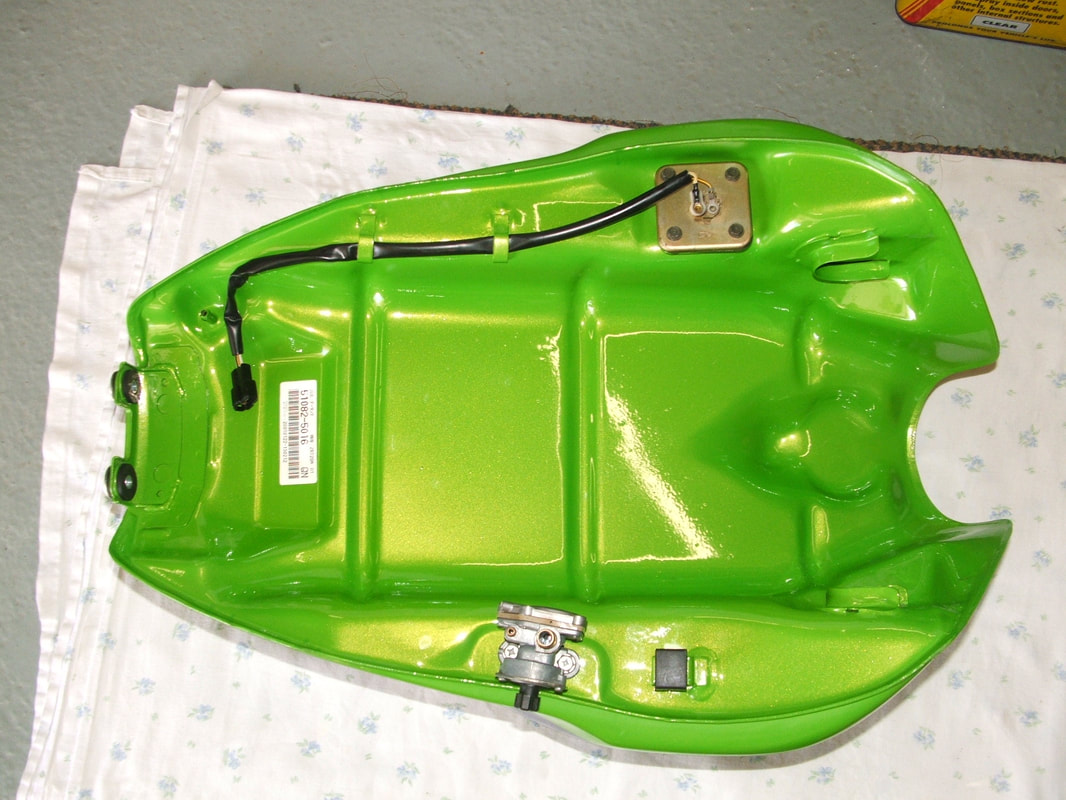
Fuel Tank components
The fuel tank has been painted.
Note the parts label and damper rubber in front of the petcock.
A breather hose connects to the outlet top left by the sender wiring.
New front tank mounting rubbers were used.
Note the parts label and damper rubber in front of the petcock.
A breather hose connects to the outlet top left by the sender wiring.
New front tank mounting rubbers were used.
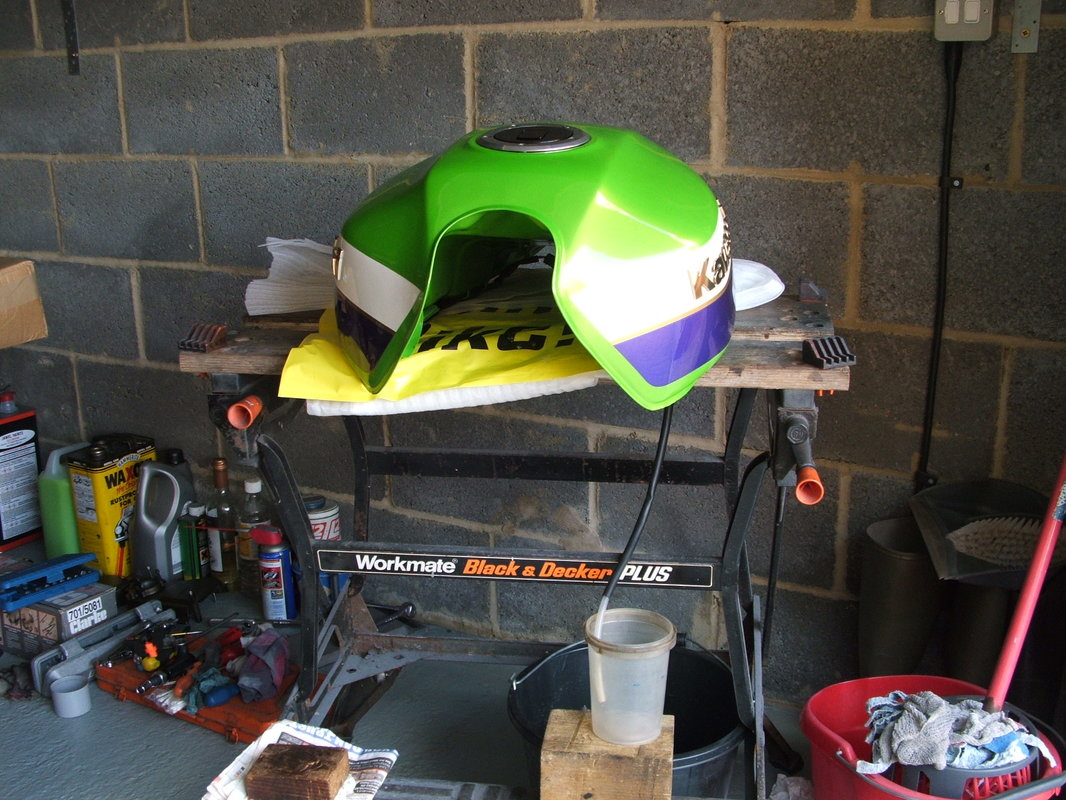
testing for fuel leaks & air locks
New gaskets for the fuel tap and fuel gauge sender have been used.
Torque the mounting bolts and then bench test the tank with 3 then 5 then 10 litres of fuel to make sure that there is no leakage from the joints.
With 10 litres in the tank and the fuel cap closed you can test for air locks by running it all into a bucket using the prime setting. You should see a constant flow.

Repainted Tail Piece
The tail piece is made of three sections, riveted together.
The internal factory finish is visible here.
Grab handles fit through the side holes -
make sure the rubber grommets are in place first.
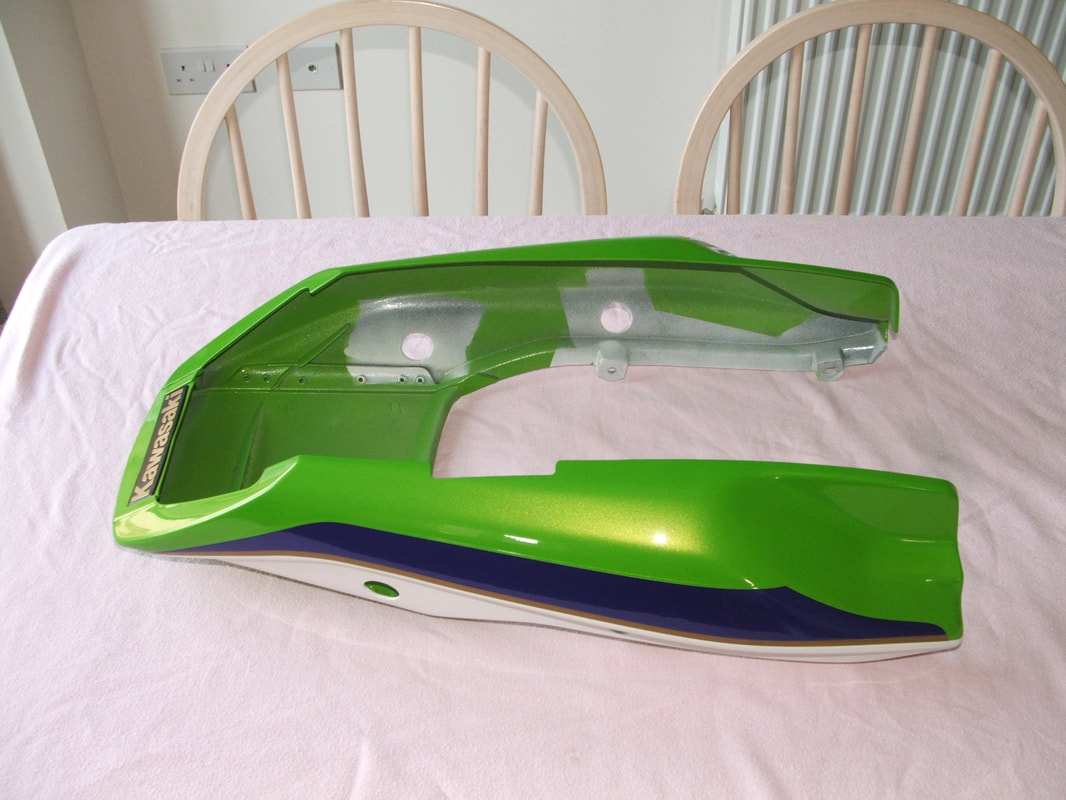
Panel joint & Helmet Lock recess
There is a Kawasaki badge at the rear which needs masking off or removing.
You can see one of the internal joints here. It is very easy to overfill the joint and this will cause cracking in the paintwork later - as it flexes.
The lower side piece recess is to allow the helmet lock bracket to fit flush.
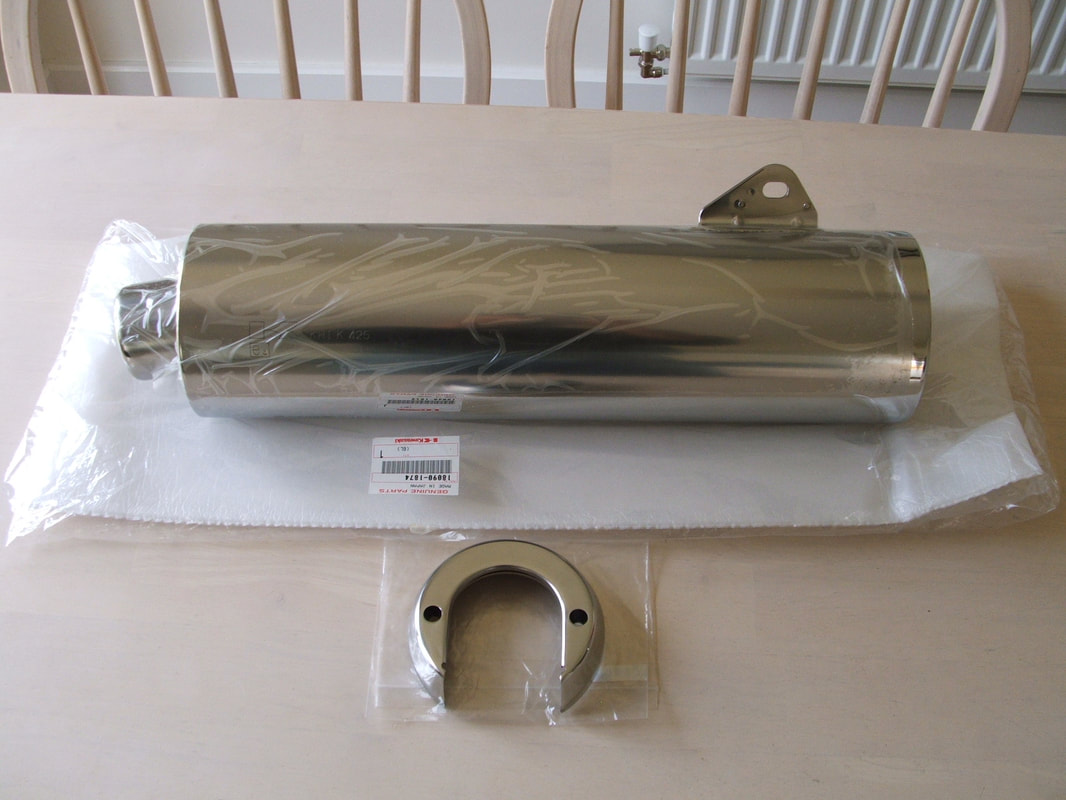
New Factory Silencer & Used End Trim
The original silencer had a few little marks. A scorpion end can was also included. These both got sold towards a new factory silencer.
The silencer end trim comes separately.
This is the original which was in good shape.
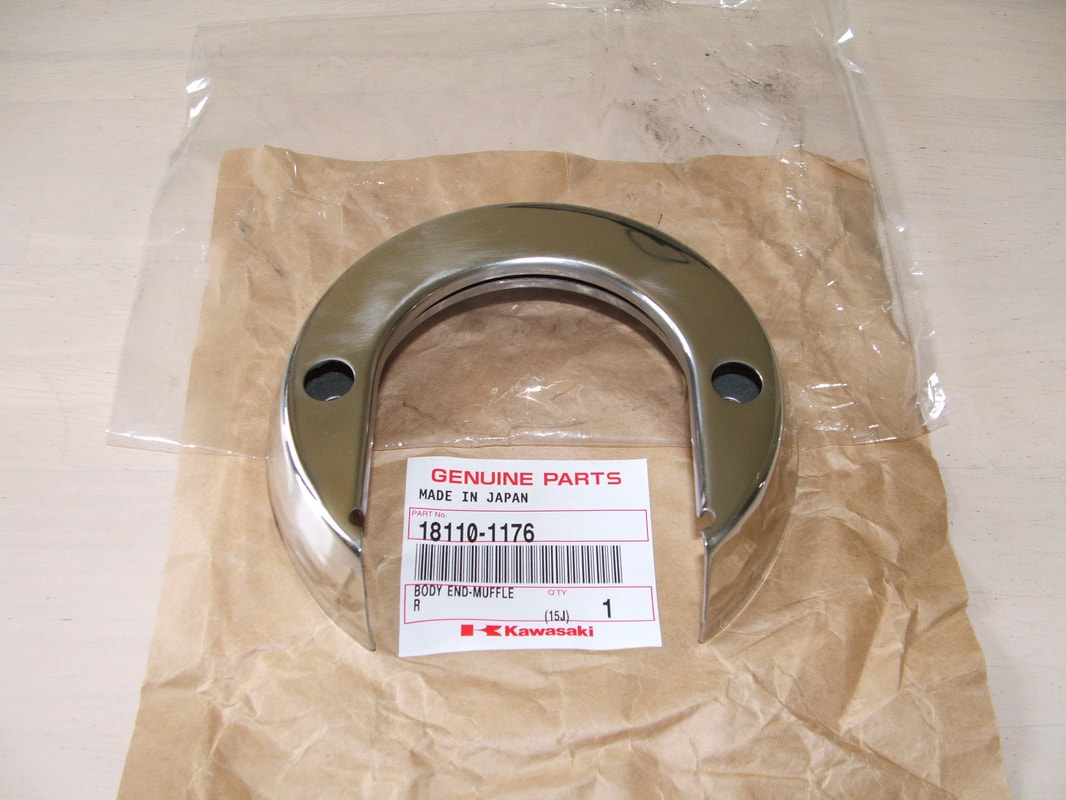
Brand New Silencer Trim
We managed to get a brand new end trim to match the new silencer.
The original one was sold off to fund the new one.
The ZRX exhaust system is made of stainless steel so it should last a long time - with care.
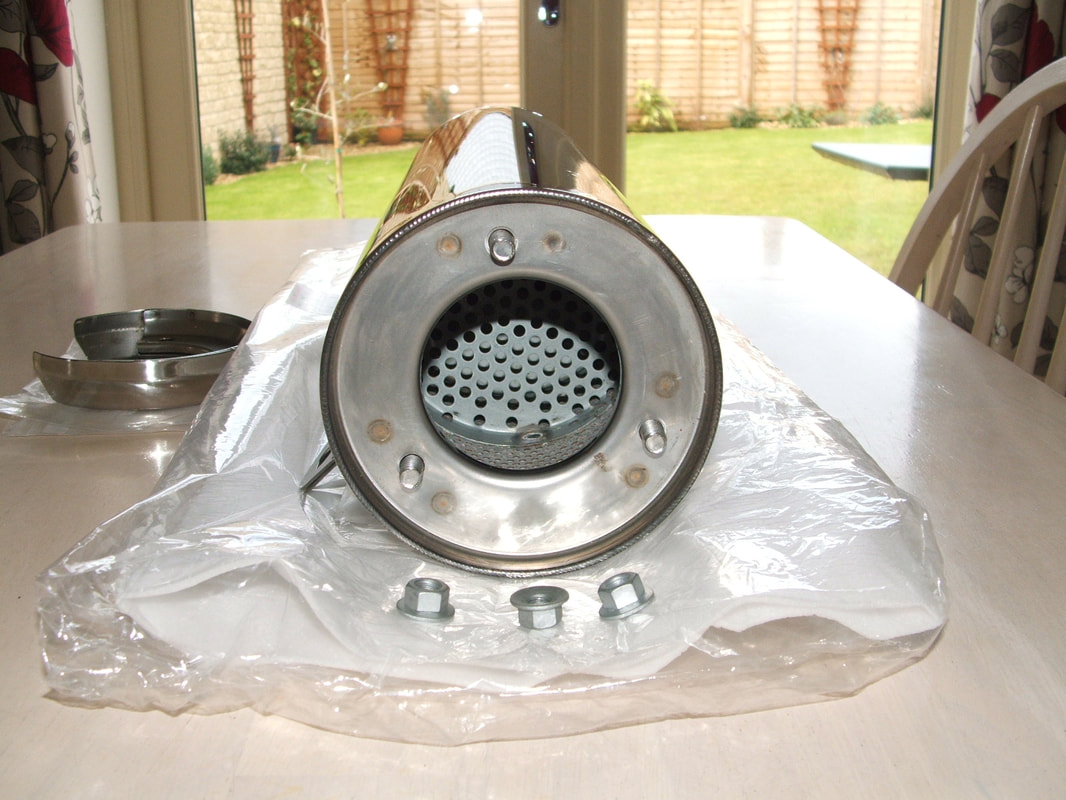
Silencer internals & fittings
You can see the new, clean, internals on the silencer here.
At £700 from Kawasaki there won't be many fitted this year !!
New flanged nuts to join it to the mid pipe were also used.
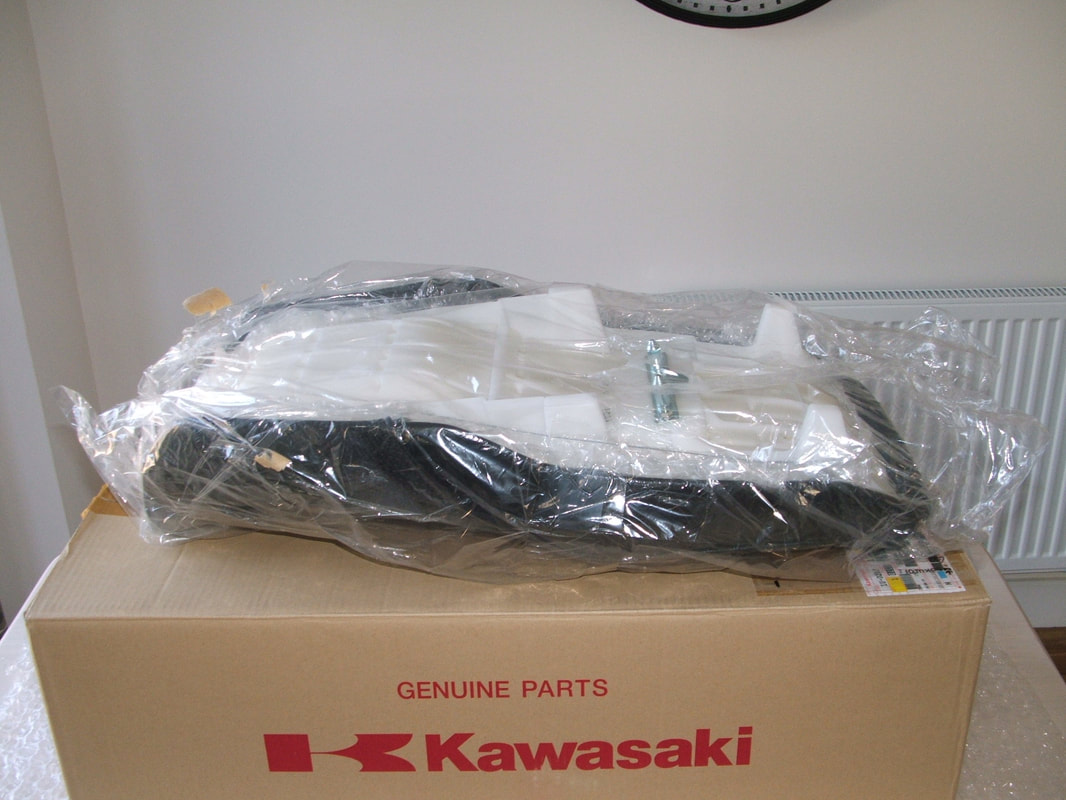
New Dual Seat Unit
The 2001 seat unit had a little hardening to the foam.
So that was sold off and a new replacement unit came over from Japan.
It does not have the two safety decals underneath so they were bought separately.
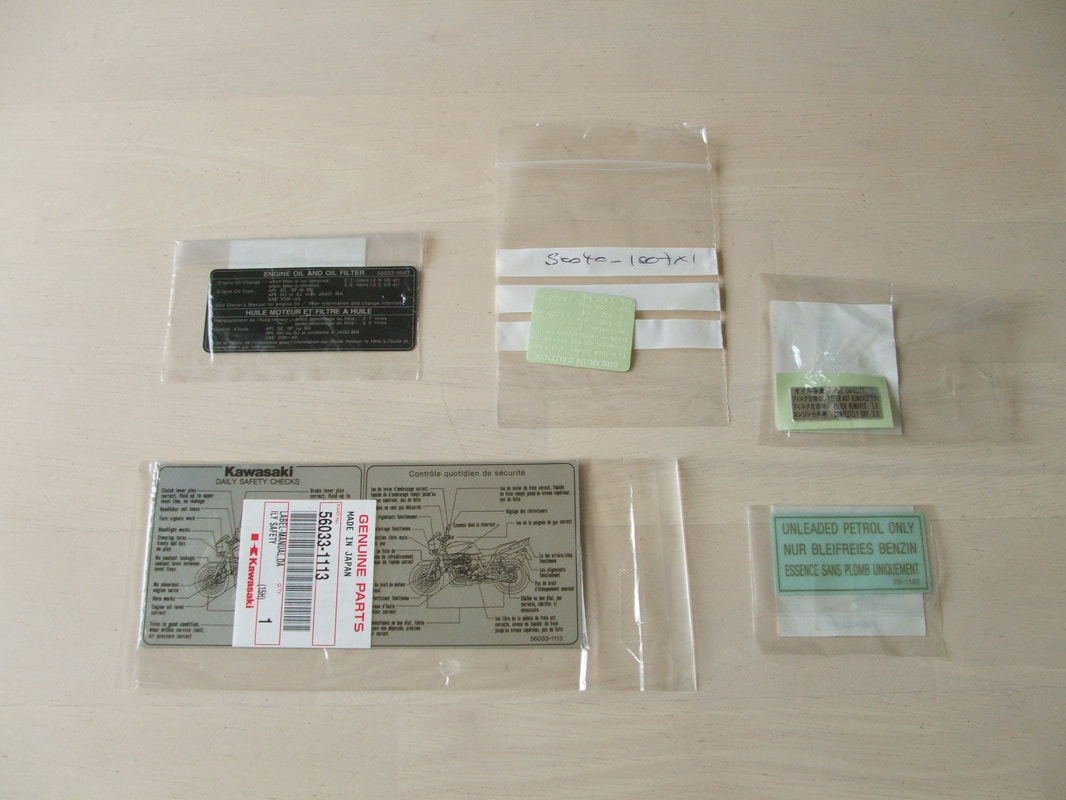
Missing Stickers
The missing stickers have all been tracked down now.
We have extra Daily Safety Checks Decals for the seat unit.
Get in touch on the Cool Parts page if you need one.
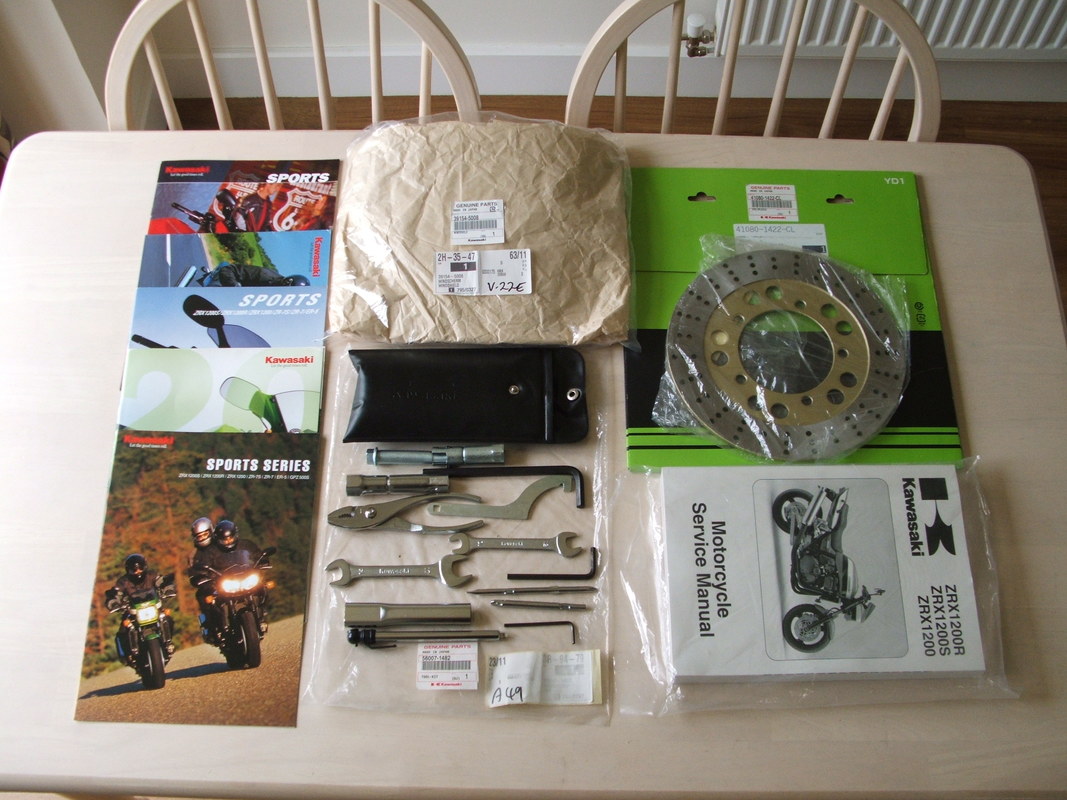
New Manuals & Tool Kit
The bike now has a new, sealed, Factory Service Manual and a new Owners Manual.
Various ZRX Sales Brochures, a new factory screen and a new rear disc will be available when it finds a new home. A brand new complete tool kit with correct tool bag has been imported from Japan to give another finishing detail.
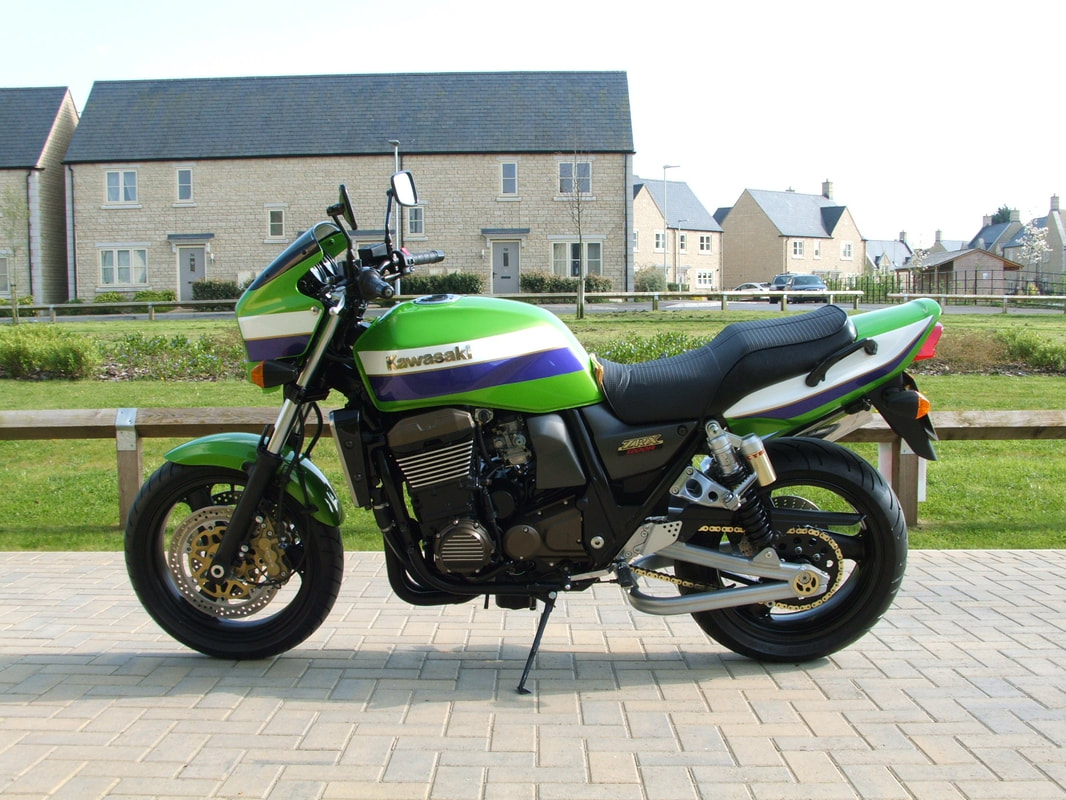
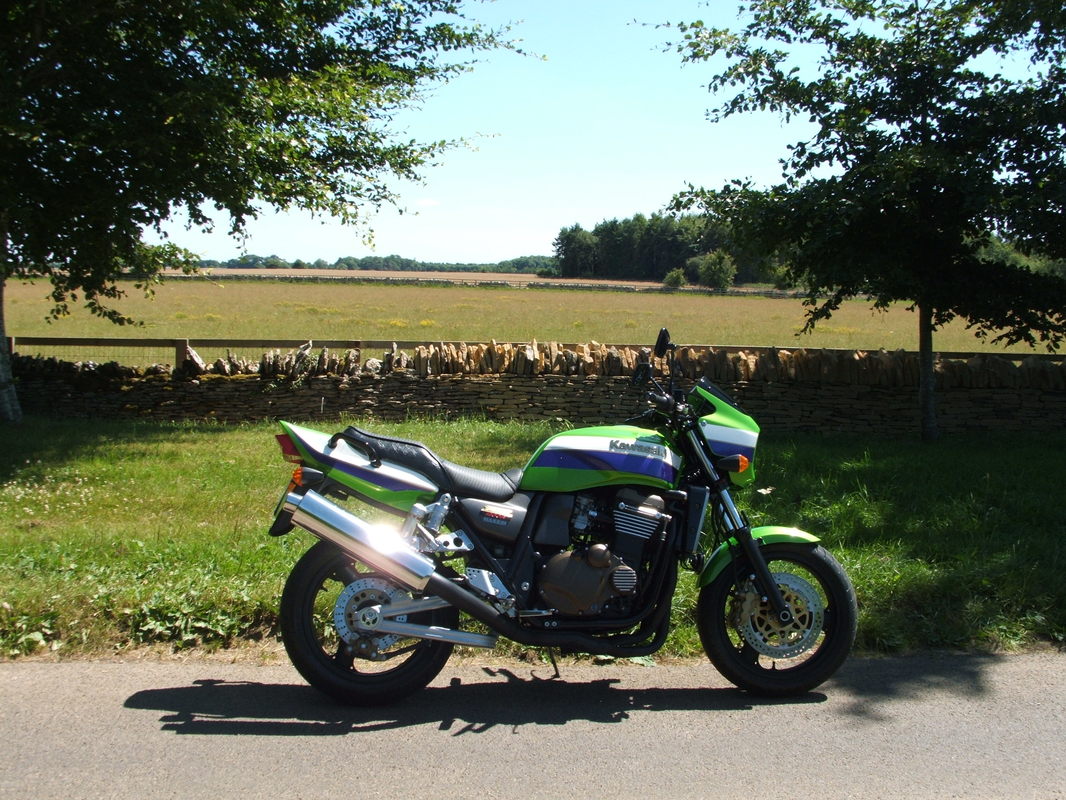
Let The Good Times Roll (again)
So here we are - all rebuilt for 2017
Just two decades after the first ZRX hit our streets.
The first version of the ZRX 1200R.
We hope you enjoyed the journey.
Perhaps you will see it out on a road test ?
Give us a wave if you do.
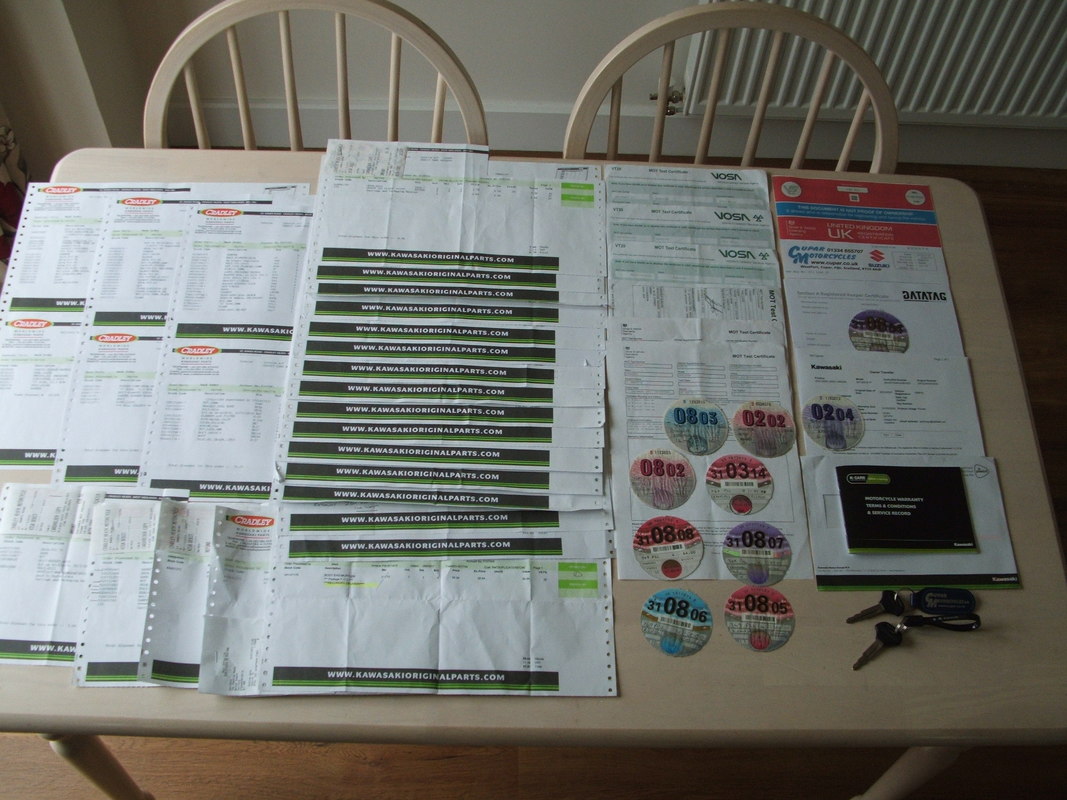
Bike History File
The history file for this ZRX includes numerous Kawasaki parts receipts, old tax discs going back to 2002 when it was first on the road, and two correct keys. One still has the original Cupar Motorcycles key fob attached, which is a nice touch.
There are also DataTag papers and Kawasaki Keeper Change records.
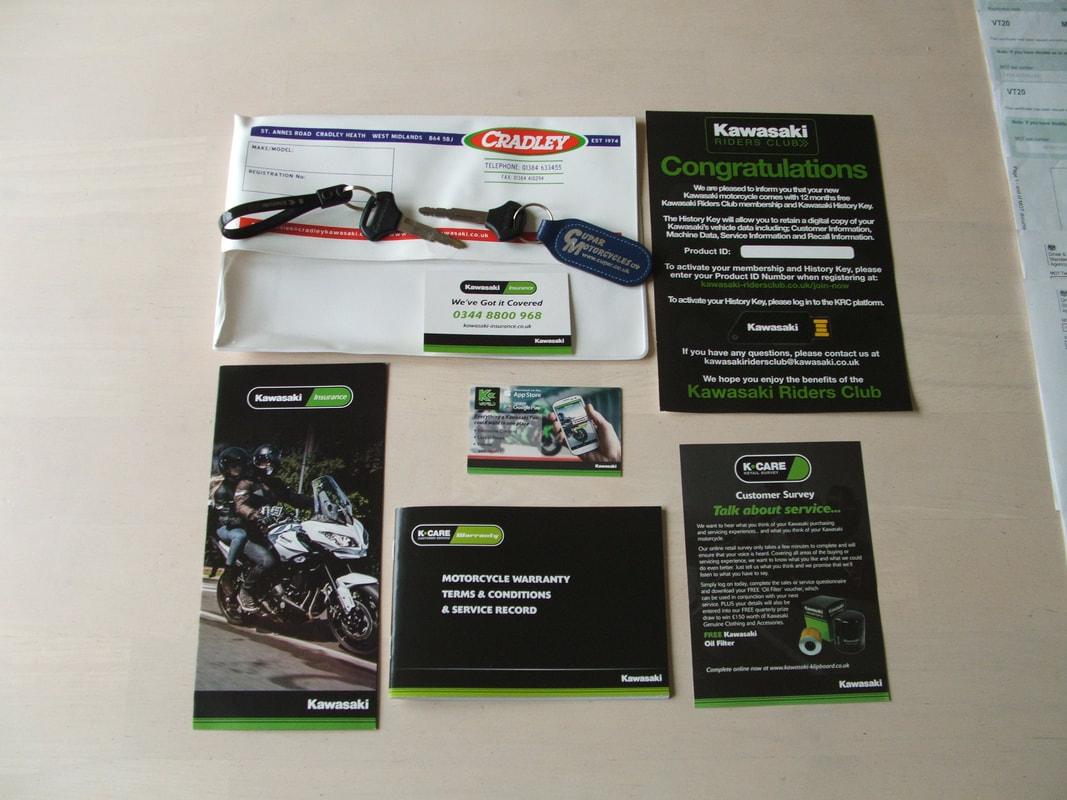
Dealer Wallet & Goodies
The Kawasaki Dealer wallet contains the stamped Service History going back to 2001 and various Kawasaki corporate flyers - all in great condition.
The keys are a matching pair with Kawasaki motif on the top. They fit all the locks on the bike which is nice.
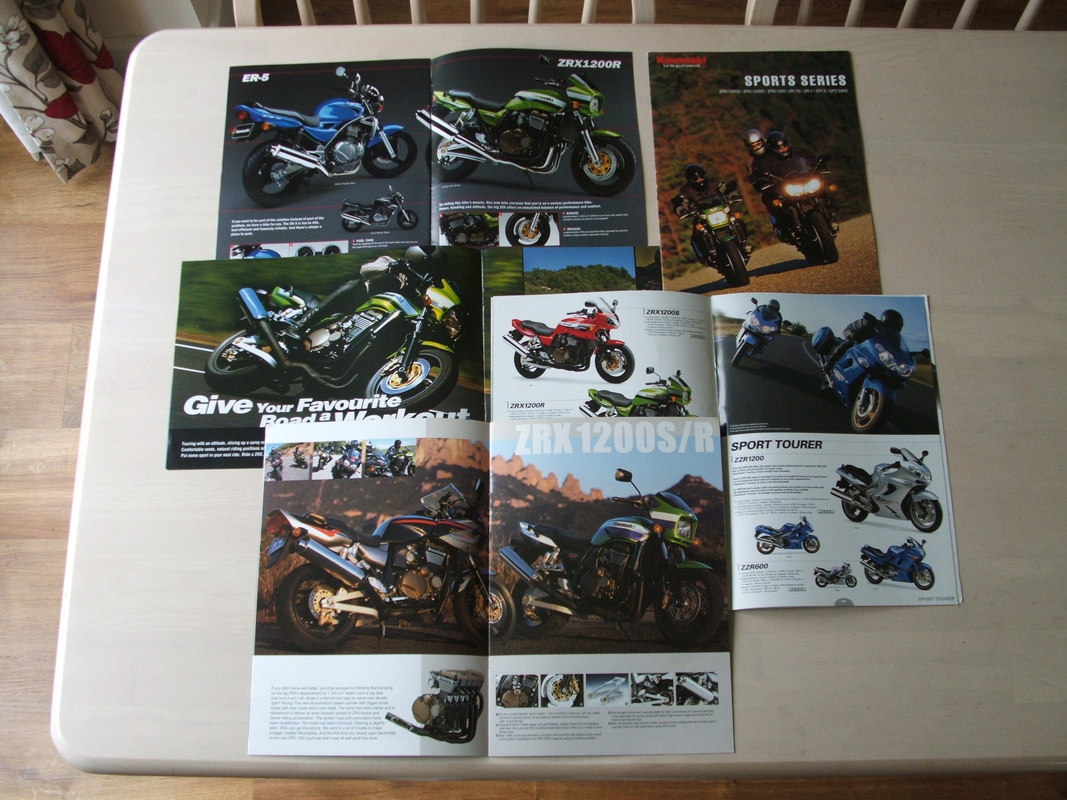
Original Sales Brochures
We could not resist collecting a few more Kawasaki Sales Brochures for the ZRX 1200 range - to go with the original 2001 sales leaflet.
Funny how they always feature a green one when there were so many other colour schemes over the years.
You can see the later fully polished exhaust systems and fork lowers. Callipers and footrest holders also changed to black.
Keep checking back for more updates on this rebuild.
There will be more little touches to tell you about.
Happy & Safe Riding in 2017
From the Zed Rider
Click this picture to see a modified ZRX being built.
